
Efficient file management is one of the most overlooked yet powerful tools for boosting productivity on a MacBook. Whether you're a student, professional, or creative, knowing how to create, name, store, and retrieve files quickly can save hours each week. macOS offers robust built-in features that, when used correctly, transform chaotic desktops into streamlined digital workspaces. This guide walks through practical strategies to master file creation and organization—no technical jargon, just real-world solutions.
Understanding File Creation Basics on macOS
Creating a new file on your MacBook doesn’t always mean opening an app first. While many users default to launching TextEdit or Pages before saving a document, there are faster methods baked into the system. The key is understanding where and how to initiate file creation based on your workflow.
For plain text documents, use Finder’s quick-create option: right-click in any folder, select New Folder, then press Cmd + N while inside a folder to open a blank document (if enabled via third-party tools or Terminal). Alternatively, leverage Automator to build custom “New File” services accessible from the right-click menu.
Applications like TextEdit, Notes, and Preview allow instant file creation with minimal steps. For example, open TextEdit, start typing, and press Cmd + S to save immediately. Name it clearly and choose a logical location. Avoid defaulting to the Desktop or Downloads—these areas become cluttered fast.
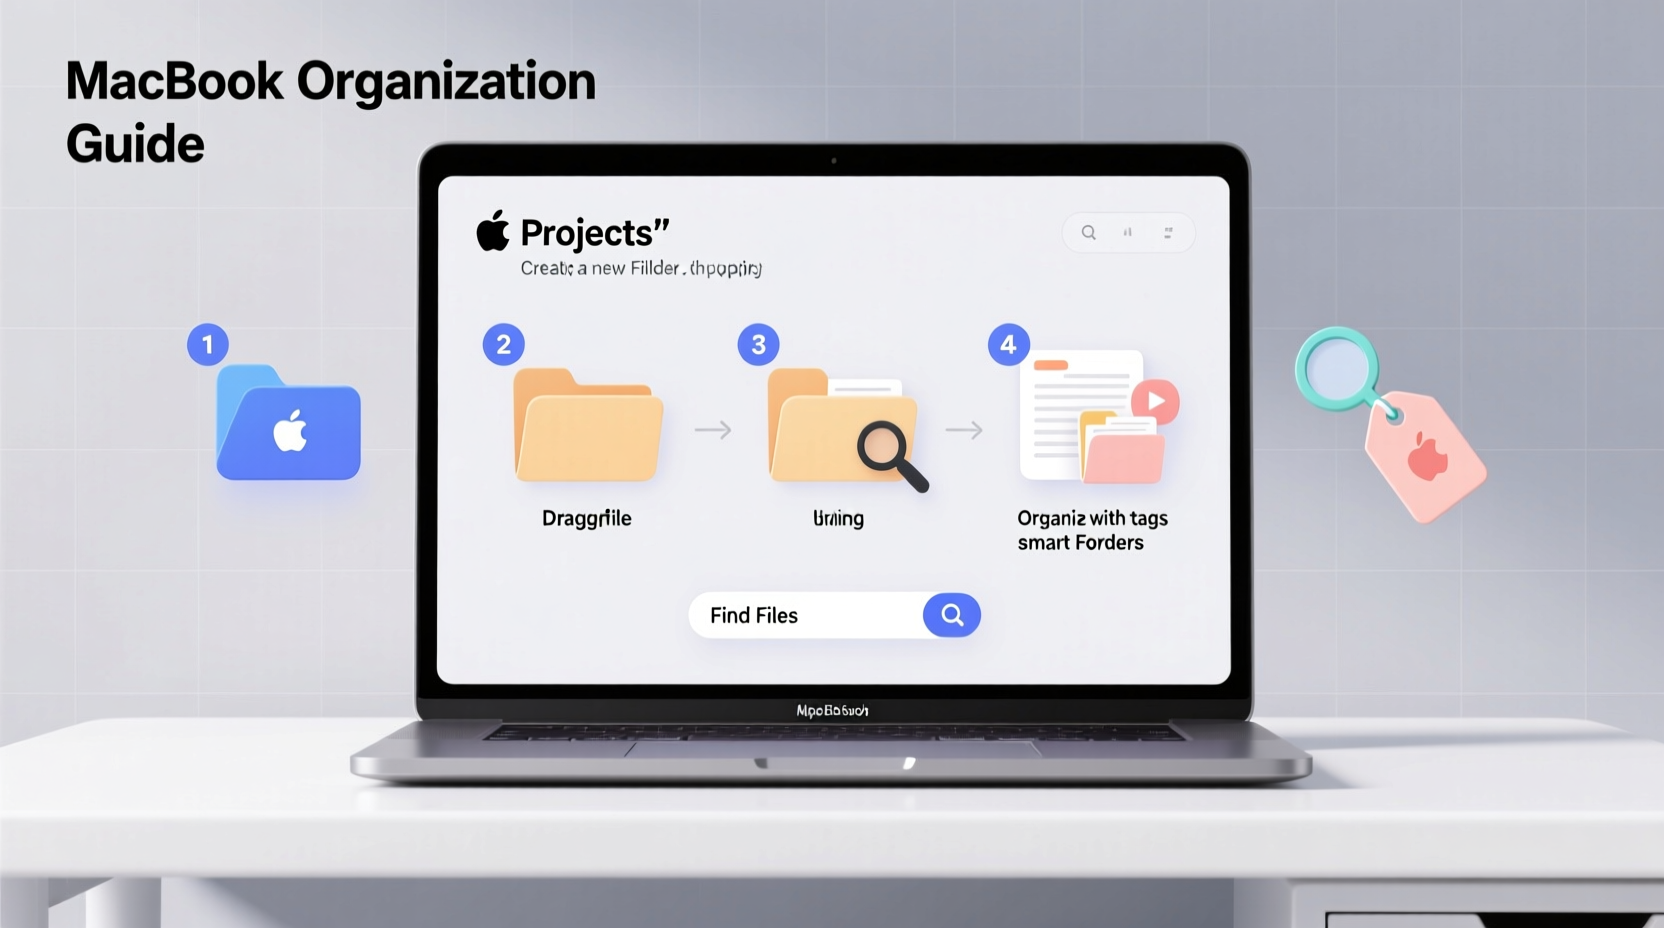
Step-by-Step Guide to Organized File Creation
- Define Your Folder Hierarchy: Start with broad categories like Work, Personal, Projects, Archives. Inside each, add subfolders such as Clients, Invoices, Drafts, or Research.
- Create Templates: Save frequently used document formats (e.g., meeting notes, budgets) as templates in a dedicated Templates folder. Duplicate them instead of starting from scratch.
- Use Tags for Cross-Categorization: Assign color-coded tags in Finder (Red = Urgent, Green = Complete) so files can belong to multiple contexts without duplication.
- Automate Repetitive Tasks: Use Shortcuts (formerly Automator) to create workflows that rename batches, move files, or generate dated folders automatically.
- Review Weekly: Schedule 15 minutes every Friday to clean up downloads, archive completed tasks, and verify backups.
Best Practices for Naming and Storing Files
A well-named file tells you exactly what it contains, when it was created, and its purpose—all at a glance. Poorly named files like “Document1_final_v2_updated.docx” cause confusion and waste time.
| Do | Don’t |
|---|---|
| Project_Name_2024-04-15_v1 | final_paper.docx |
| Budget_Q2-Marketing_2024.xlsx | new budget copy(3).xlsx |
| ClientProposal_AcmeCorp_Draft.pdf | proposal thing.pdf |
Store files using a logical path structure. For instance:
/Users/YourName/Documents/Work/ClientProjects/AcmeCorp/2024/Q2/DesignFeedback
This makes navigation predictable and supports Spotlight search accuracy. Avoid nesting too deeply—more than four levels often complicates access.
“Good file hygiene isn’t about perfection—it’s about consistency. A standardized approach reduces cognitive load and prevents data loss.” — Lena Torres, Digital Workflow Consultant
Real Example: How a Freelancer Transformed Her Workflow
Sophie, a freelance graphic designer, used to spend up to 30 minutes daily searching for client assets. Her desktop had over 200 files; her Downloads folder hadn’t been cleared in months. After implementing structured file creation habits, she reorganized everything into a tiered system:
- Main folder: Clients
- Subfolders: Client name → Project type → Year
- Standardized naming: Logo_Design_ClientName_2024-03-10_v2.ai
- Color tags: Yellow for active projects, Gray for archived
She also created a shortcut called “New Client Project” that auto-generates folders for Design, Revisions, and Final Assets. Within two weeks, Sophie reduced file search time by 70% and reported feeling more in control of deadlines.
Essential Tools and Features Built into macOS
You don’t need third-party apps to manage files effectively. macOS includes powerful tools designed for seamless organization:
- Spotlight Search (Cmd + Space): Instantly locate files by name, content, date, or type.
- Quick Look (Spacebar): Preview files without opening them—ideal for scanning PDFs, images, or spreadsheets.
- Tags: Found in Finder’s sidebar, tags let you categorize across folders. Use them like labels: #Invoiced, #ToReview, #Urgent.
- Smart Folders: Create dynamic folders that pull files based on criteria (e.g., all .pdfs modified this week).
- Version Browser: In supported apps, click File > Revert To > Browse All Versions to recover older drafts.
Checklist: Optimize Your File System in One Hour
- ✅ Delete unnecessary files from Desktop and Downloads
- ✅ Rename top 10 most-used files using clear format
- ✅ Create main category folders (Work, Personal, etc.)
- ✅ Set up a Templates folder with reusable docs
- ✅ Apply tags to 5 active project files
- ✅ Test Spotlight search with a keyword
- ✅ Back up current setup using Time Machine or iCloud
Frequently Asked Questions
Can I create a new file directly in Finder without opening an app?
By default, macOS doesn’t support creating blank documents via right-click, but you can enable this with third-party tools like \"New File Menu\" (available on the Mac App Store) or by using Terminal commands to add native functionality. Once set up, you’ll gain a “New Empty File” option in context menus.
What’s the difference between moving a file to Trash and deleting it permanently?
Moving to Trash allows recovery until you manually empty it. To delete permanently, select the file and press Option + Cmd + Delete. Use caution—this bypasses recovery unless you have a backup.
How do I prevent important files from getting lost if my MacBook fails?
Enable iCloud Drive for Documents and Desktop syncing, or use Time Machine with an external drive. Both options provide automatic, continuous backup. For critical projects, follow the 3-2-1 rule: 3 copies, 2 local (Mac + external), 1 offsite (iCloud or cloud service).
Final Thoughts: Build Habits, Not Just Folders
Mastering file creation isn’t just about knowing shortcuts or folder structures—it’s about building sustainable digital habits. Every time you save a file, ask: Is this named clearly? Is it in the right place? Can someone else understand this without explanation?
The goal isn’t a perfectly tidy system overnight, but steady improvement. Small actions compound: consistent naming, weekly reviews, smart use of tags. Over time, these practices free mental space, reduce stress, and make your MacBook a true productivity partner.


 浙公网安备
33010002000092号
浙公网安备
33010002000092号 浙B2-20120091-4
Comments
No comments yet. Why don't you start the discussion?