
GK (Garage Kit) figures offer modelers a unique opportunity to bring original or reimagined characters to life with unparalleled creative freedom. Unlike mass-produced figures, GK kits are typically cast in resin and require assembly, cleanup, and extensive customization. This makes them ideal for artists and hobbyists who want full control over their final product. However, the process can be intimidating without proper guidance. This guide breaks down the entire workflow—from unboxing raw parts to applying finishing touches—so you can confidently personalize your GK model with professional results.
Understanding GK Figures: What Makes Them Different?
GK stands for \"Garage Kit,\" a term originating from amateur modelers producing limited-run kits outside commercial manufacturing. These figures are often sculpted by independent artists and cast in polyurethane resin, giving them fine detail but also requiring more preparation than standard plastic model kits. Because they’re hand-poured, GKs may have mold lines, air bubbles, or slight inconsistencies that must be corrected before painting.
The real appeal of GK figures lies in their customizability. Since many are sold unpainted and unassembled, you decide every aspect: color scheme, facial expression, base design, and even structural modifications. Whether you're recreating a character from anime, designing an original creature, or modifying an existing mold, the canvas is yours.
“GK modeling isn’t just about assembly—it’s a sculptor’s playground where artistry meets precision.” — Hiro Tanaka, Professional Figure Sculptor & Educator
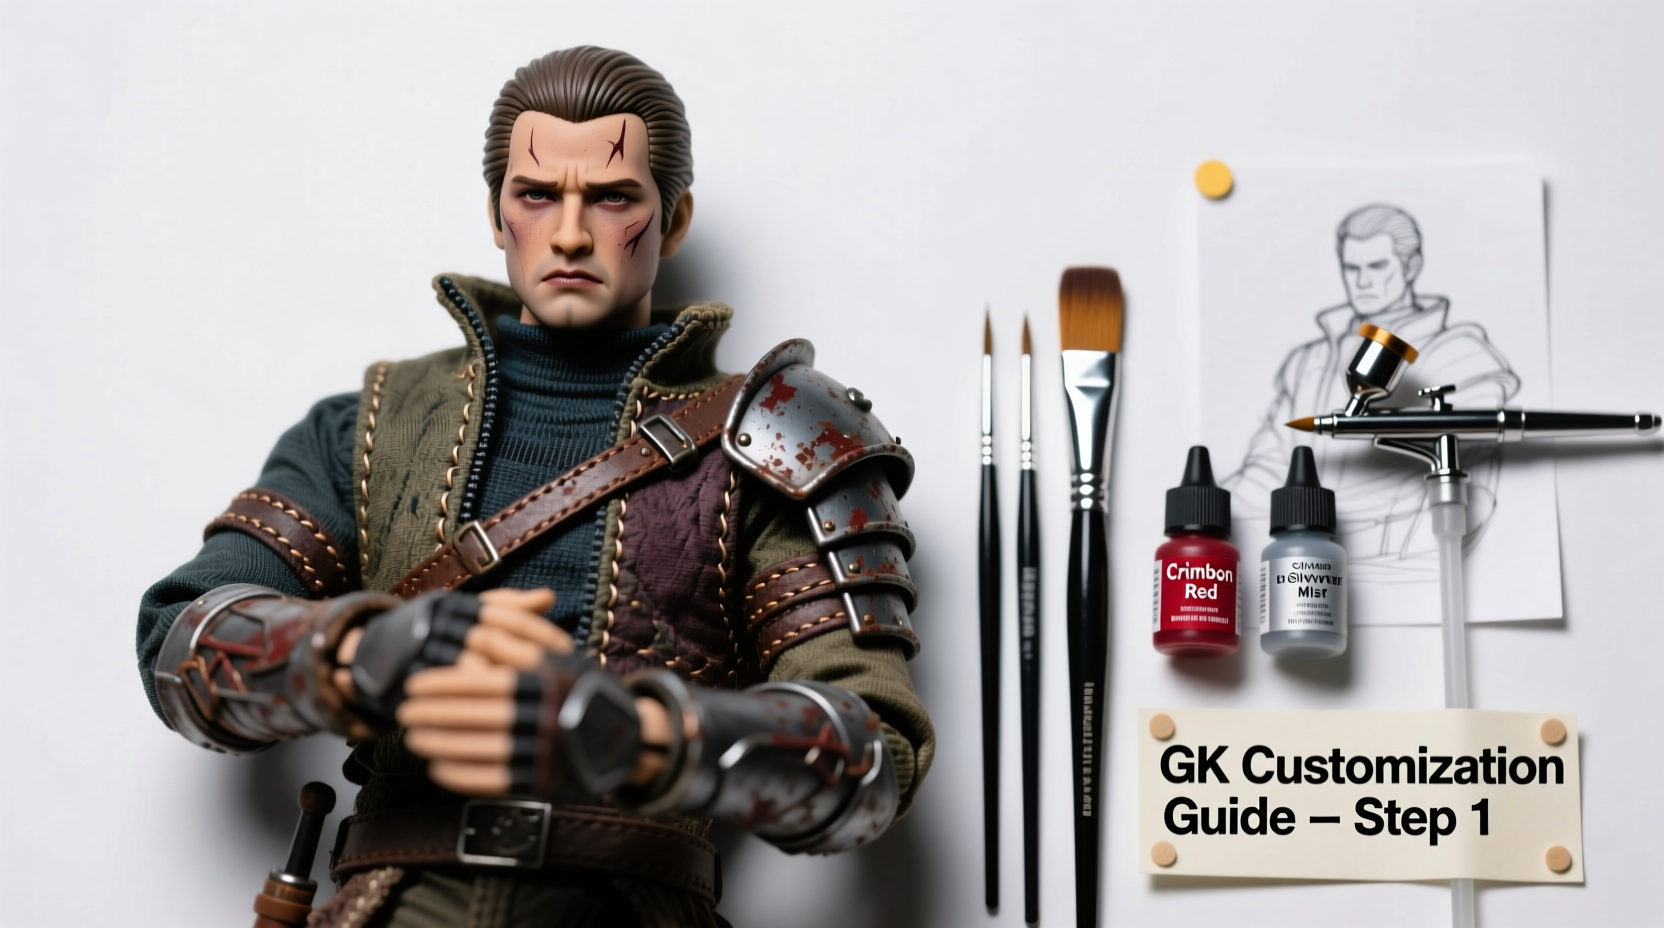
Essential Tools and Materials for Customization
Before starting, gather the right tools. A well-equipped workspace ensures smoother progress and higher-quality results. Below is a checklist of essentials categorized by function:
🛠️ Assembly & Cleanup
- Pin vise drill set (for pegging parts)
- Resin files and sandpaper (400–2000 grit)
- Blade knives (X-Acto or scalpel)
- Green stuff or epoxy putty (for gap filling or sculpting)
- Isopropyl alcohol (for cleaning resin dust)
🎨 Painting & Detailing
- Acrylic model paints (e.g., Vallejo, Citadel)
- Fine brushes (sizes 00–2)
- Airbrush system (optional but recommended)
- Primer (gray or white, spray-can or bottled)
- Matte/gloss varnish (protective topcoat)
🔧 Structural Support
- Aluminum or brass rod (for internal armature)
- Super glue (cyanoacrylate) and two-part epoxy
- Clamps or helping hands tool
Step-by-Step Guide to Personalizing Your GK Model
Follow this structured timeline to transform your raw GK kit into a fully personalized masterpiece.
- Inspect and Clean Parts: Remove all sprue remnants and mold lines using a sharp blade. Sand seams gently with 400-grit paper, progressing to finer grits. Wipe down each piece with isopropyl alcohol to remove residue.
- Dry-Fit the Figure: Assemble major components without glue to check alignment. Identify gaps or misalignments early—this saves time later.
- Create an Armature (if needed): For dynamic poses or large figures, insert a metal rod through limbs and torso to reinforce joints and prevent sagging over time.
- Peg Key Joints: Drill small holes in connecting parts and insert brass pins to increase glue surface area and stability. Essential for shoulders, hips, and necks.
- Fill Gaps and Modify Design: Use two-part epoxy putty to reshape armor, extend capes, or add accessories. Let cure fully before sanding smooth.
- Prime the Model: Apply a thin, even coat of primer. This reveals any imperfections and provides a uniform base for paint adhesion.
- Paint Layer by Layer: Start with base colors, then build up shading, highlighting, and weathering effects. Use washes for depth in crevices.
- Add Final Details: Paint eyes, insignias, and intricate patterns with the finest brush. Consider using a magnifying lamp for precision.
- Seal with Varnish: Apply a matte or satin finish to protect paint and unify sheen across materials.
- Design a Base (Optional): Craft a thematic stand using terrain materials, metal plates, or 3D-printed elements to enhance presentation.
Customization Techniques for Advanced Personalization
Once comfortable with basics, explore these methods to elevate your model beyond standard builds:
- Kitbashing: Combine parts from other models (plastic kits, spare GK pieces) to create hybrid designs. For example, attach sci-fi weaponry to a fantasy warrior.
- Sculpting Over Resin: Use Milliput or Green Stuff to add muscle definition, armor plating, or organic textures like scales or fur.
- Weathering Effects: Simulate wear with dry brushing, chipping, rust streaks, or grime filters—ideal for battle-damaged characters.
- LED Integration: Embed micro LEDs in eyes, weapons, or bases for dramatic lighting. Requires careful planning during assembly.
| Technique | Best For | Difficulty Level |
|---|---|---|
| Basic Repainting | Newcomers, quick upgrades | Beginner |
| Mold Line Removal | All GK projects | Beginner |
| Armature Building | Poseable or oversized figures | Intermediate |
| Kitbashing | Original character design | Intermediate |
| Advanced Sculpting | Full conversions or creatures | Advanced |
| Electronic Integration | Showpiece displays | Advanced |
Real Example: Transforming a Standard Bust into a Dynamic Character
Tyler, a hobbyist from Vancouver, purchased a plain resin bust of a medieval knight. Dissatisfied with its static appearance, he decided to convert it into a cursed revenant rising from a grave. He extended the base with broken stone textures made from baking soda and PVA glue, added torn fabric using aluminum foil shaped with putty, and painted glowing red eyes with translucent red layers over white LED backlighting. After six weeks of part-time work, the figure became the centerpiece of his display shelf at a local convention—earning praise for its storytelling and technical execution.
This case illustrates how far personalization can go. It wasn't just about paint; it was about vision, narrative, and craftsmanship converging into one cohesive piece.
Frequently Asked Questions
Can I paint GK figures with regular acrylics?
Yes, but use artist-grade or model-specific acrylics rather than craft paints. They offer better pigment density, durability, and adhesion on resin surfaces. Always prime first.
How do I fix a cracked resin part?
Clean the area thoroughly, then glue the pieces with super glue. Reinforce the backside with two-part epoxy or fiberglass tape. Once cured, sand and repaint as needed.
Is airbrushing necessary for good results?
No, but it significantly improves finish quality, especially for gradients and skin tones. Hand-brushing works well for smaller areas and details, though it requires more patience.
Final Tips for Long-Term Success
Conclusion: Bring Your Vision to Life
Mastering GK figure customization is a journey of patience, creativity, and technical growth. Each model you complete teaches something new—whether it's how putty behaves under sanding or how light affects painted surfaces. There’s no single “right” way to customize; your style will evolve with practice. Start simple, respect the material, and gradually push boundaries. The most rewarding GK builds aren’t those that look exactly like the box art—they’re the ones that carry a piece of you.


 浙公网安备
33010002000092号
浙公网安备
33010002000092号 浙B2-20120091-4
Comments
No comments yet. Why don't you start the discussion?