
Protecting your iPhone begins the moment you unbox it. While Apple devices are built with durability in mind, everyday use exposes them to risks—drops, dust, moisture, and accidental bumps. A high-quality case is one of the most effective ways to safeguard your investment. Yet, many users overlook the importance of proper case installation. Incorrectly fitted cases can compromise protection, interfere with functionality, or even damage ports and buttons. Mastering iPhone case installation ensures your device stays secure, accessible, and fully functional.
Why Proper Case Installation Matters
A well-installed iPhone case does more than look good—it enhances protection, maintains usability, and preserves resale value. Cases that aren’t properly aligned may leave critical areas exposed, such as camera lenses or charging ports. Gaps around the edges reduce shock absorption during drops, while misaligned cutouts can make buttons difficult to press or block speakers and microphones.
Moreover, improperly seated cases can trap dirt and moisture between the phone and the case, leading to long-term cosmetic damage or corrosion. Taking a few extra minutes to install your case correctly prevents these issues and ensures optimal performance over time.
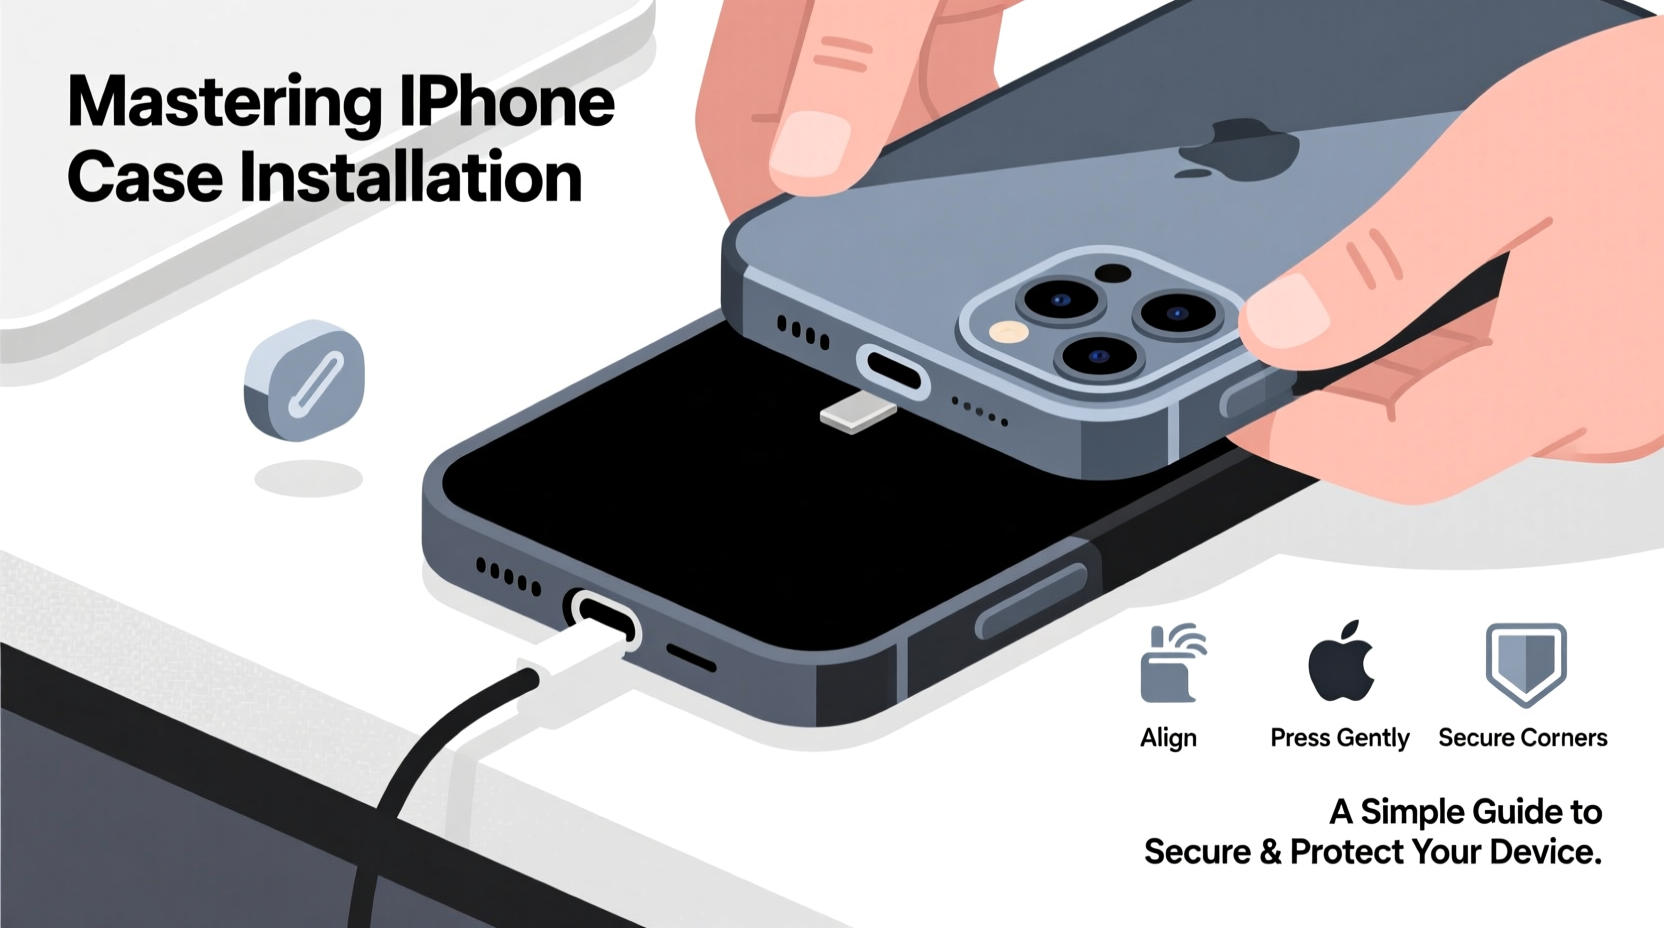
Step-by-Step Guide to Installing Your iPhone Case
The process of installing an iPhone case varies slightly depending on the material and design—whether it’s silicone, leather, rugged hybrid, or ultra-slim plastic. However, the following universal steps apply to nearly all models and case types.
- Power off your iPhone (optional but recommended): While not required, turning off your device eliminates the risk of accidental input during installation, especially when pressing near the screen.
- Clean your iPhone thoroughly: Use a microfiber cloth to wipe down the entire surface. Pay special attention to the edges and corners where grime accumulates.
- Inspect the case interior: Check for dust, loose threads, or manufacturing residue. Run your finger along the inner lining to detect imperfections.
- Align the bottom first: Start by positioning the Lightning port and speaker cutout correctly. Slide the bottom edge of the iPhone into the corresponding slot of the case.
- Press the top into place: Once the bottom is secured, gently press the top of the phone into the case. Avoid using excessive force; if resistance occurs, recheck alignment.
- Verify all ports and buttons: Ensure the volume rocker, side button, and ring switch move freely. Confirm that the camera lens sits flush within its opening without obstruction.
- Test functionality: Turn on your iPhone and plug in headphones or a charger to confirm full access to ports. Play audio to verify speaker clarity.
“Many customers return cases claiming ‘poor fit,’ only to discover they were installed upside down or misaligned at the base.” — Jordan Lee, Mobile Accessory Technician at iShield Solutions
Do’s and Don’ts of iPhone Case Installation
| Do’s | Don’ts |
|---|---|
| Use gentle pressure when snapping the case into place | Force the phone into the case aggressively |
| Double-check alignment of camera, ports, and buttons | Install the case while your hands are wet or greasy |
| Remove existing screen protectors or old case residue | Leave stickers or protective films on the iPhone |
| Choose a case designed specifically for your iPhone model | Use third-party cases not certified for your exact model |
| Check fit every few weeks for signs of loosening | Ignore cracks or warping in the case material |
Choosing the Right Case for Your Model
Not all cases are created equal. Compatibility depends on your iPhone’s generation, size, and design variations—even minor differences between models like the iPhone 14 and 15 can affect fit. For example, the iPhone 15 introduced a titanium frame and slightly adjusted button placement, rendering some older cases incompatible.
When selecting a case, always verify compatibility with your specific model number (found in Settings > General > About). Reputable brands clearly label supported devices, often including diagrams showing precise cutouts.
- Silicone cases: Offer flexibility and grip but may stretch over time.
- Hard plastic cases: Provide excellent scratch resistance but less drop protection.
- Rugged cases (e.g., OtterBox, UAG): Feature multi-layer construction with raised bezels for screen protection.
- Folio or wallet cases: Combine protection with convenience but require careful hinge alignment.
Mini Case Study: The Cost of Improper Installation
Sophia, a freelance photographer in Seattle, purchased a premium leather case for her iPhone 14 Pro Max. Eager to use it, she quickly snapped it on without checking alignment. Over the next week, she noticed muffled sound during video calls and difficulty accessing the mute switch. After two weeks, she discovered the speaker grille was partially blocked, and the ring switch had become stiff due to constant friction against the case.
She returned the case, assuming it was defective. The manufacturer reviewed photos and concluded the issue stemmed from incorrect installation—the top of the phone hadn’t been fully seated, causing lateral pressure on the controls. A replacement case, properly installed, resolved all issues. This experience cost Sophia time, shipping fees, and temporary disruption to her workflow—all avoidable with careful setup.
Essential Checklist Before & After Installation
Follow this checklist to ensure a flawless case installation every time:
- ✅ Confirm the case matches your iPhone model exactly
- ✅ Power off the device (recommended)
- ✅ Clean both the iPhone and inside of the case
- ✅ Align the bottom connectors and camera module first
- ✅ Snap the top into place gently and evenly
- ✅ Test all physical buttons for responsiveness
- ✅ Plug in a cable to verify port accessibility
- ✅ Play audio to check speaker and microphone function
- ✅ Inspect for gaps or uneven edges around the perimeter
- ✅ Store the original packaging in case returns are needed
Frequently Asked Questions
Can I install a case on my iPhone with a screen protector?
Yes, most cases are designed to accommodate standard screen protectors. However, thick or poorly applied protectors—especially those with bubbling or lifting edges—can interfere with case fit. If you notice tightness around the screen, consider trimming excess film or switching to a tempered glass protector with a slim profile.
Why does my new case feel too tight or too loose?
Slight stiffness is normal with new cases, especially silicone or TPU materials, which often loosen slightly after a few days of use. Conversely, a case that feels immediately loose likely lacks structural integrity or isn’t designed for your exact model. Avoid using ill-fitting cases, as they offer minimal protection during impacts.
How often should I remove and clean my iPhone case?
Experts recommend removing and cleaning your case every two to three weeks. This prevents buildup of sweat, oils, and pocket lint. Simply wash with mild soap and water, dry thoroughly, and reinstall. Regular cleaning extends both the case’s lifespan and your iPhone’s hygiene.
Conclusion: Secure Protection Starts With Smart Installation
Your iPhone is a powerful tool for communication, creativity, and productivity. Protecting it starts with more than just buying a case—it requires thoughtful installation and ongoing maintenance. By following precise alignment techniques, choosing compatible designs, and testing functionality post-installation, you maximize both safety and usability.
Take a moment each time you install a new case. It’s a small action that pays off in long-term device longevity, performance, and peace of mind. Whether you’re upgrading your phone or simply refreshing your accessories, mastering iPhone case installation is a simple habit that delivers lasting value.


 浙公网安备
33010002000092号
浙公网安备
33010002000092号 浙B2-20120091-4
Comments
No comments yet. Why don't you start the discussion?