
Lanyards are more than just functional accessories—they’re personal statements. Whether used for holding ID badges, keys, or as fashion accents, a well-crafted lanyard combines durability with aesthetic appeal. While many settle for mass-produced versions, creating your own allows for customization in color, pattern, strength, and comfort. With the right techniques and attention to detail, you can produce lanyards that last longer and stand out in style.
This guide walks through essential methods, material choices, and finishing touches that transform basic cord into professional-grade lanyards. From beginners to experienced crafters, these insights help refine technique and inspire creativity.
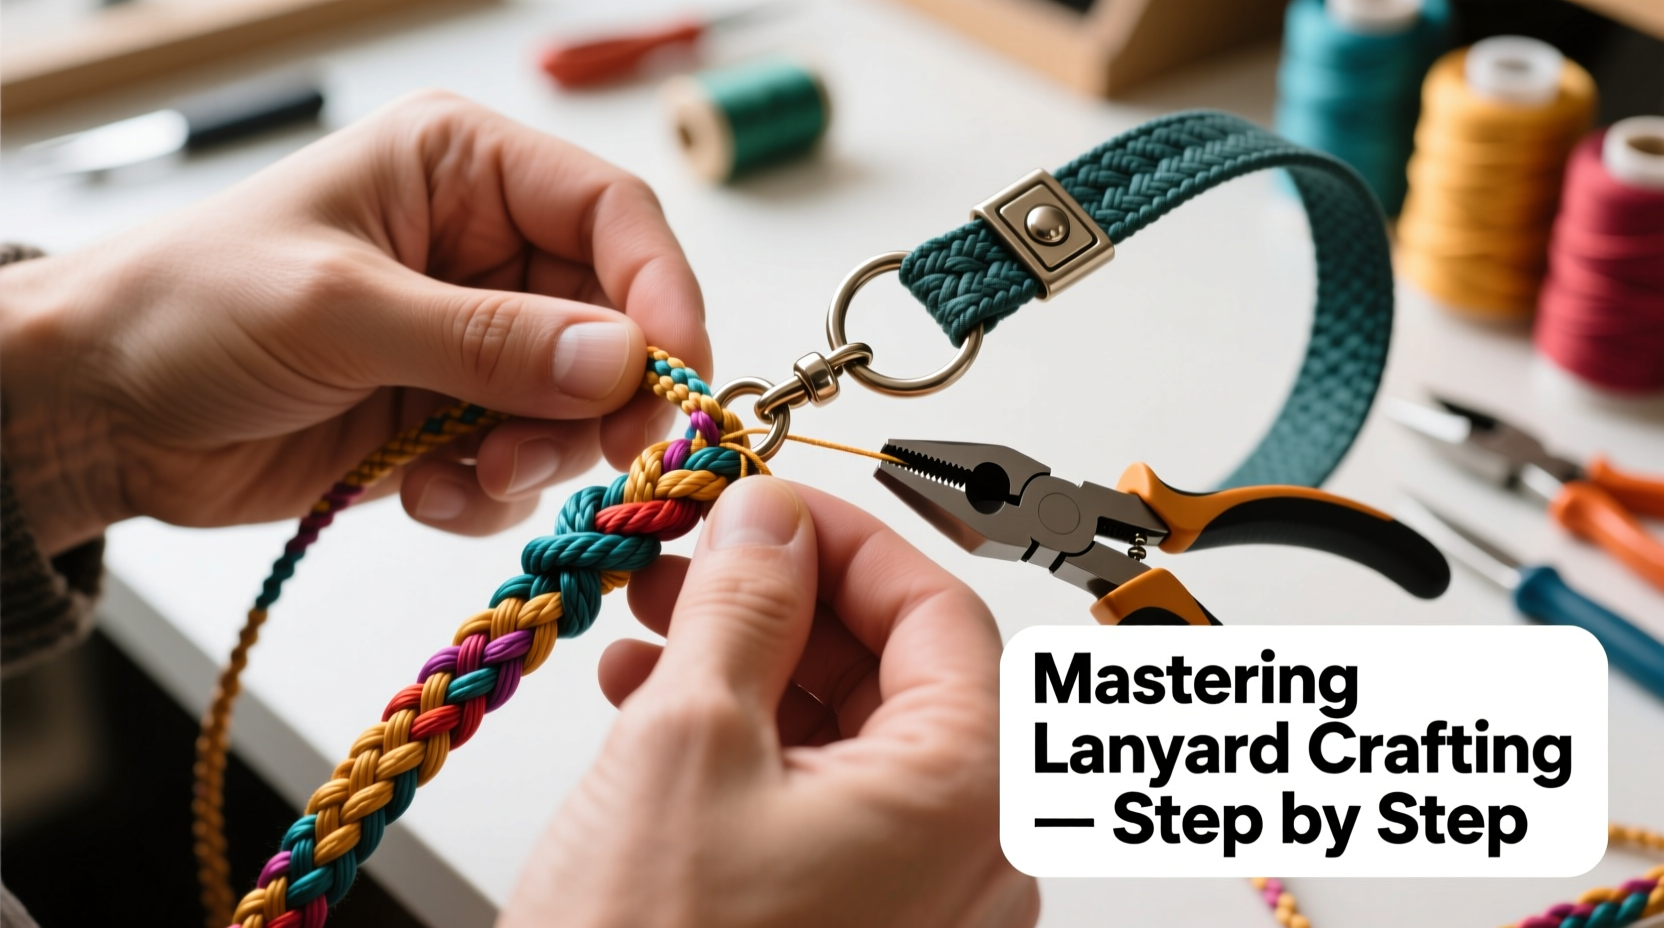
Selecting the Right Materials for Durability and Style
The foundation of any quality lanyard lies in its materials. Choosing the wrong cord can lead to fraying, stretching, or discomfort over time. The most commonly used materials include:
- Paracord (550 cord): Known for high tensile strength and resistance to abrasion. Ideal for heavy-duty lanyards.
- Nylon or polyester braided cord: Offers smooth texture and vibrant color retention. Great for decorative use.
- Satin ribbon: Provides a sleek, elegant look but less durable under strain.
- Elastic cord: Adds stretch, useful for earphone holders or snug-fit designs.
For everyday wear—especially when supporting weight like badges or tools—paracord is unmatched. Its seven inner strands can be repurposed in emergencies, adding utility beyond appearance.
Essential Knots and Weaving Techniques
Knot selection defines both the structure and visual rhythm of a lanyard. Mastery begins with foundational knots, then progresses to complex weaves.
Basic Square Knot
The square knot forms the backbone of most lanyard projects. It’s symmetrical, secure, and easy to repeat.
- Cross the left cord over the center cords and tuck it under the right.
- Bring the right cord over the left, pass it behind the center, and through the loop on the left.
- Pull tight. Repeat in reverse to complete one full square unit.
Diagonal Stitch (Half Hitch Spiral)
Creates a twisting braid effect, excellent for dynamic patterns. Works best with two contrasting colors.
- Use one strand as the “working” cord and another as the “core.”
- Loop the working cord around the core and pull through consistently from the same side.
- Maintain even tension to avoid kinking.
King Solomon Bar
A decorative variation using alternating square knots with staggered filler cords. Produces a textured, ridged surface ideal for grip and visual interest.
Step-by-Step Guide to Crafting a Custom Lanyard
Follow this sequence to create a professional-quality lanyard suitable for daily use.
- Measure and cut cords: For a standard 22-inch lanyard, cut one main cord at 6 feet (for length) and two filler cords at 3 feet each. Adjust based on desired thickness and drop length.
- Attach to anchor point: Secure cords to a fixed object like a clipboard using a lark’s head knot. Fold the main cord in half, place the loop under the clip, and pull ends through.
- Begin weaving: Start with a series of square knots, alternating direction every row for the King Solomon bar, or maintain one side for spiral effects.
- Incorporate color changes: Introduce new colored strands mid-design by splicing them in with a simple overlap and securing with a few tight knots.
- Add hardware: At the bottom, attach a key ring or badge slide using a wrapped knot or metal clasp. Finish with a loop at the top for neck suspension.
- Seal ends: Melt synthetic cord tips slightly with a lighter and press flat with pliers to prevent fraying. Do not skip this step—it ensures longevity.
| Technique | Best For | Difficulty | Durability Rating |
|---|---|---|---|
| Square Knot Braid | Beginners, ID holders | Easy | ★★★★☆ |
| Diagonal Stitch | Decorative flair | Intermediate | ★★★☆☆ |
| King Solomon Bar | Grip & visual depth | Intermediate | ★★★★★ |
| Fishtail Braid | Thin, flexible design | Advanced | ★★★☆☆ |
Design Principles for Stylish Results
A durable lanyard should also reflect personal taste. Consider these design elements before starting:
- Color harmony: Use complementary or analogous color schemes. Three colors maximum unless aiming for a carnival effect.
- Pattern rhythm: Alternate thick and thin sections or insert spacer bars to break up long stretches of single stitch.
- Ergonomics: Ensure the final product isn’t too stiff or heavy. Overly dense knots may cause neck strain during extended wear.
- Hardware integration: Choose clasps and rings that match the cord gauge. Oversized hardware pulls threads apart; undersized looks weak.
“Great lanyards balance form and function. A beautiful weave means nothing if it unravels after a week.” — Jordan Lee, Tactical Gear Designer
Common Pitfalls and How to Avoid Them
Even skilled crafters make mistakes. Awareness prevents frustration later.
- Inconsistent tension: Leads to uneven appearance. Work at a consistent pace and avoid over-tightening early rows.
- Skipping end sealing: Frayed tips ruin clean finishes. Take ten extra seconds per end to melt and flatten.
- Using cotton cord for load-bearing use: Cotton absorbs moisture and weakens. Reserve for display pieces only.
- Ignoring wear points: Areas near clips experience the most stress. Reinforce with double knots or epoxy drops.
Mini Case Study: Building a Corporate Event Lanyard
A local tech startup needed 150 custom lanyards for their annual conference. Off-the-shelf options looked generic and often broke within hours. They turned to a small artisan workshop for a better solution.
The designer chose 4mm paracord in company colors (navy and electric blue), using a diagonal stitch pattern for visual motion. Each lanyard included a quick-release buckle for safety and a silicone badge holder to prevent scratching.
After the event, feedback showed 94% of attendees still had intact lanyards three weeks later—far exceeding industry norms. Several departments requested permanent versions for daily office use.
The success came down to material integrity, thoughtful construction, and alignment with brand identity—proof that craftsmanship makes a measurable difference.
Checklist: Before You Finish Your Lanyard
- ✅ All knots are tight and aligned.
- ✅ Ends are sealed and smoothed.
- ✅ Hardware moves freely without snagging.
- ✅ Length is comfortable when worn (standard is 20–24 inches).
- ✅ Design reflects intended use (e.g., no loose tassels on industrial sites).
- ✅ Tested under light tension (simulating badge weight).
FAQ
How long should a lanyard be?
A standard adult neck lanyard ranges from 20 to 24 inches in total length. Allow 22 inches as a baseline, adjusting for user height or purpose (e.g., shorter for kids, longer for cross-body carry).
Can I wash my handmade lanyard?
Yes, if made from synthetic fibers like nylon or polyester. Hand wash with mild soap and air dry. Avoid machine washing, which can loosen knots and distort shape.
What’s the strongest lanyard knot?
The King Solomon bar offers superior strength due to interlocking square knots and layered structure. When tied correctly with paracord, it withstands over 500 pounds of tensile force.
Final Thoughts and Call to Action
Crafting lanyards is an art rooted in precision and intention. Every knot contributes to both resilience and beauty. By selecting quality materials, mastering core techniques, and applying thoughtful design, you create more than an accessory—you build a reliable tool with personality.
Whether making one for yourself or producing batches for clients, the principles remain the same: durability starts with preparation, and style emerges from consistency.


 浙公网安备
33010002000092号
浙公网安备
33010002000092号 浙B2-20120091-4
Comments
No comments yet. Why don't you start the discussion?