
Setting up email on your iPad should be simple, but misconfigurations, forgotten passwords, or unfamiliar settings can turn it into a frustrating experience. Whether you're using iCloud, Gmail, Outlook, or a custom business domain, getting your mail working smoothly is essential for staying connected. This guide walks you through every phase of the process—ensuring your iPad handles your inbox efficiently, securely, and without interruptions.
Why Proper Mail Configuration Matters
Your iPad isn’t just a device for browsing or entertainment—it’s a productivity hub. A correctly configured email account ensures timely notifications, seamless syncing across devices, and reliable access to attachments and calendars. Poor setup, on the other hand, can lead to missed messages, duplicate emails, or drained battery life due to constant reconnection attempts.
Apple's built-in Mail app supports most major providers out of the box, but advanced features—like two-factor authentication, IMAP/SMTP customization, or managing multiple accounts—require attention to detail. Mastering these elements turns a basic setup into a professional-grade system.
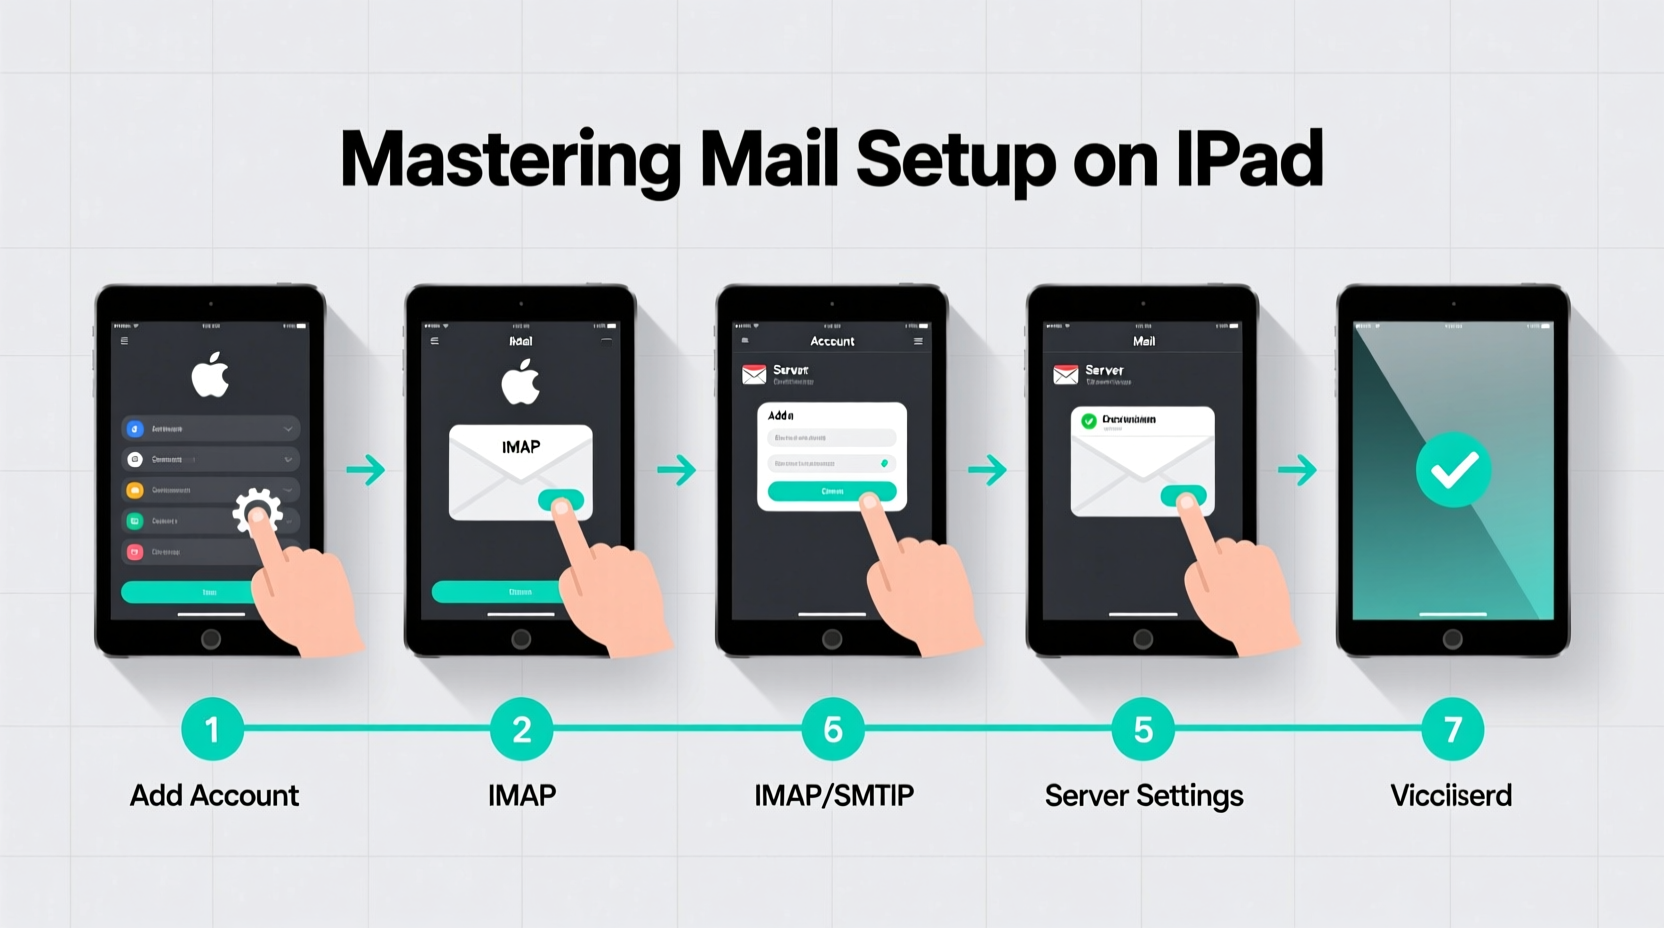
Step-by-Step: Adding Your Email Account
The foundation of mastering your iPad mail setup begins with adding your account correctly. Follow this timeline to ensure no steps are missed:
- Open Settings: Tap the gear icon on your home screen.
- Select Mail: Scroll down and tap “Mail” (not the Mail app itself).
- Tap Accounts: Under the \"Accounts\" section, choose “Add Account.”
- Choose Your Provider: Select from options like iCloud, Gmail, Yahoo, Outlook.com, Exchange, or “Other” for custom domains.
- Enter Login Details: Input your full email address and password.
- Allow App Access: If prompted, grant permission for the Mail app to access your account. For Google and Microsoft, this may involve signing in via a secure web prompt.
- Select Sync Options: Choose which data to sync—Mail, Contacts, Calendars, Notes, and Reminders.
- Save: Tap “Save” at the top right. The iPad will verify settings and complete setup.
If automatic configuration fails—common with corporate or self-hosted domains—you’ll need to enter server details manually. Tap “Next,” then “Advanced,” and input the correct incoming (IMAP) and outgoing (SMTP) server information provided by your IT department or hosting service.
Optimizing Your Mail Experience
Once your account is active, fine-tune the settings to match how you work. These adjustments enhance performance and reduce distractions.
- Customize Inbox Layout: Go to Settings > Mail > Inbox and choose between unified, filtered, or prioritized views.
- Manage Notifications: Navigate to Settings > Notifications > Mail. Enable alerts only for important accounts and consider scheduling Focus modes during work hours.
- Enable Push or Fetch: In Settings > Mail > Accounts > [Your Account] > Advanced, set “Fetch New Data” to “Push” if supported. Otherwise, choose a short fetch interval (e.g., every 15 minutes).
- Adjust Preview Length: Limit message previews to 2–3 lines to preserve privacy and reduce clutter.
- Use Signatures Smartly: Create a concise signature under Settings > Mail > Signature. Use different signatures per account if needed.
| Feature | Recommended Setting | Why It Matters |
|---|---|---|
| Sync Frequency | Push (if available) | Ensures immediate delivery without draining battery |
| Mail Preview | 2 Lines | Balances visibility with screen cleanliness |
| Signature | Per Account | Maintains professionalism across personal and work emails |
| Message Deletion | Move to Trash, Not Archive | Reduces confusion and accidental permanent deletion |
Handling Common Setup Issues
Even with careful setup, problems arise. Here’s how to resolve them quickly:
Authentication Errors: Double-check your username and password. For services like Gmail, ensure “Less Secure App Access” is disabled and instead use App Passwords if two-factor authentication is enabled.
Can’t Send Mail (SMTP Error): Verify the outgoing mail server port. Most providers use port 587 with TLS encryption. Incorrect ports or disabled encryption cause sending failures.
Emails Not Syncing: Confirm that “Mail” is toggled ON under Settings > [Your Account] > Account > Mail. Also check date & time settings—incorrect time zones disrupt IMAP synchronization.
“Over 60% of mail setup issues stem from outdated passwords or incorrect server ports. Always verify credentials first before diving into advanced troubleshooting.” — Jordan Lee, Apple-Certified Support Technician
Mini Case Study: Streamlining a Small Business Workflow
Sarah runs a boutique marketing agency and struggled with inconsistent email access across her team’s iPads. After switching to a hosted Exchange solution, she manually configured each iPad using IMAP settings provided by her IT consultant. She standardized signature formats, enabled push notifications, and trained staff to use VIP lists for client follow-ups. Within a week, response times improved by 40%, and no critical messages were missed during travel.
The key wasn’t just technical setup—it was consistency. By treating email configuration as part of operational hygiene, Sarah turned a routine task into a competitive advantage.
Checklist: Pro-Level Mail Setup Completion
Before declaring your setup complete, run through this checklist:
- ✅ All email accounts successfully added and verified
- ✅ Push or frequent fetch enabled for timely updates
- ✅ Correct signature applied per account
- ✅ Notifications customized to avoid overload
- ✅ Calendar and contact syncing enabled where needed
- ✅ Two-factor authentication secured with app-specific passwords (if applicable)
- ✅ Test email sent and received successfully
- ✅ Backup method confirmed (e.g., iCloud backup includes mail settings)
Frequently Asked Questions
Can I use multiple email accounts on one iPad?
Absolutely. The iPad supports an unlimited number of email accounts. You can switch between them seamlessly in the Mail app or consolidate all inboxes into a single view under Settings > Mail > Multiple Accounts > Combined Inbox.
Why does my iPad keep asking for my password?
This typically indicates an expired session or revoked app access. For Google accounts, visit your security settings online and generate an app-specific password. For others, re-enter credentials in Settings > Mail > Accounts and ensure background refresh is allowed.
Is it safe to store work email on my personal iPad?
Yes, if proper precautions are taken. Enable a strong passcode, use Face ID or Touch ID, and consider enabling remote wipe via Find My. For sensitive industries, consult your organization’s mobile device management (MDM) policy.
Conclusion: Take Control of Your Digital Communication
Configuring email on your iPad isn’t just about connecting an account—it’s about creating a reliable, efficient communication channel tailored to your lifestyle. With the right settings, your iPad becomes more than a device; it becomes an extension of your workflow. From initial setup to daily optimization, each step builds toward a smoother, more productive experience.


 浙公网安备
33010002000092号
浙公网安备
33010002000092号 浙B2-20120091-4
Comments
No comments yet. Why don't you start the discussion?