
In the vast world of Minecraft, few decorative elements offer as much creative potential as banners. More than just flags on a pole, banners serve as personalized emblems, architectural accents, and even functional tools in certain game mechanics. Whether you're marking your base, designing a medieval fortress, or creating pixel art on a grand scale, mastering banner design elevates both aesthetics and expression. This guide walks through every stage—from gathering materials to advanced layering—so you can craft truly unique banners that stand out in any biome.
Understanding Banner Basics
Banners were introduced in Minecraft to add depth to player expression and world-building. They are crafted using six wool blocks and one stick, forming a blank banner that serves as your canvas. Once created, banners can be customized at a loom or directly in an anvil using dyes and pattern combinations.
Each banner supports up to six layers of design, allowing for intricate compositions. Patterns range from simple borders and stripes to complex symbols like skulls, crescents, and gradients. The key to mastery lies not just in knowing which patterns exist, but in understanding how they interact when layered and colored.
Step-by-Step Guide to Crafting Your First Custom Banner
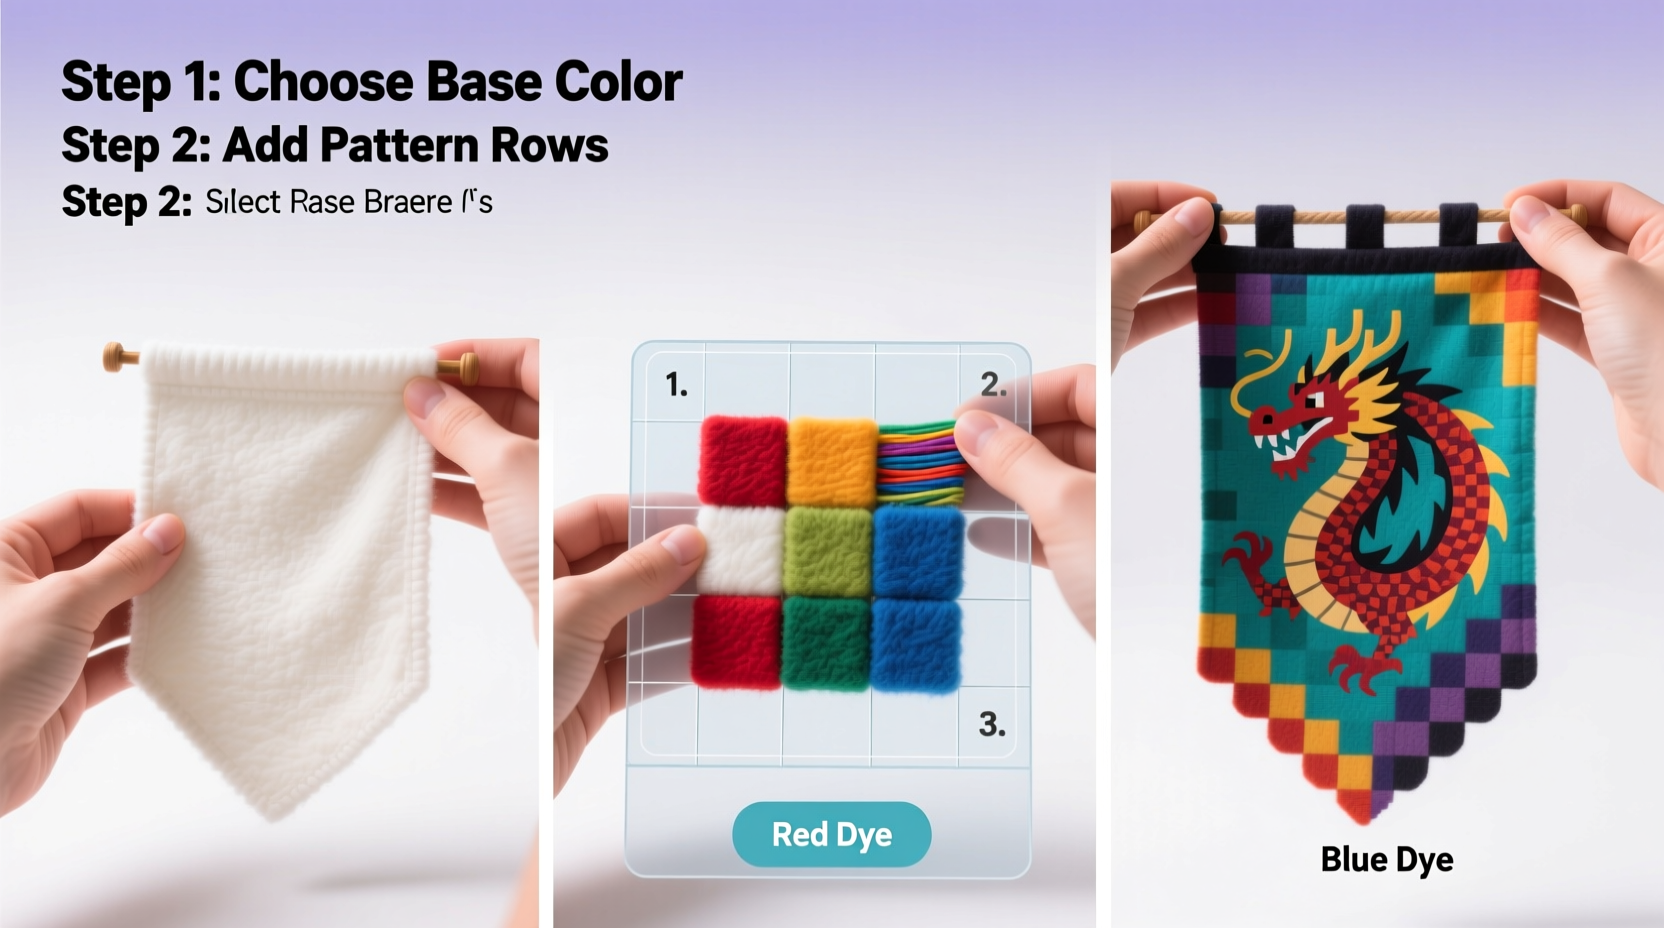
Creating a custom banner is a structured process that blends crafting mechanics with artistic vision. Follow these steps to go from raw materials to a finished design.
- Gather Materials: Collect one stick and six wool blocks of any color (white works best for a neutral base).
- Craft the Blank Banner: In the crafting grid, place the wool in the top two rows and the stick in the center of the bottom row.
- Acquire Dyes: Farm flowers, cut trees for saplings, mine lapis lazuli, or trade with villagers to collect all 16 dye colors.
- Use a Loom: Place the loom in your inventory interface. Insert the blank banner, then add a dye and a pattern item (like paper for a border) to preview the design.
- Apply the Design: Move the newly designed banner back into your inventory. Repeat the process to add more layers.
- Display It: Right-click any solid block to place your banner, or use it on a shield in your off-hand for personal flair.
The loom simplifies customization by letting you preview changes before committing. Without it, you’d need to use an anvil—a far more resource-intensive method due to XP costs.
Pattern Library and Color Theory
Minecraft offers 37 distinct banner patterns, each unlocked through specific items such as paper, vines, or nether stars. Combining these with 16 dye colors opens over 500 possible visual combinations per layer—and exponentially more when stacking.
Successful design hinges on thoughtful color pairing. Complementary colors (e.g., red and green) create contrast, while analogous schemes (blue, cyan, light blue) offer harmony. Avoid clashing combinations unless intentional—such as warning signs or trap decoys.
| Pattern Name | Required Item | Best Used For |
|---|---|---|
| Base (Color) | Dye only | Background fills |
| Per bend sinister | Rabbit Hide | Diagonal accents |
| Creeper | Creeper Head | Themed bases or warnings |
| Gradient | Feather | Smooth transitions |
| Bricks | Brick | Fortress detailing |
Layer order matters. The first applied pattern appears behind subsequent ones. To create a gold cross on a red field with a black border, apply the red fill first, then the black border, and finally the gold cross.
“Players who treat banners like digital canvases often develop signature styles—some mimic national flags, others invent entirely new heraldry.” — Lin Zhao, Minecraft Community Designer & Builder Mentor
Advanced Techniques: Layering and Shield Integration
Once comfortable with basic designs, explore advanced applications. Skilled builders use banners to label storage rooms, mark territory, or enhance roleplay environments. One powerful technique is reverse layering: applying darker outlines before lighter inner shapes to simulate drop shadows or embossed effects.
Another underused feature is banner placement on shields. When a banner is combined with a shield in a crafting grid, it transfers the design, allowing players to carry their emblem into battle. This is especially effective in multiplayer servers where teams adopt shared insignias.
For large-scale projects—like recreating a castle coat of arms—break the design into sections. Craft individual banners for turrets, gatehouses, and banners, ensuring consistency in color and proportion. Test layouts in Creative mode before finalizing in Survival.
Mini Case Study: Building a Faction Identity
In a popular survival server, \"The Iron Pact\" struggled with unclear team identity. Members used random gear and no unified base markers. After adopting a standardized banner—a black hammer on a yellow field with a red border—base entrances were clearly marked, and player morale improved.
The leader, Maya, used a loom to pre-craft 12 identical banners. She placed them atop watchtowers and integrated the same design onto all members’ shields. New recruits instantly recognized allied structures, and rival groups began referring to them by their banner name: “The Hammerfolk.”
This case shows that beyond decoration, banners function as communication tools—conveying allegiance, status, and intent without words.
Checklist: Creating a Cohesive Banner System
- ✅ Gather all 16 dye colors
- ✅ Build or obtain a loom
- ✅ Define your theme (military, nature, fantasy, etc.)
- ✅ Choose 2–3 primary colors and one accent
- ✅ Select 3–5 complementary patterns
- ✅ Test design in Creative mode
- ✅ Save a template banner in storage
- ✅ Apply design to shields if needed
- ✅ Deploy consistently across your build zone
Common Mistakes to Avoid
New banner artists often fall into predictable traps. Applying too many layers can clutter the design—especially at small scale. Using low-contrast colors (like yellow on white) renders details invisible from a distance. Others forget to save templates, forcing them to recreate complex designs repeatedly.
Also, placing banners on inappropriate blocks—like glass or fences—can break immersion. Opt for full blocks or walls where banners appear mounted naturally.
FAQ
Can I remove a layer from a banner once it’s applied?
No, layers cannot be removed. However, you can overwrite a banner by crafting a new one with fewer layers or start fresh with a blank banner.
How many layers can a banner hold?
A banner can have up to six layers, including the base color. This limit encourages thoughtful design rather than overcrowding.
Can banners be used as camouflage or deception?
Yes. Clever players place misleading banners—like a peaceful village symbol near a trap—to manipulate enemy expectations. In PvP scenarios, this psychological edge can be decisive.
Conclusion
Banners are among Minecraft’s most versatile yet underrated features. With patience and creativity, they transform generic builds into meaningful spaces. From simple markers to elaborate coats of arms, the only limit is your imagination. Now that you understand the mechanics, theory, and strategic value of banners, it’s time to craft your legacy—one pixel of wool at a time.


 浙公网安备
33010002000092号
浙公网安备
33010002000092号 浙B2-20120091-4
Comments
No comments yet. Why don't you start the discussion?