
Photoshop’s layer system is the backbone of non-destructive editing and creative flexibility. Whether you're designing digital art, retouching photos, or building complex composites, understanding how to create and manage layers efficiently transforms your workflow from chaotic to intuitive. Layers allow you to isolate elements, test ideas without permanent changes, and maintain full control over every component of your image. This guide breaks down the essentials—from creating your first layer to mastering advanced organizational techniques—so you can work faster, cleaner, and with greater precision.
Understanding the Photoshop Layers Panel
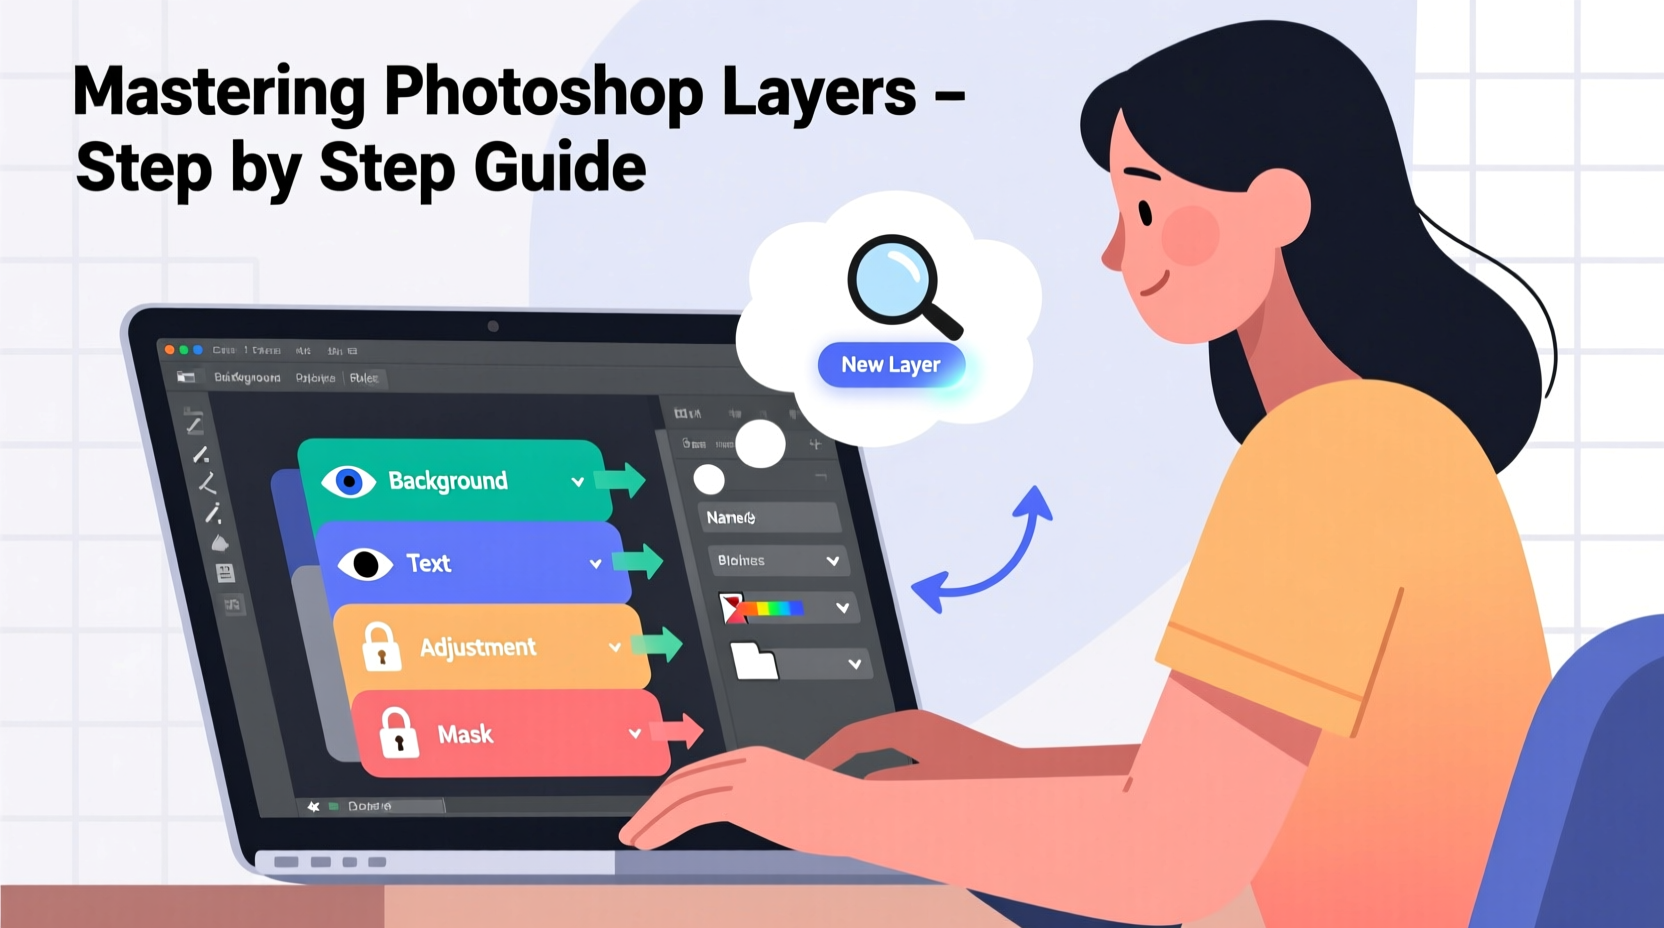
The Layers panel is where your entire composition comes together. Located by default on the right side of the workspace, it displays every element in your document as a separate layer. Each layer acts like a transparent sheet stacked on top of others. You can edit one layer without affecting the rest, which is essential for maintaining flexibility.
Key components of the Layers panel include:
- Layer visibility (eye icon): Toggle on/off to hide or show a layer.
- Layer opacity: Adjust transparency from 0% (fully transparent) to 100% (fully opaque).
- Blending modes: Change how a layer interacts with layers beneath it (e.g., Multiply, Screen, Overlay).
- Lock options: Prevent accidental edits to position, transparency, or pixels.
- Layer thumbnails: Visual preview of the content on that layer.
Creating and Managing New Layers
Creating a new layer is simple, but doing so strategically is what separates novice users from efficient designers. Here’s how to add layers and set yourself up for success:
- Click the New Layer icon (a square with a folded corner) at the bottom of the Layers panel.
- Alternatively, use the keyboard shortcut Ctrl+Shift+N (Windows) or Cmd+Shift+N (Mac).
- In the dialog box, assign a name, choose a color label, and set blending mode and opacity if needed.
- Click OK to create the layer.
Once created, always consider placement. Layers higher in the stack appear in front of lower ones. Drag layers up or down to reposition them visually. For example, text should typically sit above background images, while shadow effects may go beneath main subjects.
“Layers aren’t just about stacking—they’re about structure. Think of them as building blocks in a blueprint.” — Lena Torres, Digital Imaging Specialist
Best Practices for Layer Organization
As projects grow, so does the number of layers. Without organization, the Layers panel becomes overwhelming. Follow these strategies to keep your workflow smooth:
Use Layer Groups (Folders)
Group related layers by selecting them and pressing Ctrl+G (or Cmd+G). Name the group descriptively—such as “UI Elements” or “Portrait Retouching”—and collapse it when not in use. This reduces clutter and improves navigation.
Apply Color Labels
Right-click any layer and choose a color under “Layer Properties.” Use red for final elements, yellow for adjustments, green for graphics, etc. This visual coding helps identify layer types at a glance.
Rename Every Layer
Avoid generic names like “Layer 1 copy 3.” Instead, be specific: “Logo Final,” “Gradient Overlay,” “Model – Teeth Whitening.” Clear naming saves time during revisions.
Step-by-Step: Building a Composite Image Using Layers
Let’s walk through a real-world scenario: combining a model photo with a fantasy landscape.
- Open base image: Start with your background landscape. This becomes your bottom layer.
- Add model photo: Place the model image above the background. Use Select > Subject to isolate them quickly.
- Create a mask: With the model layer selected, click the Add Layer Mask button. Refine edges using the Brush Tool (B) with black or white paint.
- Add lighting effects: Create a new layer named “Vignette.” Fill with black, set blending mode to Multiply, lower opacity to 40%, and use a large soft brush to erase the center.
- Color grading: Add a Solid Color adjustment layer (e.g., deep blue), set to Soft Light at 20% opacity to unify the scene’s mood.
- Final touches: Group all character-related layers, label “Model Composite,” and duplicate the group to test different shadow intensities.
This process demonstrates how layers enable experimentation. Want to try a warmer tone? Add another adjustment layer, tweak settings, and toggle visibility to compare results—all without altering original pixels.
Common Layer Mistakes and How to Avoid Them
Even experienced users fall into traps that slow down productivity. Recognizing these pitfalls early prevents frustration later.
| Mistake | Why It’s Problematic | Solution |
|---|---|---|
| Working directly on the Background layer | Limits flexibility; no transparency or transformation freedom | Duplicate it first (Ctrl+J) or double-click to convert to a regular layer |
| Too many ungrouped layers | Hard to locate elements; increases confusion | Use groups and consistent naming conventions |
| Ignoring layer opacity vs. fill | Opacity affects everything including layer styles; fill does not | Use “Fill” to reduce texture or pattern intensity while keeping drop shadows visible |
| Forgetting to merge smartly | Permanently flattens data, losing editability | Use Ctrl+E only when necessary; prefer grouping or Smart Objects |
Mini Case Study: Restoring an Old Family Photo
Sarah was tasked with restoring a faded 1950s wedding photo for her grandmother’s birthday. The image had stains, low contrast, and missing details in the dress.
She began by duplicating the background layer and labeling it “Original Backup.” Then she created separate layers for each fix:
- “Spot Healing” – used Clone Stamp and Healing Brush non-destructively via a new layer (with Sample All Layers enabled).
- “Brightness/Contrast” – applied as an adjustment layer to avoid clipping highlights.
- “Dress Detail” – painted subtle white strokes on a new layer set to Overlay mode at 30% opacity to reconstruct lace patterns.
By isolating each correction, Sarah could fine-tune individual fixes without damaging the original. She even experimented with sepia tones using a Color Balance adjustment layer, then toggled it off when her grandmother preferred a natural look. The final result was delivered in under two hours—thanks to structured layer management.
Frequently Asked Questions
Can I change the order of layers after creating them?
Yes. Simply click and drag a layer up or down in the Layers panel. The visual stacking order updates immediately.
What’s the difference between merging and flattening layers?
Merging (Ctrl+E) combines selected layers into one. Flattening (Layer > Flatten Image) merges all visible layers into a single background, discarding hidden ones. Both are destructive—use sparingly and save a layered version first.
When should I use Smart Objects instead of regular layers?
Use Smart Objects when applying transformations (scaling, rotating) repeatedly. They preserve original data, preventing quality loss. Right-click a layer and choose “Convert to Smart Object” before resizing.
Conclusion: Take Control of Your Creative Process
Mastering Photoshop layers isn’t about memorizing shortcuts—it’s about developing a mindset of organization, experimentation, and non-destructive editing. When you harness the full power of layers, you stop fighting the software and start expressing your vision clearly and confidently. From simple designs to intricate composites, every great Photoshop project rests on a well-structured foundation of layers.


 浙公网安备
33010002000092号
浙公网安备
33010002000092号 浙B2-20120091-4
Comments
No comments yet. Why don't you start the discussion?