
The puff stitch is a textured, three-dimensional knitting technique that adds depth and visual interest to scarves, blankets, and sweaters. While it’s often associated with crochet, many knitters are now adapting the puff stitch using only two straight or circular needles. This method creates a soft, bouncy fabric that stands out from standard knit and purl patterns. For beginners, mastering the puff stitch may seem challenging at first, but with clear guidance and practice, it becomes an accessible and rewarding skill.
Unlike flat stitches, the puff stitch relies on multiple loops worked into a single stitch, then pulled together to form a small “puff” or cluster. The result is a raised, cushion-like texture that works beautifully in both solid and variegated yarns. Whether you're creating a cozy baby blanket or adding detail to a winter hat, this stitch brings warmth and character to any project.
Understanding the Puff Stitch in Knitting
In traditional crochet, the puff stitch involves inserting the hook into a single space, yarn over, pulling up a loop, and repeating several times before completing the stitch. In knitting, we simulate this effect by working multiple incomplete knit stitches into one base stitch, then gathering them together with a final pass through all loops. The technique mimics the fullness of the crochet version while remaining fully compatible with needle-based knitting.
Because the puff stitch uses more yarn per unit than stockinette or garter stitch, it produces a denser, warmer fabric. It's ideal for cold-weather accessories where insulation matters. However, because of its bulk, it should be used thoughtfully in garments—too much texture can make a piece stiff or difficult to wear comfortably.
Materials and Tools You’ll Need
Before starting, gather the right supplies. Choosing appropriate materials ensures smoother progress and better results, especially for beginners still building muscle memory.
- Yarn: Medium-weight (worsted) yarn in a light color makes stitches easier to see. Wool or acrylic blends work well due to their elasticity.
- Needles: A pair of straight or circular knitting needles sized US 7–9 (4.5–5.5 mm), depending on yarn label recommendations.
- Tapestry Needle: For weaving in ends after completion.
- Stitch Markers (optional): Helpful for marking pattern repeats, especially in larger projects.
- Scissors: For cutting yarn cleanly.
Avoid slippery yarns like silk or bamboo at first—they can cause loops to slide off easily during multi-loop steps. Stick to matte-finish, medium-grip fibers until you gain confidence.
Step-by-Step Guide to Knitting the Puff Stitch
This sequence assumes you already know how to knit and purl. Each puff stitch will occupy one stitch on your left needle but create a clustered group on the right. After forming the puff, you’ll need to stabilize the fabric by working a return row, typically in purl or reverse stockinette.
- Cast on an even number of stitches. Multiples of 4 work well for balanced patterning. For practice, cast on 20 stitches.
- Row 1 (Right Side): *Knit 2, puff stitch*. Repeat from * to end. End with knit 2.
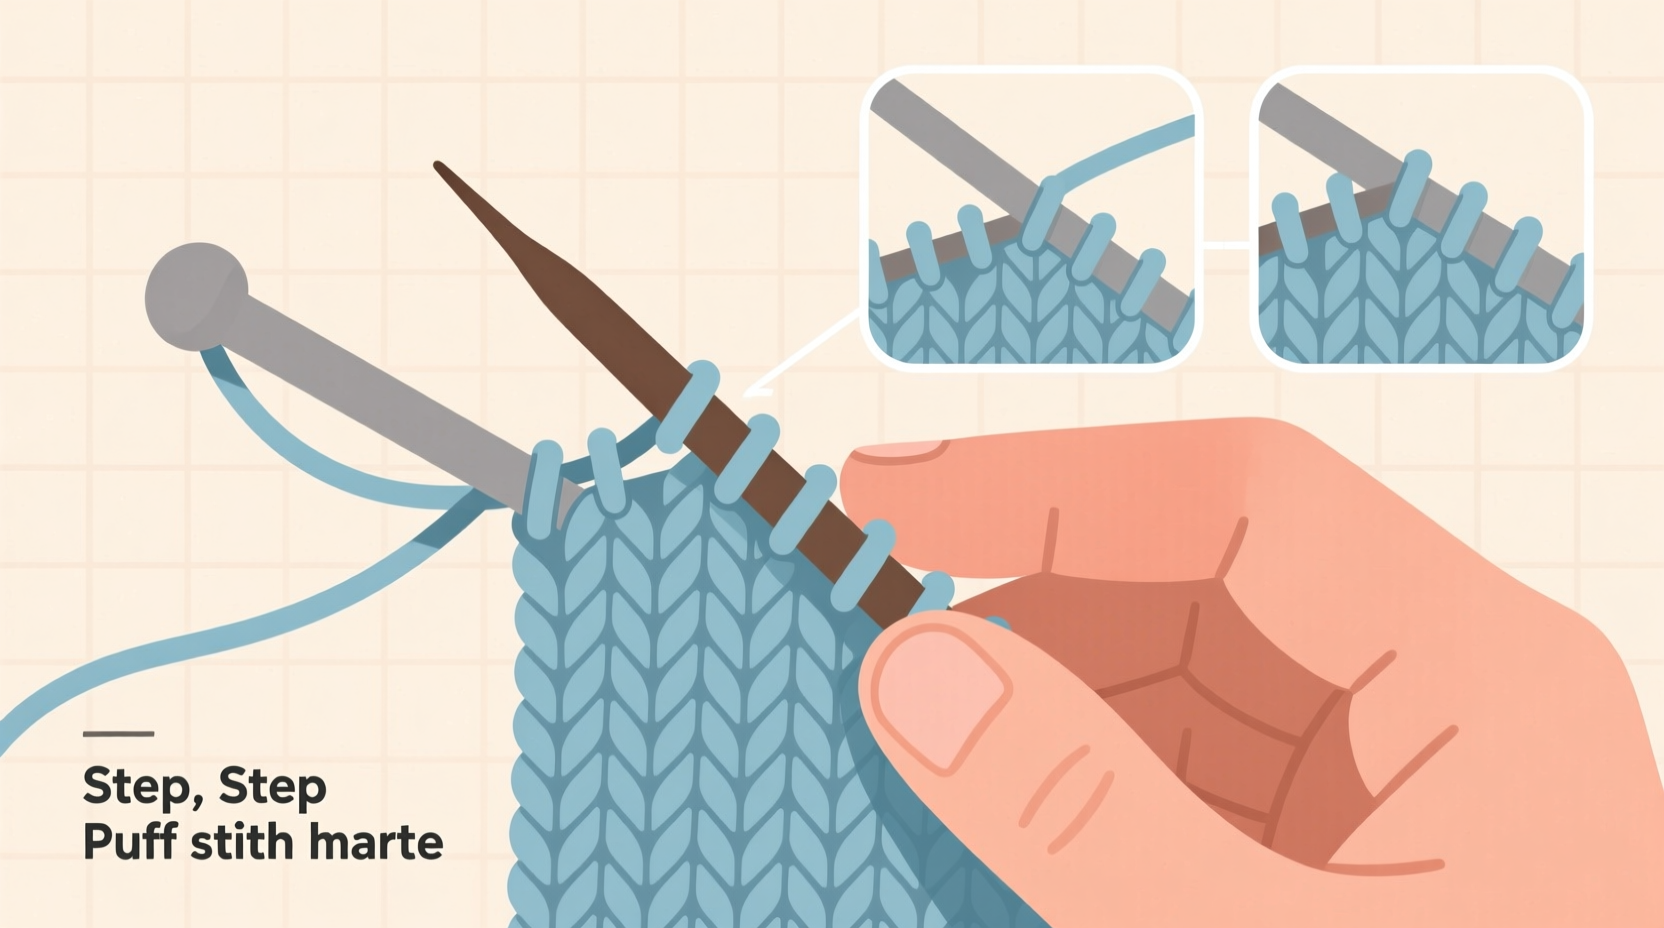
- To make one puff stitch:
- Insert right needle into next stitch as if to knit.
- Wrap yarn and pull up a loop (you now have 2 loops on the right needle).
- Do not slide the original stitch off—insert again into the same stitch.
- Repeat pulling up a loop two more times, for a total of 5 loops on the right needle.
- Knit all 5 loops together through the front loops.
- Pass the original stitch off the left needle. One puff is complete.
- Row 2 (Wrong Side): Purl all stitches. This evens out the texture and prepares for the next puff row.
- Repeat Rows 1 and 2 until your swatch reaches desired length.
As you work, notice how each puff forms a dome-shaped bump. These align in columns when repeated every few stitches, creating a rhythmic, quilted appearance. Keep tension consistent—loose pulls during the multiple loop phase can lead to gaps, while overly tight finishing reduces puff volume.
Common Mistakes and How to Fix Them
Even experienced knitters encounter issues when learning new textures. Here’s a breakdown of frequent problems and solutions specific to the puff stitch:
| Issue | Possible Cause | Solution |
|---|---|---|
| Puffs are uneven in size | Inconsistent loop height or count | Use same wrap tension each time; count loops before closing |
| Stitches too tight to work into | Finishing puff too tightly | Loosen final knit-through-five motion slightly |
| Fabric curls at edges | Difference in stitch depth between puffs and plain stitches | Add 2–3 garter stitch edge stitches on each side |
| Yarn snags during multi-loop stage | Rough or splintered needles | Switch to polished metal or high-quality bamboo |
“Texture stitches like the puff require patience, but they teach control and precision faster than any basic pattern.” — Lena Patel, Master Knitter & Yarn Craft Instructor
Real Example: Sarah’s First Puff Stitch Scarf
Sarah, a beginner knitter from Portland, wanted to move beyond scarves in garter stitch. She tried the puff stitch after seeing a sample at her local yarn shop. Her first attempt was frustrating—loops slipped off, and some puffs collapsed. But she followed a structured approach: practiced the stitch on a 20-stitch swatch, used stitch markers every four stitches, and watched slow-motion video tutorials to refine hand positioning.
After three practice rows, her puffs became evenly shaped. She incorporated them into a scarf using cream-colored wool, alternating puff rows with reverse stockinette. The finished piece had a subtle, cloud-like texture and received compliments from friends. More importantly, Sarah gained confidence in reading her knitting and manipulating multiple loops—a skill she later applied to cables and lacework.
Checklist: Mastering the Puff Stitch Successfully
- ☑ Choose worsted-weight yarn and smooth needles
- ☑ Cast on in multiples of 4 + 2 for edge stability
- ☑ Practice the \"knit 5 in one, then knit together\" motion slowly
- ☑ Maintain even yarn tension throughout each puff formation
- ☑ Work a purl row after each puff row to balance the fabric
- ☑ Block your finished swatch to open up the texture
- ☑ Compare puffs across rows for consistency
Frequently Asked Questions
Can I use the puff stitch in the round?
Yes, but you must adapt the return row. Instead of purling on the wrong side, work a plain knit row between puff rounds. This keeps the texture visible on the outer layer. Be mindful of spiraling—use a marker to track the beginning of each round.
Is the puff stitch suitable for garments like sweaters?
It can be, but sparingly. Full yokes or sleeve cuffs benefit from the added warmth and visual appeal. Avoid large panels of puff stitch in fitted garments, as the extra bulk may restrict movement or distort shaping.
How do I clean a puff stitch project?
Hand wash in cool water with mild detergent. Gently press out excess moisture—never wring. Lay flat to dry on a towel, reshaping the puffs lightly with your fingers while damp to preserve definition.
Expanding Your Textured Knitting Skills
Once comfortable with the puff stitch, experiment with variations. Try spacing puffs further apart (every 6 stitches) for a scattered effect, or cluster them densely for a quilted look. Combine with cable crosses or bobbles for advanced dimensionality. Some knitters alternate puff rows with ribbing to create stretchable borders on hats or mittens.
You can also reverse the puff by working it from the wrong side, creating inward dimples instead of outward bumps. This requires careful tracking of right and wrong sides but opens creative possibilities for reversible fabrics.
Final Thoughts and Next Steps
Learning the puff stitch is more than just adding another technique to your repertoire—it’s about developing control, rhythm, and an eye for detail. What begins as a challenge soon becomes intuitive, unlocking doors to more complex designs. The tactile satisfaction of running your fingers over a field of neat, springy puffs is unmatched in knitting.
Start small. Make a coaster, a bookmark, or a square for a future blanket. Share your progress with a knitting group or online community. Tag your posts with #PuffStitchBeginner—you might inspire someone else to pick up their needles for the first time.


 浙公网安备
33010002000092号
浙公网安备
33010002000092号 浙B2-20120091-4
Comments
No comments yet. Why don't you start the discussion?