
Slime has evolved from a simple childhood novelty into a sensory craft enjoyed by kids and adults alike. While the basics of slime—glue, activator, and additives—are well known, one tool is quietly revolutionizing the game: the air pump. When used correctly, an air pump transforms ordinary slime into a light, fluffy, cloud-like substance that stretches, squishes, and bounces in ways traditional slime cannot. Yet, many makers struggle to harness its full potential. This guide breaks down exactly how to use a slime air pump effectively, avoid common mistakes, and consistently create high-quality, airy slime.
The Science Behind Air-Pumped Slime
Air-pumped slime, often called “cloud slime” or “fluffy slime,” relies on mechanical aeration to incorporate thousands of tiny air bubbles into the polymer structure. As the air pump runs, it whips air into the mixture, expanding volume and altering texture. The result is a soft, pillowy slime that feels almost weightless in hand.
The key to success lies in understanding the interaction between ingredients and aeration. Standard slime formulas using PVA glue and borax or saline solution form long polymer chains. When air is introduced during mixing, these chains trap bubbles, creating a foam-like matrix. Without proper technique, however, the slime can collapse, become sticky, or fail to hold volume.
“Air incorporation isn’t just about volume—it changes the rheology of slime entirely. Properly aerated slime has better elasticity and recovery.” — Dr. Lena Torres, Materials Scientist & DIY Polymer Educator
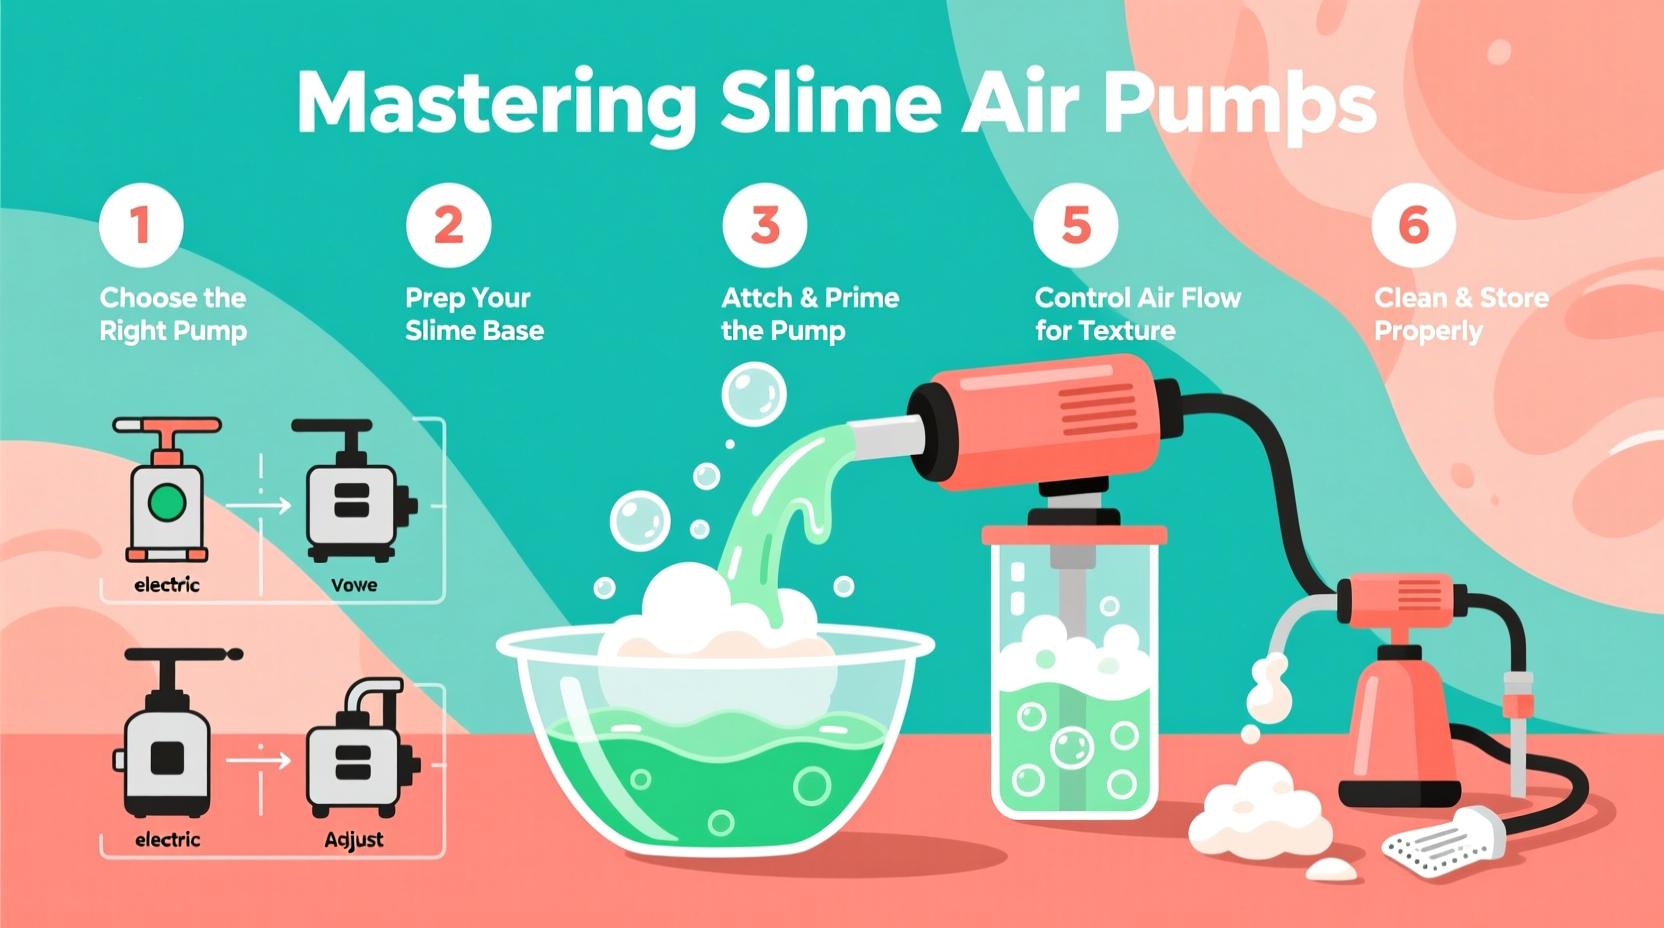
Choosing the Right Air Pump and Accessories
Not all air pumps are suitable for slime. Most aquarium air pumps work well due to their consistent airflow and durability, but size and output matter. A small 2–4 watt pump is ideal for home use. Larger pumps may over-aerate or splatter the mixture.
| Pump Type | Best For | Avoid If |
|---|---|---|
| Aquarium Air Pump (2–4W) | Beginners and consistent results | You need ultra-light texture (may require longer pumping) |
| Adjustable Flow Pump | Advanced users seeking control | Budget is limited (higher cost) |
| Handheld Electric Whisk | No access to air pumps | Seeking authentic bubbly texture (less uniform aeration) |
| Compressed Air Canister | Quick fluffing of existing slime | Large batches (expensive and inconsistent) |
Pair your pump with a diffuser stone or porous tip to break airflow into fine bubbles. This prevents large pockets of air and ensures even distribution throughout the slime.
Step-by-Step Guide to Using a Slime Air Pump
Follow this sequence for reliable, fluffy results every time. This method works best with white school glue and liquid starch or contact solution as the activator.
- Prepare your base slime: Mix 1 cup of white PVA glue with 1/4 cup of water. Stir until smooth. Add 1/2 tsp of baking soda and 1 tbsp of lotion for softness.
- Add color and fragrance (optional): Incorporate liquid dye or mica powder and 5–10 drops of essential oil if desired. Mix thoroughly.
- Begin slow activation: Add 2 tbsp of liquid starch or contact solution. Stir with a spatula until the mixture starts to pull away from the bowl.
- Transfer to deep container: Move slime to a tall, narrow cup or jar—this helps contain splatter and improves air flow efficiency.
- Insert air pump tubing: Place the diffuser end into the center of the slime mass. Ensure it’s submerged but not touching the bottom directly.
- Run the pump for 3–7 minutes: Start with shorter durations (3 min) for softer fluff; extend to 7+ minutes for ultra-light, marshmallow-like texture.
- Pause and fold: Every 2 minutes, stop the pump and fold the slime over itself to redistribute unwhipped portions.
- Final knead: Remove slime and knead by hand for 2–3 minutes. Add a pinch of cornstarch if sticky, or a drop of lotion if dry.
The transformation is dramatic: what begins as a dense, stretchy blob becomes a voluminous, spongy delight that slowly collapses back under pressure—a hallmark of well-aerated slime.
Common Mistakes and How to Fix Them
- Over-activation: Adding too much activator before pumping causes premature cross-linking, limiting expansion. Solution: Use only enough activator to cohere the slime initially; reserve more for post-pump adjustments.
- Under-aeration: Weak or short pumping yields minimal volume. Solution: Use a stronger pump or extend runtime in 2-minute intervals.
- Collapsed slime: If slime deflates quickly, it likely lacks structural integrity. Solution: Add a small amount of fresh glue (1 tsp), remix, and re-pump for 2–3 minutes.
- Splattering: Caused by shallow containers or excessive airflow. Solution: Use a narrow vessel and reduce pump intensity if adjustable.
Mini Case Study: From Sticky Mess to Salon-Quality Fluff
Jamie, a hobbyist slime maker from Portland, struggled for weeks to achieve fluffy texture. Her early attempts resulted in dense, sticky batches that lost volume within minutes. After switching from a handheld whisk to a 3-watt aquarium pump with a diffuser stone and adjusting her activator ratio, she followed the folding technique during pumping. Within one batch, her slime tripled in volume and held its shape for over 48 hours. She now sells custom aerated slimes at local craft fairs, citing controlled aeration as her signature edge.
Pro Tips for Advanced Results
- For glitter slimes, add fine holographic glitter after pumping to preserve sparkle dispersion.
- Use opaque containers to monitor aeration progress—the contrast makes it easier to see bubble development.
- Layer different colored slimes and pump them together for marbled, gradient effects.
- Store aerated slime in an airtight container with minimal headspace to slow deflation.
Frequently Asked Questions
Can I use a balloon pump or manual inflator?
No. These tools introduce large bursts of air rather than continuous micro-bubbles, leading to uneven texture and rapid collapse. Electric air pumps with diffusers are necessary for consistent results.
How long does air-pumped slime last?
Typically 1–2 weeks when stored properly. Over time, air escapes and the slime densifies. To revive, knead with a bit of lotion and re-pump for 1–2 minutes.
Is it safe to use aquarium pumps for slime?
Yes, as long as the pump and tubing are cleaned thoroughly and used exclusively for slime. Avoid sharing equipment with actual aquariums to prevent chemical contamination.
Checklist: Master Your Next Air-Pumped Slime Batch
- ☐ Choose a 2–4W air pump with adjustable flow (if possible)
- ☐ Attach a clean diffuser stone to the tubing
- ☐ Prepare slime base with glue, water, baking soda, and lotion
- ☐ Add color and scent before activation
- ☐ Use minimal activator to start—just enough to form a cohesive mass
- ☐ Transfer to a narrow, deep container
- ☐ Submerge diffuser and run pump in 2-minute intervals
- ☐ Fold slime between cycles for even aeration
- ☐ Knead post-pump and adjust texture with lotion or starch
- ☐ Store in an airtight container away from heat and sunlight
Conclusion
Mastering the slime air pump opens up a new dimension in sensory crafting. It’s not just about making slime fluffier—it’s about precision, timing, and understanding how simple tools can transform everyday materials. With the right setup and technique, anyone can produce professional-grade, cloud-like slime that delights the senses and stands out in the crafting community.


 浙公网安备
33010002000092号
浙公网安备
33010002000092号 浙B2-20120091-4
Comments
No comments yet. Why don't you start the discussion?