
For many new guitarists, the G major chord is one of the first real challenges. It looks simple on paper, but getting all six strings to ring clearly without muting or buzzing can feel frustrating. Yet, mastering the G chord is essential—it appears in countless songs across genres, from pop and rock to country and folk. With the right approach, consistent practice, and attention to detail, any beginner can learn to play it cleanly and confidently.
Why the G Chord Is Harder Than It Looks
The G major chord uses three fingers across five or six strings, often requiring a stretch that beginners aren’t used to. Unlike simpler chords like C or E minor, the fingering for G involves positioning your middle, ring, and pinky fingers in a way that demands both dexterity and precision. The most common issues include:
- Muted high E string due to incorrect finger placement
- Buzzing on the low E string from insufficient finger pressure
- Fatigue from over-tensing the hand
- Difficulty transitioning to or from other chords
Understanding these obstacles is the first step toward overcoming them. The key isn’t just repetition—it’s mindful, structured practice.
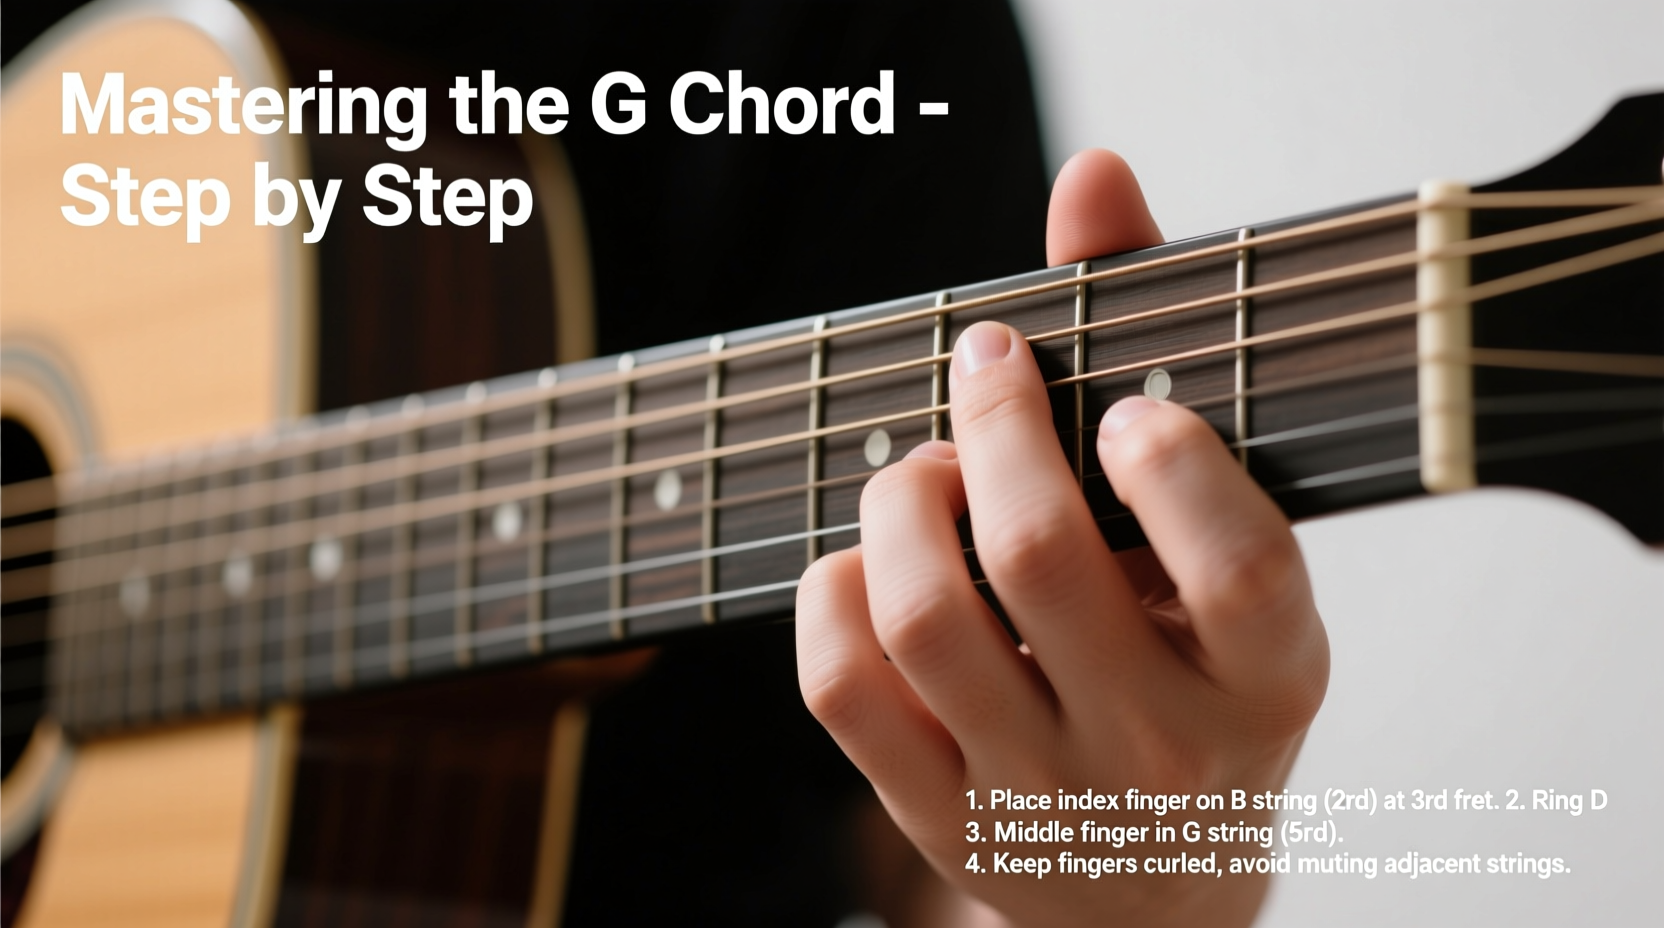
Step-by-Step Guide to Forming a Clean G Chord
- Position Your Fingers Correctly
Place your ring finger (third finger) on the third fret of the low E string (6th string). This note is G. - Add Your Middle Finger
Put your middle finger on the second fret of the A string (5th string). This note is B. - Place Your Pinky Finger
Rest your pinky (fourth finger) on the third fret of the high E string (1st string). This completes the triad with another G note. - Check String Engagement
Strum all six strings slowly. Listen for any dead or buzzing notes. Adjust finger placement as needed. - Aim for Clean Tone
Press down firmly but not excessively. Use the tips of your fingers, not the pads, to avoid touching adjacent strings.
Common Mistakes and How to Fix Them
| Issue | Cause | Solution |
|---|---|---|
| Buzzing on the low E string | Finger not close enough to the fret | Move ring finger closer to the third fret wire |
| Muted high E string | Pinky touching adjacent string or pressing flat | Use fingertip and arch the finger more |
| A string not sounding | Middle finger muting the D string | Lift middle finger slightly to clear the D string |
| Hand cramps | Over-gripping or poor wrist angle | Relax thumb position; keep wrist straight, not bent inward |
Many beginners press too hard, thinking more pressure equals better sound. In reality, efficient technique relies on precise placement, not brute force. Over time, calluses will form, making sustained pressure easier.
Practice Drills for Strength and Accuracy
Building muscle memory and finger strength takes targeted exercises. Try these daily drills for faster progress:
- Five-Second Hold: Press the G chord and hold for five seconds. Release. Repeat 10 times. Focus on clean tone each time.
- Slow Strumming Check: Strum each string individually. Identify which ones aren’t ringing out and adjust accordingly.
- Chord Transitions: Practice switching between G and C, then G and D. These are common progressions (e.g., G–C–D–G).
- Finger Lifts: While holding the chord, lift and replace each finger one at a time without disturbing the others. This improves control.
“Most students give up on the G chord because they expect instant results. But clarity comes from consistency, not luck.” — Daniel Reyes, Guitar Instructor with 15+ years of teaching experience
Real Example: From Frustration to Fluency
Meet Jamie, a self-taught guitarist who started learning online during lockdown. For weeks, her G chord sounded muddy, especially when changing from C. She avoided songs that used it, limiting her repertoire. After focusing on isolated finger placement and slow transitions for just 10 minutes a day, she noticed improvement within two weeks. By recording herself weekly, she tracked her progress and stayed motivated. Today, she plays full songs like “Knockin’ on Heaven’s Door” and “Horse with No Name” with clean changes between G, C, and D.
Jamie’s breakthrough came not from playing more, but from practicing smarter—targeting the root causes of her muffled notes and building confidence through small wins.
Essential Tips for Long-Term Success
- Keep your nails short—long nails make fingertip placement difficult.
- Angle your wrist slightly outward to allow fingers to land vertically on the fretboard.
- Use a metronome when practicing transitions to build rhythmic accuracy.
- Don’t rush. Even 5 focused minutes per day are more effective than an hour of distracted strumming.
FAQ: Common Questions About the G Chord
Can I play the G chord without using my pinky?
Yes, some simplified versions use only two or three fingers. However, skipping the high E string (3rd fret) weakens the chord’s full sound. Learning the standard version early ensures you’re prepared for more advanced playing later.
Why does my hand hurt when I play G?
Some discomfort is normal at first. Pain usually comes from tension. Relax your shoulder, forearm, and grip. Take breaks every few minutes. As your hand adapts, the strain will decrease.
How long should it take to master the G chord?
With regular practice, most beginners achieve a clean G chord within 2–4 weeks. Mastery—meaning seamless transitions and consistent clarity—can take 6–8 weeks. Everyone progresses at their own pace.
Final Checklist: Are You Ready to Move Forward?
- Can you place all three fingers accurately without looking?
- Does each string ring clearly when strummed individually?
- Can you switch from G to C and back smoothly within four beats?
- Have you practiced with a relaxed hand and proper wrist alignment?
- Are you tracking progress, even in small improvements?
Conclusion: Play With Confidence
Mastering the G chord isn’t about perfection on the first try—it’s about persistence, awareness, and smart practice. Every guitarist, from bedroom beginners to stage performers, once struggled with this same chord. What separates those who succeed is not talent, but the willingness to slow down, troubleshoot, and keep going.
Now that you understand the mechanics, common pitfalls, and proven strategies, it’s time to pick up your guitar and apply them. Commit to ten focused minutes a day, and within a month, you’ll wonder why it ever felt difficult.


 浙公网安备
33010002000092号
浙公网安备
33010002000092号 浙B2-20120091-4
Comments
No comments yet. Why don't you start the discussion?