
Time lapse photography transforms the slow passage of time into dynamic visual stories. From clouds racing across mountain peaks to cityscapes awakening at dawn, this technique reveals motion invisible to the naked eye. While the concept is simple—capturing still images at intervals and compiling them into video—the execution demands precision, planning, and an understanding of both technical and creative elements.
Whether you're using a DSLR, mirrorless camera, or even a smartphone, mastering time lapse requires more than just pressing record. It involves choosing the right settings, stabilizing your gear, managing exposure shifts, and post-processing with intention. This guide walks through every phase of creating compelling time lapses, from pre-shoot preparation to final export.
Understanding the Core Principles
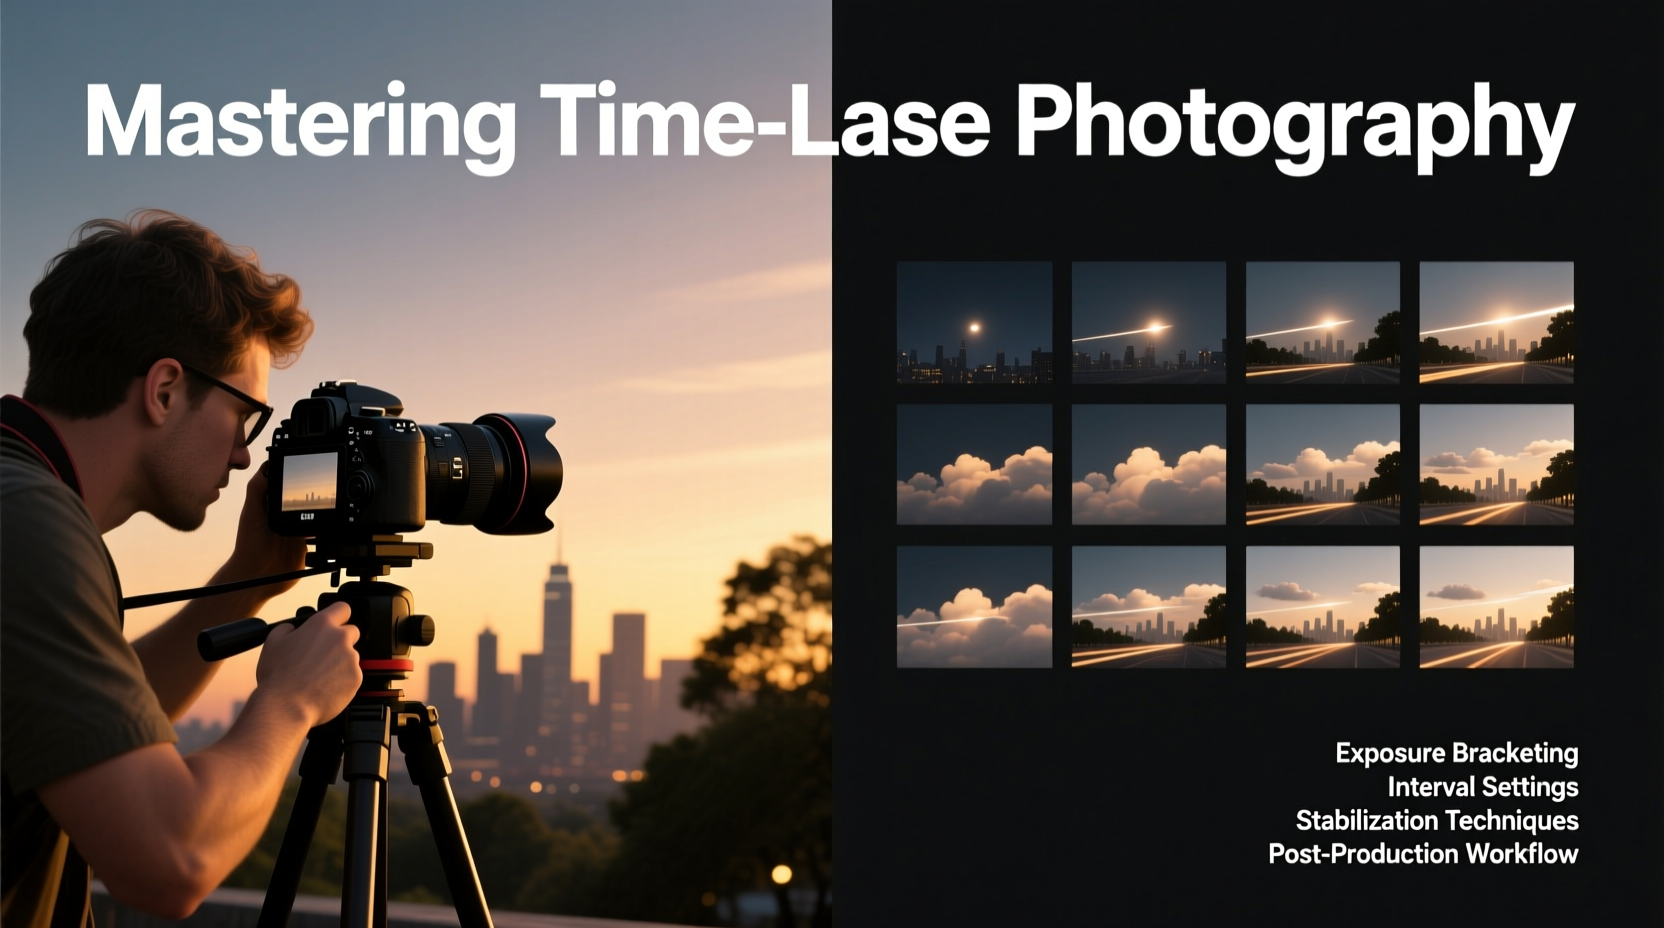
At its foundation, time lapse photography compresses time by capturing frames at set intervals. When played back at standard frame rates (usually 24 or 30 fps), these sequences reveal accelerated movement. The key variables are interval duration, total shooting time, and desired playback length.
For example, to create a 10-second clip at 24 fps, you need 240 individual frames. If your subject changes slowly—like a flower blooming—you might shoot one frame every 5–10 minutes. For faster scenes like traffic flow, intervals of 1–2 seconds work better.
Consistency in exposure is critical. Automatic settings can cause flickering due to minor metering differences between shots. Always use manual mode to lock ISO, aperture, and shutter speed. If lighting changes dramatically (e.g., sunset to night), consider exposure ramping—a gradual adjustment of shutter speed over time.
Essential Gear and Setup
The right equipment ensures reliability and image quality throughout long shoots. While basic setups exist, investing in key components significantly improves results.
| Gear | Recommended Options | Purpose |
|---|---|---|
| Camera | DSLR or mirrorless with intervalometer | High resolution, manual control, RAW support |
| Lens | Wide-angle prime or zoom (e.g., 16–35mm) | Captures expansive scenes with sharp detail |
| Intervalometer | Built-in or external remote trigger | Automates shot timing; prevents camera shake |
| Sturdy Tripod | Aluminum or carbon fiber with ball head | Eliminates movement during extended sessions |
| Batteries & Memory | Dual batteries, high-capacity UHS-II SD cards | Prevents mid-shoot power or storage failure |
Smartphones can produce decent time lapses using built-in apps, but they lack manual control and risk overheating. For serious work, dedicated cameras remain superior.
“Time lapse isn’t about how many frames you take—it’s about consistency. One shaky shot ruins the rhythm.” — Daniel Reyes, Cinematic Photographer
Step-by-Step Guide to Shooting Your First Time Lapse
Follow this structured workflow to ensure success from setup to completion.
- Scout the Location: Visit ahead of time to assess lighting, safety, and potential obstructions. Note sunrise/sunset times if applicable.
- Frame Your Composition: Apply rule of thirds, leading lines, or symmetry. Leave space for moving elements like clouds or vehicles.
- Set Camera to Manual Mode: Lock focus (preferably manual), white balance, ISO, aperture, and shutter speed. Avoid autofocus mid-sequence.
- Determine Interval and Duration: Use a time lapse calculator or app to estimate based on subject speed and desired output.
- Enable Intervalometer: Input delay, number of shots, and start time. Double-check battery and card capacity.
- Start the Sequence: Begin shooting and step away. Do not touch the tripod or camera until finished.
- Monitor Conditions: Watch for weather changes, shadows, or unexpected movement that could compromise the shot.
Avoiding Common Pitfalls
Even experienced photographers encounter issues. Recognizing and preventing these mistakes elevates your results.
- Flickering footage: Caused by inconsistent exposure or auto-white balance. Always shoot in manual mode and disable auto-ISO.
- Insufficient storage: A 4K sequence over several hours may require hundreds of gigabytes. Format cards before each shoot and bring spares.
- Focus drift: Autofocus systems may adjust slightly between shots. Switch to manual focus after initial setup.
- Camera shake: Wind or accidental bumps ruin stability. Use a weighted tripod or sandbags in exposed areas.
- Overheating: Long exposures or hot environments can overheat sensors. Allow cooling breaks or use external fans in controlled settings.
Post-Processing Workflow
Raw files offer maximum flexibility in editing. Import sequences into software like Adobe Lightroom, LRTimelapse, or DaVinci Resolve for batch adjustments.
Begin by syncing exposure, contrast, and color temperature across all images. Use timelapse-specific tools to smooth transitions and reduce flicker. Export as an image sequence (e.g., TIFF or JPEG), then import into video editing software to compile at your target frame rate.
Color grading enhances mood—warm tones for sunsets, cooler palettes for urban nights. Add subtle music or ambient sound to deepen immersion, but avoid overpowering audio.
“The best time lapses don’t just show change—they evoke emotion. It’s not just clouds moving; it’s the sky breathing.” — Lena Torres, Visual Storyteller
Real-World Example: Capturing a Sunset-to-Stars Transition
Photographer Mark Chen planned a 5-hour sequence atop Utah’s Delicate Arch. He used a full-frame mirrorless camera with a 20mm f/1.8 lens, mounted securely on a carbon fiber tripod. His goal was to capture daylight fading into twilight and finally star trails emerging.
To handle the extreme light shift, he employed exposure ramping via an external intervalometer, gradually increasing shutter speed from 1/125s to 30s. He shot in RAW at 2-second intervals, totaling over 9,000 frames. Back home, he processed the sequence using LRTimelapse to smooth exposure gradients and remove noise in darker frames.
The result was a seamless 30-second video showing the arch glowing under golden hour, transitioning to deep blue skies, and culminating in rotating star trails above the formation. The piece went viral on Vimeo and was featured in a national park documentary series.
Checklist: Pre-Shoot Preparation
- ✅ Scout location and check weather forecast
- ✅ Charge multiple batteries and format memory cards
- ✅ Mount camera securely on tripod with level base
- ✅ Set camera to manual mode (ISO, aperture, shutter)
- ✅ Manually focus and disable autofocus
- ✅ Configure intervalometer with correct interval and shot count
- ✅ Enable grid overlay for composition alignment
- ✅ Attach lens hood and protective cover if needed
FAQ
How long should my time lapse be?
Most viewers prefer clips between 10–30 seconds. Longer sequences work in documentaries or installations, but keep online content concise for engagement.
Can I do time lapse without an intervalometer?
Some cameras have built-in intervalometers. If not, smartphone apps or USB remote triggers can automate shooting. Never rely on continuous burst mode—it drains battery and risks overheating.
What frame rate should I use?
24 fps gives a cinematic feel; 30 fps feels smoother and more natural. Choose based on your project’s tone. Once rendered, changing frame rate affects pacing, so decide early.
Conclusion: Start Creating, Keep Experimenting
Time lapse photography rewards patience and precision. Each sequence tells a story only visible through deliberate observation. With the right gear, technique, and attention to detail, you can turn ordinary moments into extraordinary visuals.
Don’t wait for perfect conditions—start small. Capture your coffee cooling, curtains fluttering in the breeze, or shadows shifting across your wall. Every frame builds experience. As you refine your process, your ability to anticipate light, motion, and transformation will grow.


 浙公网安备
33010002000092号
浙公网安备
33010002000092号 浙B2-20120091-4
Comments
No comments yet. Why don't you start the discussion?