
Cutting out unwanted sections from a video is one of the most fundamental skills in video editing. Whether you're trimming a shaky clip, removing awkward pauses, or eliminating irrelevant content, knowing how to make clean cuts efficiently can dramatically improve your final product. With the right tools and techniques, even beginners can achieve professional-looking results without spending hours learning complex software.
This guide walks through the entire process—from choosing the right editor to exporting your polished video—while offering practical tips and real-world insights that apply whether you're working on social media clips, vlogs, or corporate presentations.
Selecting the Right Video Editing Software
The first step in mastering video cuts is choosing an editor that matches your skill level and project needs. While advanced editors offer precision and flexibility, simpler tools can get the job done faster for basic edits.
| Software | Skill Level | Best For | Cost |
|---|---|---|---|
| DaVinci Resolve | Intermediate to Advanced | Precise cuts, color grading, audio sync | Free (Studio version paid) |
| Adobe Premiere Pro | Advanced | Professional workflows, multi-track editing | Subscription-based |
| Shotcut | Beginner to Intermediate | Open-source, cross-platform editing | Free |
| iMovie | Beginner | Quick trims, Mac/iOS users | Free |
| CapCut | Beginner | Social media content, mobile & desktop | Free with optional premium features |
For most beginners, CapCut or iMovie provides an intuitive interface with drag-and-drop functionality, making it easy to remove sections without a steep learning curve. More experienced editors might prefer DaVinci Resolve for its timeline precision and non-destructive editing capabilities.
Step-by-Step Guide to Cutting Out Sections
Regardless of the software you choose, the core workflow for removing parts of a video remains consistent. Follow these steps to cleanly eliminate any segment:
- Import Your Video: Open your editor and import the video file into the media library or directly onto the timeline.
- Locate the Section to Remove: Play through the video and identify the start and end points of the part you want to delete.
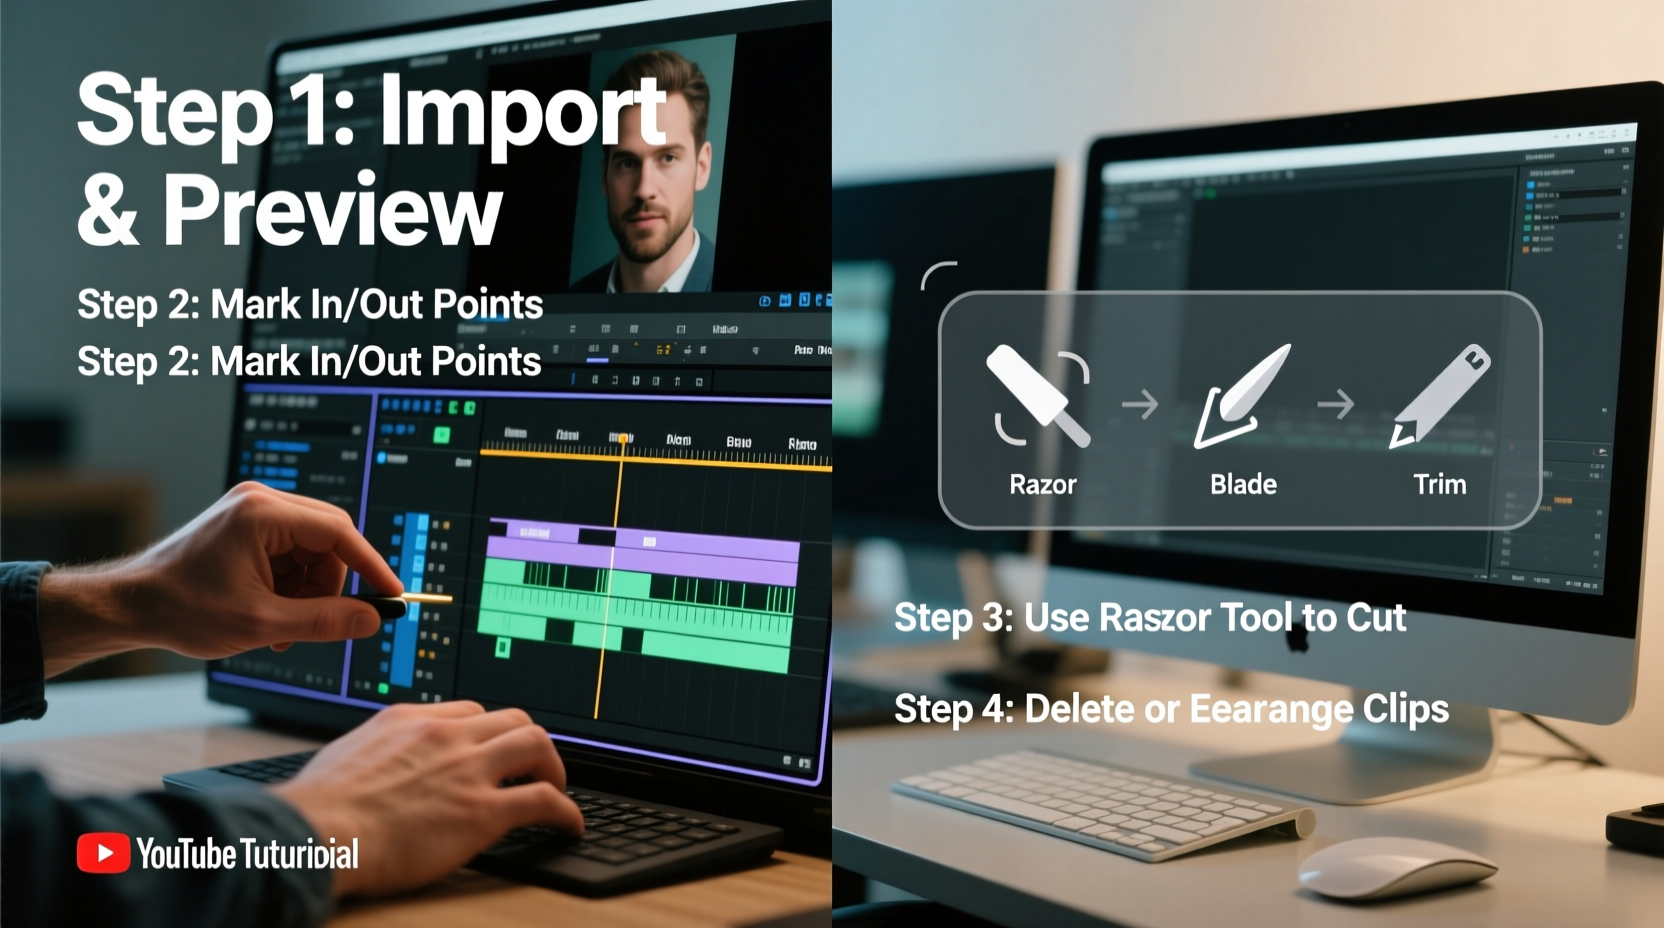
- Split the Clip: Use the \"split\" or \"razor\" tool (often represented by a blade icon) to cut the video at the beginning and end of the unwanted section.
- Select the Middle Segment: Click on the portion between the two cuts—the section you wish to remove.
- Delete the Segment: Press the Delete key or use the context menu to remove it. The remaining clips will typically snap together automatically.
- Preview the Edit: Play back the transition to ensure there are no jarring jumps or audio sync issues.
- Export the Final Video: Choose export settings appropriate for your platform (e.g., 1080p for YouTube, square format for Instagram).
This method works across nearly all modern video editors. Some apps like CapCut and iMovie even allow you to long-press and drag to highlight a section for instant deletion—ideal for quick mobile edits.
Avoiding Common Editing Mistakes
Even simple cuts can go wrong if not handled carefully. Here are frequent pitfalls and how to avoid them:
- Making abrupt transitions: Removing a section may leave a sudden jump between scenes. Consider adding a crossfade or short black frame to smooth the change.
- Ignoring audio continuity: If background music or voiceover spans the deleted section, cutting the video may break the audio flow. Either adjust the audio track separately or mute problematic segments.
- Over-cutting: Removing too many small parts can disrupt narrative flow. Ask yourself: Does this pause add personality or breathing room? Sometimes silence enhances authenticity.
- Editing in low resolution: Zoom in on the timeline to see frames clearly. Many editors let you expand the timeline view for frame-by-frame accuracy.
“Clean cuts aren’t just about removal—they’re about maintaining rhythm and intent. A well-placed pause can be as powerful as action.” — Jordan Lee, Video Storytelling Coach
Real Example: Cleaning Up a Vlog Interview
Consider a scenario where Maya records a 15-minute interview for her travel vlog. After reviewing the footage, she notices several off-topic tangents, a phone interruption, and a long gap while changing camera batteries.
Using DaVinci Resolve, she imports the clip and zooms into the timeline. She splits the video at the start of each unwanted section: the tangent begins at 04:32, the phone rings at 07:15, and the battery change occurs from 10:40 to 11:50. After isolating and deleting these three segments, she listens to the audio to confirm the host’s voice flows naturally. One cut creates a slight echo from ambient sound, so she adds a 0.5-second crossfade between clips. Finally, she exports the trimmed version at 1080p, reducing the runtime to 11 minutes with tighter pacing and improved viewer engagement.
Essential Checklist for Clean Video Cuts
Before finalizing your edit, run through this checklist to ensure quality and consistency:
- ✅ Backed up the original video file
- ✅ Identified exact in and out points for deletion
- ✅ Used split tools to isolate the target section
- ✅ Removed only the intended portion
- ✅ Checked audio sync and background sound continuity
- ✅ Previewed the edit at normal speed and in slow motion
- ✅ Applied transitions if needed for smoother flow
- ✅ Exported in the correct resolution and format for the target platform
Frequently Asked Questions
Can I undo a cut if I make a mistake?
Yes, almost all video editors support undo (Ctrl+Z or Cmd+Z). However, the ability to recover lost data diminishes after multiple actions or closing the project. Always save incremental versions of your work.
Is it possible to cut a video without losing quality?
When using non-destructive editors like Premiere Pro or DaVinci Resolve, the original video data isn’t altered—only the playback range changes. Even when exporting, choosing high-bitrate settings preserves visual fidelity. Avoid repeatedly re-encoding the same file, as this degrades quality over time.
How do I cut out a section on my smartphone?
Mobile apps like CapCut, InShot, or Apple’s iMovie let you tap and drag to select a segment, then tap “Delete” to remove it. Most offer snapping to movement detection or speech breaks, helping you find natural cut points quickly.
Final Thoughts and Next Steps
Cutting out sections of a video doesn’t require advanced training—just attention to detail and the right approach. By mastering this foundational skill, you gain greater control over pacing, clarity, and storytelling. Whether you're editing a home movie or producing content for clients, clean, intentional cuts elevate your work from amateur to polished.
Start small: take a recent video, identify one section that slows it down, and remove it using the steps outlined here. Experiment with different tools, compare results, and refine your technique. Over time, you’ll develop an instinct for timing and flow that makes editing feel effortless.


 浙公网安备
33010002000092号
浙公网安备
33010002000092号 浙B2-20120091-4
Comments
No comments yet. Why don't you start the discussion?