
Changing a watch strap is more than a simple accessory swap—it’s an opportunity to personalize your timepiece, improve comfort, and extend its lifespan. Whether you’ve just purchased a new band or are restoring a vintage model, proper installation ensures the watch sits securely on your wrist and maintains its structural integrity. Many people avoid DIY strap changes out of fear of damaging their watch, but with the right tools and method, it's a straightforward process. This guide walks you through each stage with precision, offering expert insights and practical advice to achieve a flawless result.
Understanding Watch Strap Types and Compatibility
Before attempting installation, confirm that your new strap is compatible with your watch. The key factor is the lug width—the distance between the lugs where the strap attaches—measured in millimeters. Common widths range from 14mm to 24mm, and mismatched sizes will either gap or strain the case.
Different strap materials come with distinct attachment mechanisms:
- Leather & NATO Straps: Typically use spring bars and standard lug attachments.
- Stainless Steel Bracelets: Often feature micro-adjustment links and screw-in spring bars.
- Rubber & Silicone Bands: Use quick-release pins or spring bars, depending on brand.
- Mesh (Milanese) Bands: Require special sizing tools and magnetic or folding clasps.
Always verify compatibility with your watch model. Luxury brands like Rolex, Omega, and Grand Seiko may use proprietary systems requiring specific tools or pins.
Essential Tools for Safe Installation
Attempting strap replacement without the correct tools risks scratching the case or bending spring bars. Here’s what you’ll need:
| Tool | Purpose | Recommended For |
|---|---|---|
| Spring Bar Removal Tool | Depresses spring bars for safe removal | All strap types with spring bars |
| Lug Press or Nylon Strap Puller | Removes straps without leverage damage | Delicate watches or glued straps |
| Micro Screwdriver Set | Adjusts screw-type bracelets | Metal bands with link removal screws |
| Jeweler’s Loupe | Inspect alignment and pin seating | Precision work on small components |
| Soft Cloth Mat | Protects watch during handling | All installations |
Investing in a quality tool kit pays off in longevity and confidence. Avoid using knives, pliers, or flathead screwdrivers—they increase the risk of irreversible scratches.
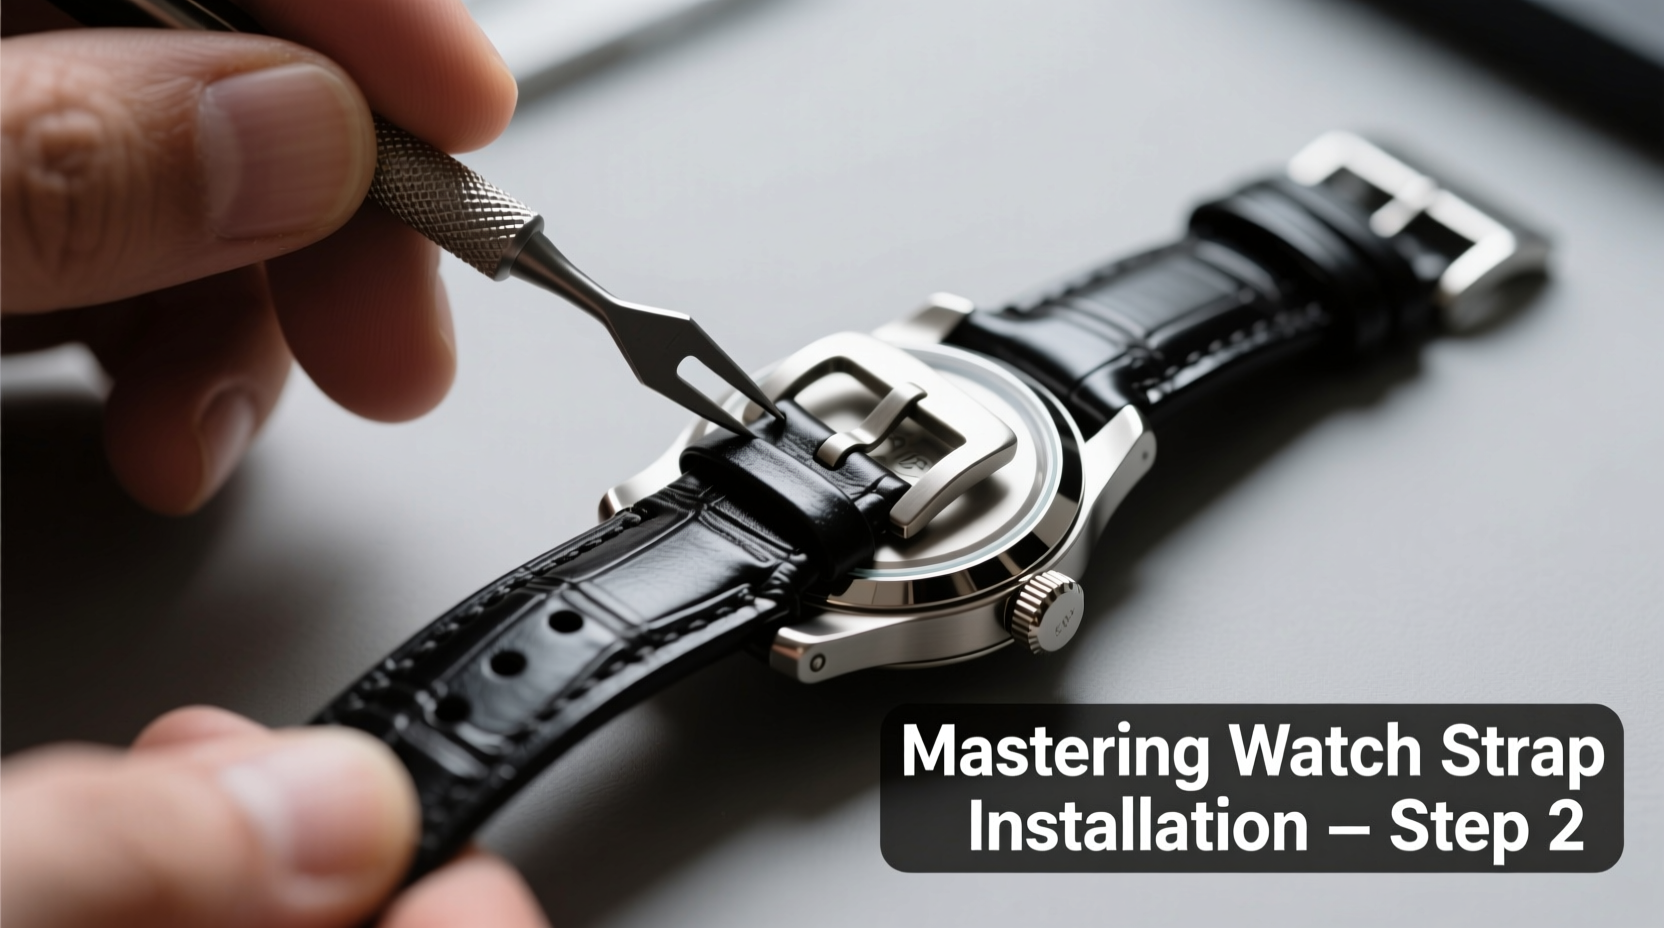
Step-by-Step Guide to Removing and Installing a Watch Strap
Follow this sequence carefully to ensure a secure, scratch-free installation.
- Prepare Your Workspace: Choose a clean, well-lit surface. Lay down a soft cloth to protect the watch face and case.
- Position the Watch: Place the watch upside down so the back faces up and the crown is away from you.
- Locate the Spring Bars: Identify the thin metal rods running through the lugs. These hold the strap in place.
- Engage the Removal Tool: Insert both ends of the spring bar tool into the gap between the lug and the strap pin. Apply gentle inward pressure until the pin compresses.
- Slide Out the Old Strap: While holding the pin compressed, slide the strap sideways off the pin. Repeat on the other side.
- Inspect the Lugs and Pins: Check for wear, debris, or bent pins. Replace damaged spring bars before reinstallation.
- Align the New Strap: Position one end of the new strap under the lug, aligning the hole with the spring bar channel.
- Insert One Side of the Spring Bar: Partially insert one end of the spring bar into the lug, keeping the other end free.
- Compress and Seat the Other End: Compress the exposed end of the spring bar and slide it into the opposite lug. You should feel a slight snap as it locks into place.
- Test the Fit: Gently tug on the strap to ensure it doesn’t detach. The connection should be firm but allow smooth movement.
Special Considerations for Metal Bracelets
Bracelets often require resizing before installation. Most use removable links secured by screws or push pins.
To resize:
- Count how many links need removal based on your wrist size.
- Use a pin press or fine punch to gently drive out the pins. Note the direction—some pins are directional.
- Reassemble the bracelet with remaining links and secure with screws if applicable.
- Ensure the clasp functions smoothly after reassembly.
“Precision in strap installation preserves both aesthetics and water resistance. A misaligned spring bar can compromise gasket seals over time.” — Daniel Reeves, Master Watchmaker, Geneva Institute of Horology
Avoiding Common Mistakes
Even experienced users make errors that affect durability and safety. Here’s what to avoid:
| Do | Don’t |
|---|---|
| Double-check lug width before purchase | Force a strap that doesn’t align easily |
| Use dedicated tools designed for watches | Use household tools like scissors or keys |
| Install straps on a soft surface | Work over hard or cluttered surfaces |
| Replace worn spring bars regularly | Reuse bent or fatigued pins |
| Verify clasp operation post-installation | Assume everything works after assembly |
One frequent oversight is neglecting the orientation of asymmetric straps. NATO and certain leather bands have designated top/bottom sides affecting how they sit and fasten. Always consult the manufacturer’s instructions.
Mini Case Study: Restoring a Vintage Dive Watch
James, a collector in Portland, acquired a 1970s Seiko 6309 diver with a cracked rubber strap. He wanted to restore it authentically while ensuring daily wear safety. After measuring the 18mm lug width, he sourced a period-correct rubber strap with trapezoidal lugs and fixed spring bars.
Using a nylon loop puller to avoid lever marks on the vintage case, he removed the old strap. Upon inspection, he found one spring bar corroded and replaced it with a stainless steel version. During reinstallation, he discovered the new strap’s spring bar holes were slightly tighter. By lightly lubricating the pins with silicone grease, he achieved a smooth fit without forcing the components.
The result was a secure, historically accurate restoration that felt balanced on the wrist—proving that attention to detail enhances both function and heritage value.
FAQ: Frequently Asked Questions
Can I install a watch strap without tools?
It’s not recommended. While some modern watches use quick-release systems, traditional spring bars require compression tools to avoid damaging the lugs or injuring your fingers. Attempting it bare-handed risks losing control and scratching the case.
How often should I replace spring bars?
Every 1–2 years with regular strap changes. Spring bars lose tension over time, increasing the risk of accidental detachment. Stainless steel versions last longer than nickel-plated ones, especially in humid environments.
Why does my new strap feel loose even after installation?
This may indicate undersized spring bars or incorrect lug width. Double-check measurements. Some aftermarket straps cut slightly narrow to fit multiple models, leading to lateral play. Opt for straps labeled “exact fit” or made by reputable brands.
Conclusion: Take Control of Your Timepiece’s Comfort and Style
Mastering watch strap installation empowers you to adapt your timepiece to any occasion—be it a formal event, outdoor adventure, or casual weekend. With the right tools, a methodical approach, and respect for mechanical precision, you can maintain your watch’s integrity while expressing personal style. Don’t let fear of complexity hold you back; each successful installation builds confidence and deepens your appreciation for horological craftsmanship.


 浙公网安备
33010002000092号
浙公网安备
33010002000092号 浙B2-20120091-4
Comments
No comments yet. Why don't you start the discussion?