
When you're on the road or parked at a scenic campground, a malfunctioning RV air conditioner can turn comfort into frustration—especially during summer heat. If your RV AC is running but not cooling, it doesn’t always mean a costly repair or replacement is needed. Many cooling issues stem from simple, fixable problems that you can diagnose and resolve yourself with basic tools and knowledge. Understanding the most common causes and their solutions helps you get back to enjoying a cool, comfortable interior without delay.
Understanding How Your RV Air Conditioner Works
Road vehicle air conditioners operate on principles similar to home units but are designed for compact spaces and mobile environments. Most RVs use rooftop-mounted ductless split systems or self-contained roof units powered by 110-volt electricity. The system includes a compressor, condenser coil, evaporator coil, refrigerant lines, thermostat, and blower fan. When functioning properly, the refrigerant absorbs heat from inside the RV and releases it outside, creating cooled air circulated through vents.
Disruptions in any part of this cycle can result in warm airflow. Common culprits include power supply issues, dirty components, refrigerant problems, or mechanical failure. Before calling a technician, perform a methodical check to identify where the breakdown occurs.
“Over 60% of ‘broken’ RV AC units we inspect simply need cleaning or reset procedures.” — Dale Reynolds, Mobile HVAC Technician with 15+ years in RV service
Step-by-Step Troubleshooting Guide
Follow this logical sequence to isolate the cause of insufficient cooling. Start with the simplest checks and progress to more complex diagnostics.
- Verify Power Supply: Ensure your RV is connected to adequate shore power (30- or 50-amp) and that the circuit breaker hasn’t tripped. Check both the main panel and the dedicated AC breaker.
- Inspect Thermostat Settings: Confirm the thermostat is set to “Cool” mode, the temperature is lower than the current room reading, and the fan is set to “Auto” or “On” as appropriate.
- Listen for Compressor Engagement: After setting a low temperature, stand near the rooftop unit. You should hear a click followed by a humming sound when the compressor kicks in. No sound may indicate electrical or control board issues.
- Check Airflow at Vents: Weak airflow suggests a clogged filter or failing blower motor. Strong airflow with warm air points to refrigerant or compressor issues.
- Examine Outdoor Unit Condition: Use a ladder safely to inspect the rooftop shroud. Look for debris, bent fins, or ice buildup blocking airflow.
Common Causes and Quick Fixes
Many cooling failures have straightforward explanations. Address these first—they’re often responsible for sudden loss of cold air.
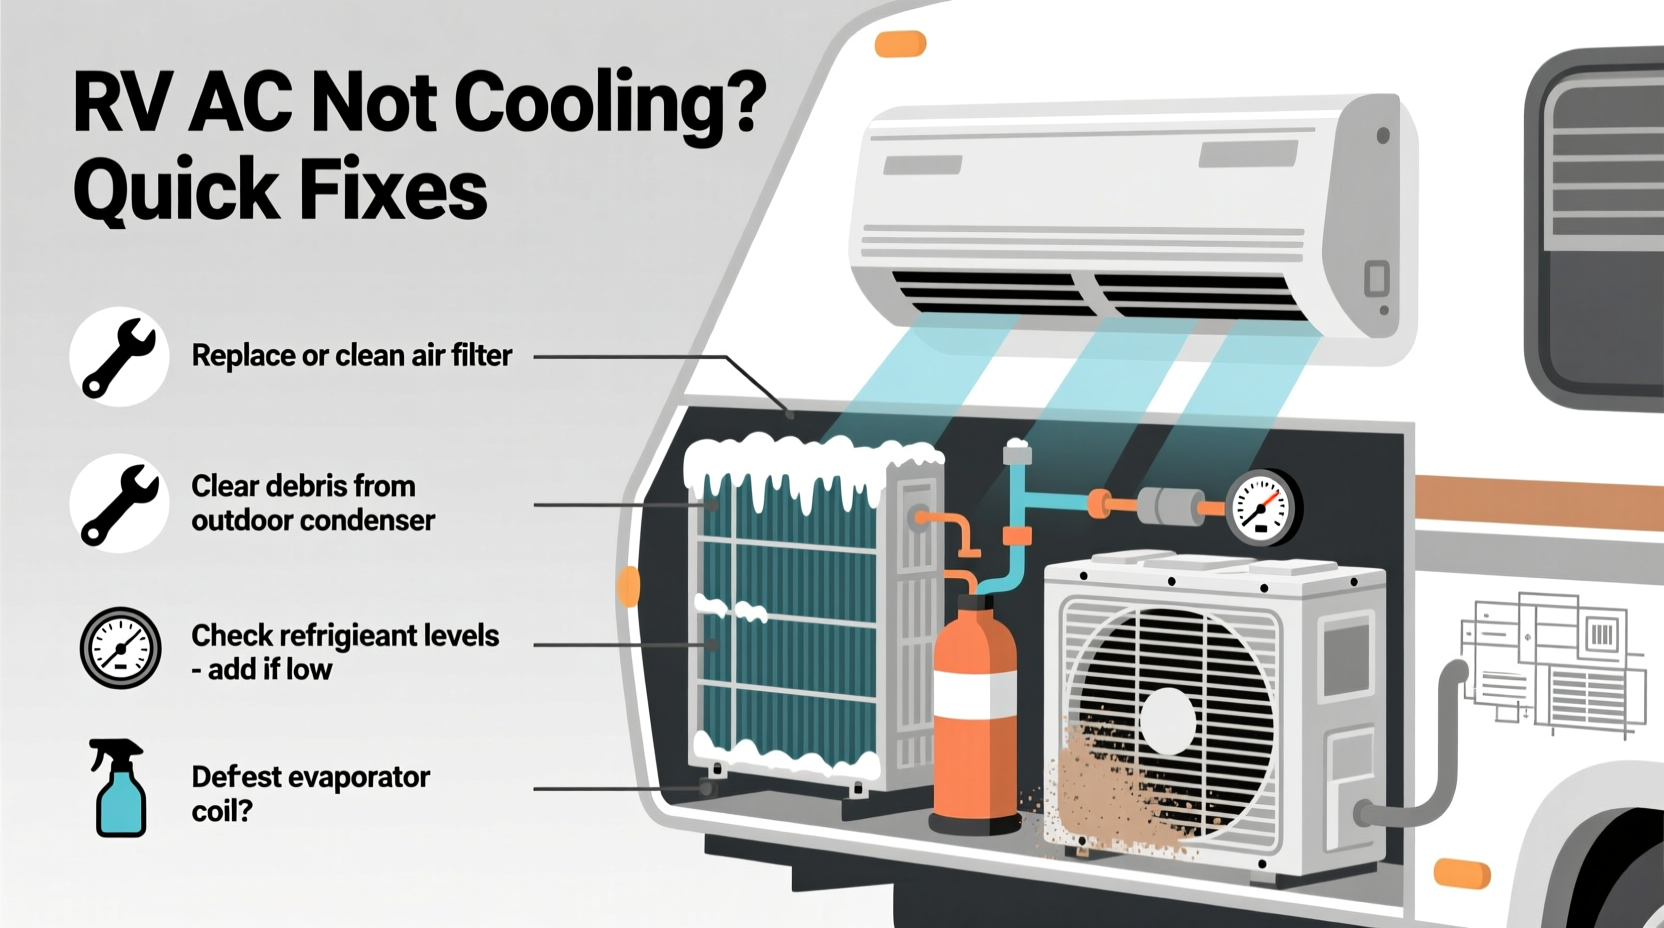
Dirt Buildup on Coils and Filters
The evaporator and condenser coils absorb and release heat. When coated in dust, dirt, or mold, they lose efficiency. Similarly, a clogged air filter restricts airflow, causing the system to work harder and cool poorly.
- Clean or replace the air filter every 30–60 days during heavy use.
- Use a soft brush and coil cleaner to gently clean indoor and outdoor coils annually.
- Remove leaves, spider webs, and debris from the exterior fins using compressed air or a vacuum with a brush attachment.
Tripped Breaker or Blown Fuse
Routine power surges or overloaded circuits can trip breakers or blow fuses specific to the AC unit. Reset the breaker and wait 5 minutes before restarting the system. If it trips again immediately, there may be a short circuit or compressor issue.
Thermostat Malfunction
A faulty thermostat may send incorrect signals. Test by bypassing it temporarily (only if you’re experienced with electrical systems), or swap in a known-working model. Digital thermostats with dead batteries or calibration errors are frequent silent culprits.
Low Refrigerant Levels
Refrigerant leaks reduce cooling capacity. Signs include hissing noises, ice on copper lines, or the unit running constantly without cooling. While recharging requires EPA-certified technicians, spotting early symptoms lets you act before damage escalates.
Failing Capacitor or Fan Motor
The start capacitor provides the initial jolt to the compressor and fan. A bulging or leaking capacitor needs replacement. Similarly, a sluggish outdoor fan prevents proper heat dissipation, leading to poor performance.
| Symptom | Possible Cause | Quick Fix |
|---|---|---|
| No power to unit | Tripped breaker, blown fuse | Reset breaker, replace fuse |
| Weak airflow | Clogged filter, dirty blower | Clean/replace filter, vacuum blower |
| Warm air output | Low refrigerant, bad compressor | Call technician for leak test |
| Loud humming, no start | Failed capacitor | Replace dual-run capacitor |
| Unit cycles frequently | Dirty coils, oversized thermostat differential | Deep clean coils, recalibrate thermostat |
Mini Case Study: The Weekend Warrior’s Cooling Crisis
Tom and Maria arrived at a Texas state park in July, eager for a relaxing weekend. But within an hour, the coach was sweltering despite the AC running continuously. They followed a systematic approach: first checking the breaker (fine), then replacing the dusty filter (minor improvement). Next, they climbed up and found the rooftop unit clogged with pine needles and dust. After carefully cleaning the fins with a garden hose and fin comb, the airflow improved dramatically. An hour later, cold air returned. Their total fix time: 45 minutes. Cost: $0. Lesson learned: preventive maintenance saves stress and money.
Essential Maintenance Checklist
Prevention beats repair. Use this checklist monthly during peak season to keep your RV AC operating efficiently.
- ✅ Inspect and clean or replace air filter
- ✅ Clear debris from rooftop shroud and condenser fins
- ✅ Verify thermostat responsiveness and calibration
- ✅ Listen for unusual noises (grinding, clicking)
- ✅ Check for moisture or ice around indoor vents or ducts
- ✅ Confirm secure electrical connections at plug and breaker
- ✅ Schedule professional inspection every 1–2 years
Frequently Asked Questions
Why is my RV AC running but not cooling?
This typically indicates one of several issues: low refrigerant, dirty evaporator or condenser coils, a failing compressor, or a malfunctioning thermostat. Begin with cleaning filters and coils, then verify power delivery and thermostat settings. If those don’t resolve it, suspect refrigerant or internal component failure.
Can I recharge the refrigerant myself?
No. Handling refrigerants requires EPA Section 608 certification due to environmental regulations and safety risks. Additionally, adding refrigerant without fixing the underlying leak leads to recurring problems. Always hire a qualified technician for diagnosis and recharging.
How do I know if my AC capacitor is bad?
Signs include a humming noise without startup, visible bulging or leaking on the capacitor casing, or a burnt smell near the unit. A multimeter test can confirm failure, but replacement is usually faster and safer for non-experts.
Final Thoughts and Action Plan
An RV air conditioner not blowing cold air is a common but solvable issue. Most problems arise from neglect, environmental exposure, or minor electrical faults—all of which are manageable with proactive care. By understanding how the system works, performing regular maintenance, and knowing when to call a pro, you maintain comfort on every journey.
Don’t wait until the next heatwave to act. Take 30 minutes this week to inspect your unit, clean the filter, and ensure all electrical connections are secure. These small efforts prevent major disruptions down the road and extend the life of your cooling system.


 浙公网安备
33010002000092号
浙公网安备
33010002000092号 浙B2-20120091-4
Comments
No comments yet. Why don't you start the discussion?