
Earphones are more than just audio tools—they’re personal accessories. Many users customize them with stickers, paint, charms, or adhesive wraps to reflect individuality. While these decorations can enhance style, they may eventually need removal due to wear, changing tastes, or resale preparation. However, improper removal can scratch surfaces, degrade materials, or compromise internal components. The key is using gentle, targeted methods that preserve both function and form.
This guide outlines practical, tested approaches to safely strip earphone embellishments. Whether dealing with glittery decals on earbud housings or resin-coated over-ear cushions, the right technique prevents irreversible harm. By understanding material sensitivities and applying controlled methods, you can restore your earphones to a clean, factory-like state—without sacrificing performance.
Understanding Earphone Materials and Risks
Before attempting any removal, identify the construction of your earphones. Common materials include plastic, rubber, silicone, metal, and composite polymers. Each reacts differently to solvents, heat, and abrasion:
- Plastic housings (common in budget and mid-range models) are prone to scratching and chemical warping.
- Silicone and rubber ear tips or grips may degrade when exposed to alcohol or acetone.
- Aluminum or metal finishes resist heat better but can lose coating if scrubbed aggressively.
- Coated fabrics or leather (on headbands) require non-moisture-heavy solutions to avoid delamination.
Decorations themselves vary: vinyl stickers, nail polish, glue-on gems, fabric wraps, or permanent markers each demand tailored handling. Rushing the process risks residue buildup, microfractures, or blocked audio ports. Always start with the least invasive method and escalate only if necessary.
Step-by-Step Guide to Safe Decoration Removal
- Power off and disconnect: If using wireless earphones, turn them off and place in a dry workspace. Never handle near liquids while powered.
- Remove detachable parts: Take off ear tips, wings, or cushions. These often carry decorations and can be cleaned separately.
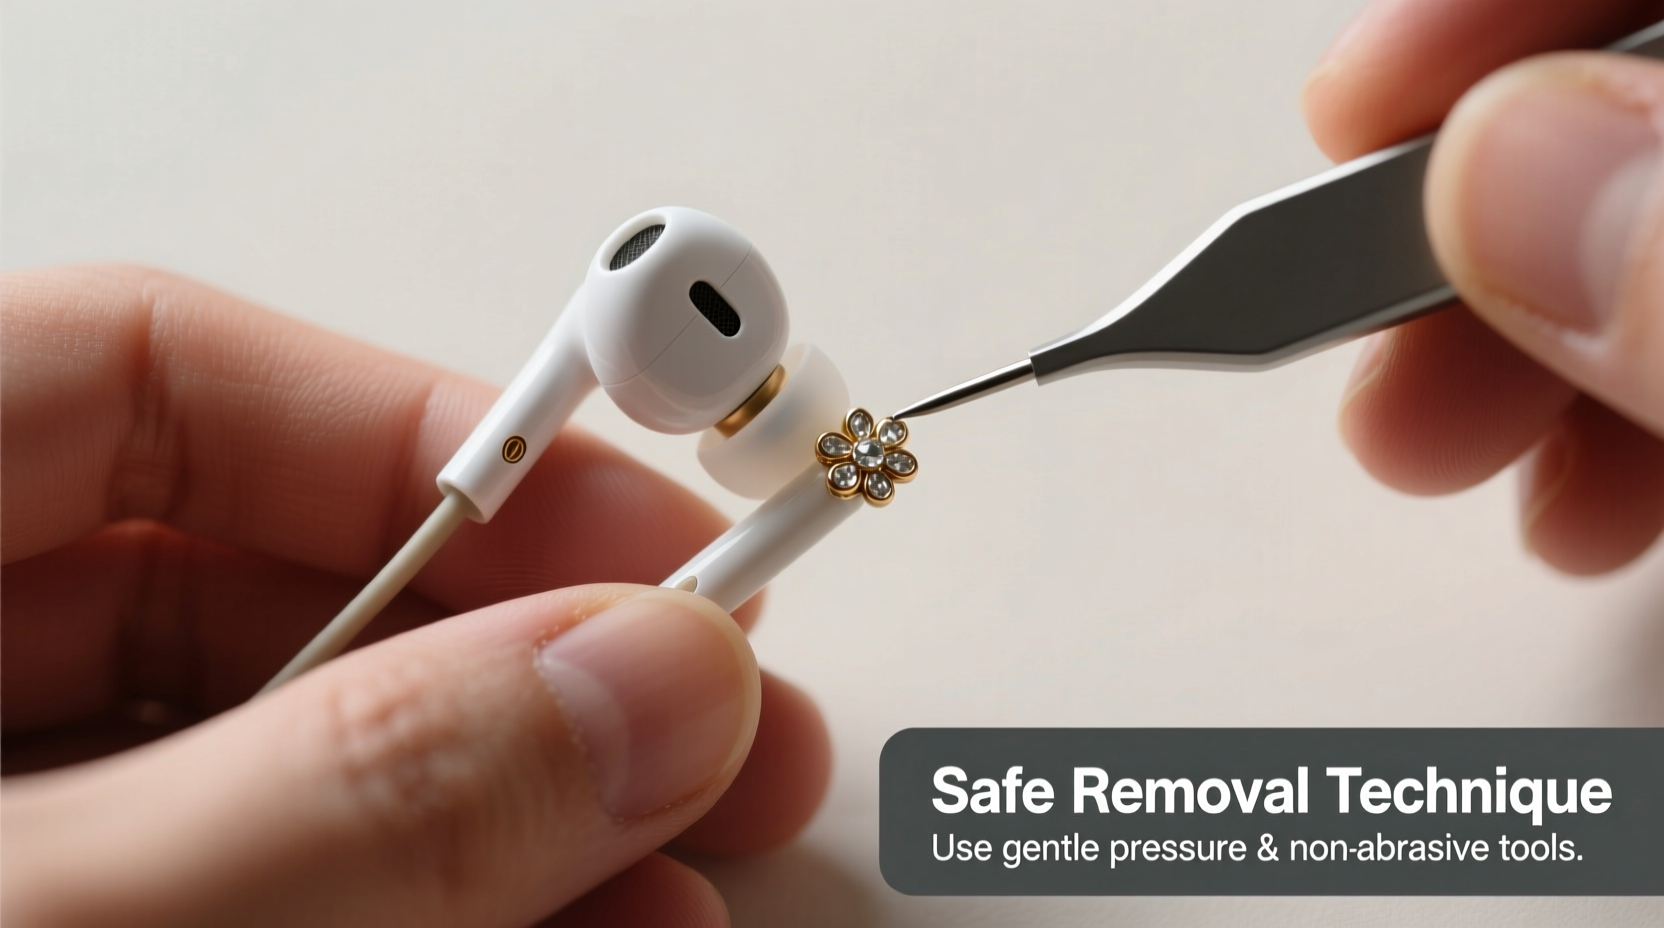
- Dry peel gently: For stickers or wraps, use a plastic card edge or fingernail to lift one corner. Pull slowly at a 45-degree angle to minimize surface stress.
- Apply heat cautiously: Use a hairdryer on low heat, held 15–20 cm away, for 20–30 seconds. Heat softens adhesives but never overheat—plastics can warp above 60°C.
- Use solvent sparingly: Dampen a cotton swab with isopropyl alcohol (70% or lower), vegetable oil, or adhesive remover. Rub in small circles on residue only.
- Clean and dry thoroughly: Wipe with a dry microfiber cloth. Allow 10–15 minutes of air drying before reassembling.
For painted designs, avoid scraping. Instead, apply a tiny amount of non-acetone nail polish remover on a cotton bud and dab lightly. Reapply as needed rather than rubbing hard.
Do’s and Don’ts: A Quick Reference Table
| Action | Do | Don't |
|---|---|---|
| Peeling Stickers | Use a plastic tool at a shallow angle | Pull straight up or use metal blades |
| Using Solvents | Dampen cloth, not pour directly | Use acetone on plastic or rubber |
| Heat Application | Low setting, intermittent bursts | Hold heat source in one spot for over 30 sec |
| Final Cleaning | Microfiber cloth, light pressure | Use paper towels or abrasive pads |
Real Example: Removing Glitter Decals from Wireless Earbuds
A user customized their earbuds with rhinestone transfers and glitter film. After six months, the edges began lifting, trapping dirt. Attempting to pull the film caused minor chipping on one housing. They paused and researched safer methods. Using a nylon spudger (a plastic opening tool), they gently lifted a corner. A hairdryer on cool-warm setting softened the adhesive within 25 seconds. The film peeled cleanly with no further damage. Residual stickiness was removed with a cotton swab dipped in olive oil, wiped after two minutes. The earbuds were fully functional post-cleaning, with no audio distortion or sensor issues.
This case highlights the importance of patience and proper tools. What seemed like a simple peel turned risky without preparation. Controlled heat and non-abrasive implements made the difference between success and damage.
Expert Insight on Material Preservation
“Many people treat earphones like disposable gadgets, but high-end models have delicate finishes and precision engineering. Using household solvents carelessly can degrade hydrophobic coatings or corrode contact points. When in doubt, go slower and gentler.” — Dr. Lena Torres, Audio Device Materials Scientist
Dr. Torres emphasizes that modern earphones often include nano-coatings for water and dust resistance. Harsh chemicals or vigorous scrubbing can compromise these layers, reducing longevity even if immediate damage isn’t visible.
Essential Checklist for Safe Removal
- ✔ Power down and unpair wireless earphones
- ✔ Remove all detachable accessories (tips, covers)
- ✔ Identify decoration type and base material
- ✔ Test solvent on a hidden area
- ✔ Use plastic tools, not metal
- ✔ Apply heat in short bursts only
- ✔ Clean residue with minimal liquid
- ✔ Dry completely before reassembly
Frequently Asked Questions
Can I use rubbing alcohol on all earphone types?
Isopropyl alcohol (70%) is generally safe on hard plastic and metal surfaces but should be avoided on rubberized coatings, silicone, or matte finishes, which may crack or become sticky. Always use sparingly and wipe immediately with a dry cloth.
What if glue residue remains after removal?
Try natural oils like coconut or baby oil. Apply a drop to the area, wait 3–5 minutes, then gently rub with a soft cloth. These oils break down adhesives without harming most plastics. Avoid commercial degreasers unless specified safe by the manufacturer.
Will removing decorations void my warranty?
Customizations themselves may void warranty if they cause damage, but simply removing them does not. However, if removal leads to cracks or corrosion, manufacturers may deny claims citing user modification. Always follow official care guidelines when possible.
Conclusion: Preserve Function While Updating Style
Personalizing earphones adds flair, but knowing how to reverse modifications safely ensures your devices last longer and perform better. The techniques outlined here balance effectiveness with caution—prioritizing device integrity over speed. Whether you're prepping for resale, refreshing your gear, or correcting a DIY misstep, a thoughtful approach prevents costly mistakes.


 浙公网安备
33010002000092号
浙公网安备
33010002000092号 浙B2-20120091-4
Comments
No comments yet. Why don't you start the discussion?