
Flip flops are a staple of warm-weather footwear—lightweight, affordable, and easy to slip on. But their simplicity comes with a trade-off: the straps often break after weeks or months of use. Rather than discarding them at the first sign of damage, you can extend their life with quick, effective repairs using common household items. With the right technique, a repaired flip flop can be just as reliable as a new pair. This guide covers practical, long-lasting solutions that require no special skills—just a little patience and resourcefulness.
Why Flip Flop Straps Break
The most common point of failure is where the strap meets the sole, especially between the toes or at the heel anchor. Repeated bending, exposure to sunlight, and contact with rough surfaces weaken the material over time. Most flip flops use soft EVA foam or rubber, which degrades faster under heat and friction. The stress concentration at the attachment points accelerates wear, leading to cracks or complete separation.
Understanding the cause helps in choosing the best repair method. A temporary fix might suffice for occasional use, but if you rely on your flip flops daily, durability should be the priority.
Durable Repair Methods You Can Try at Home
Below are five proven techniques, ranging from immediate fixes to semi-permanent solutions. Each method uses accessible materials and tools, making them ideal for home application.
1. Shoe Goo or Rubber Cement Reinforcement
Shoe Goo is a flexible adhesive specifically designed for footwear. It fills gaps, bonds rubber and foam, and dries into a tough, waterproof layer. For minor tears or loosening straps, this is the simplest and most effective option.
- Clean the area around the break with rubbing alcohol to remove dirt and oil.
- Apply Shoe Goo generously across the crack or detachment point.
- Press the strap back into place and hold for 30 seconds.
- Let it cure for at least 24 hours before wearing.
For added strength, embed a small piece of mesh fabric or an old inner tube patch into the wet adhesive before it sets. This creates a reinforced bridge across the damaged zone.
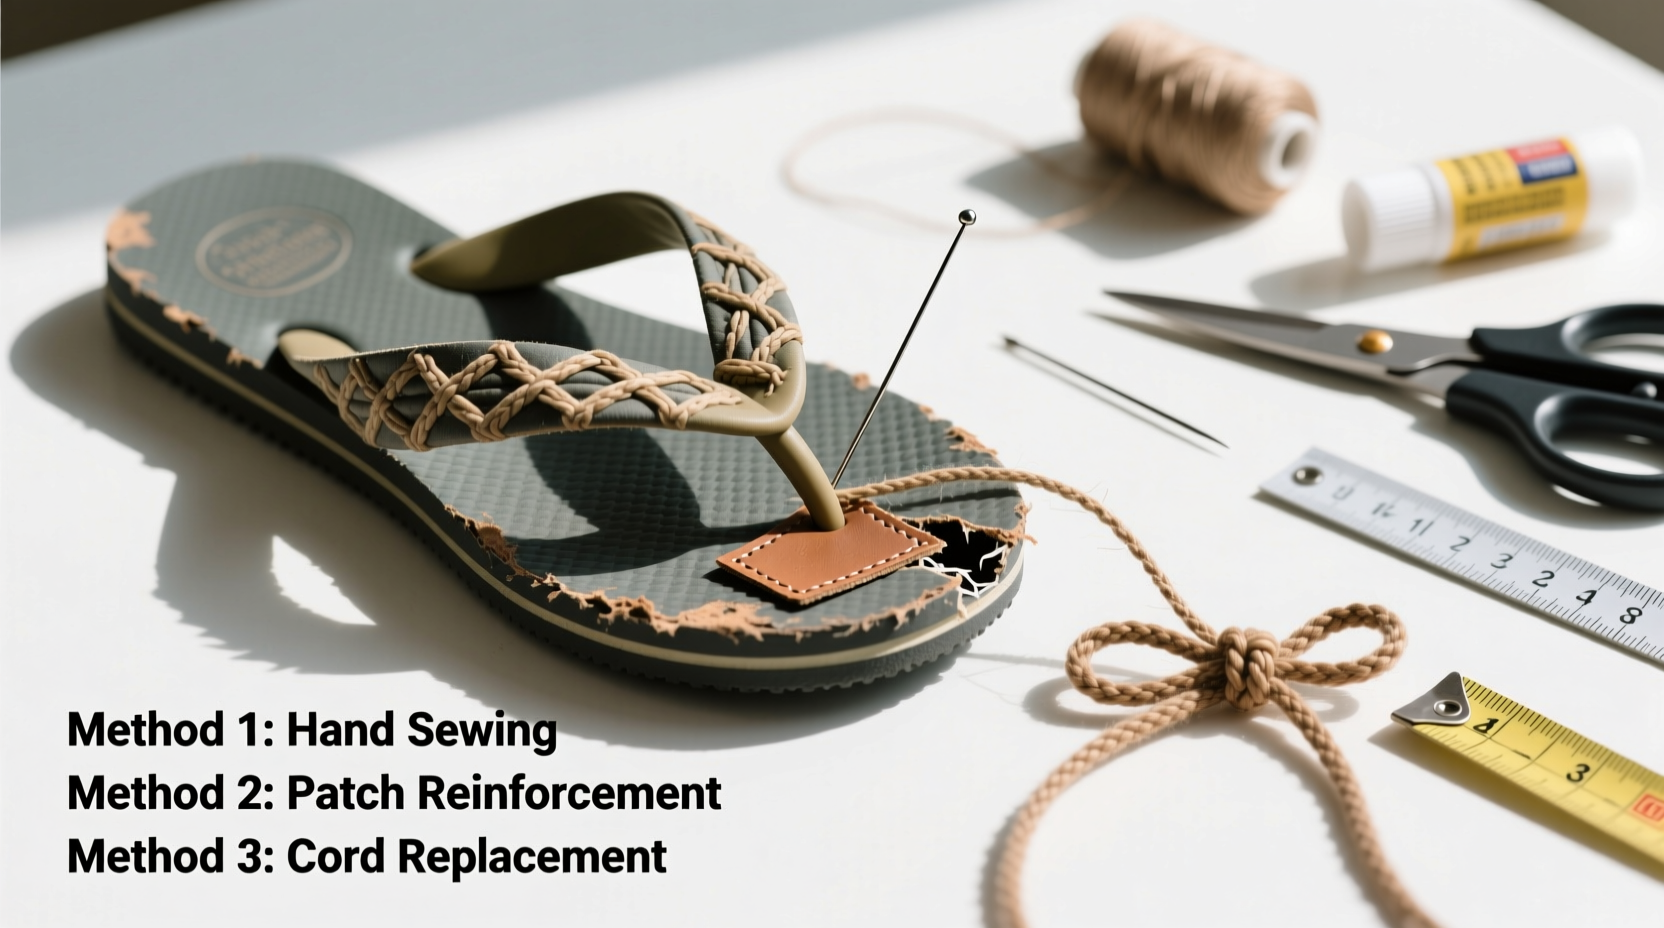
2. Needle and Heavy-Duty Thread Stitching
If the strap has pulled away completely but the material is still pliable, sewing it back provides excellent durability. Use a curved upholstery needle and waxed nylon thread for best results.
- Punch small pilot holes on either side of the break using a nail or awl.
- Thread the needle and tie a secure knot at the end.
- Sew through the holes in a crisscross pattern (like a whipstitch) for maximum hold.
- Tie off the thread with multiple knots and seal with clear nail polish to prevent fraying.
This method works especially well for fabric-based straps or sandals with layered soles.
3. Metal Ring or Keyring Reinforcement
A clever mechanical fix involves using a small metal ring to re-anchor a detached strap. This is ideal when the original hole has stretched or torn out.
- Find a sturdy keyring or split ring (about 1/2 inch in diameter).
- Reinforce the area around the new attachment point with several layers of duct tape or a leather patch.
- Drill or punch two small holes near the original break site.
- Thread the strap through the ring and pull it tight.
- Secure the ring in place by wrapping strong thread or thin wire around the base and sealing with epoxy.
The ring acts as a pivot point, reducing direct strain on the sole.
4. Paracord or Braided Cord Replacement
When the original strap is beyond repair, replacing it with paracord offers superior strength and customization. Paracord withstands UV rays, water, and heavy use.
- Cut a 12-inch length of paracord.
- Melt one end slightly to prevent fraying.
- Thread it through the existing holes or create new ones with a heated needle.
- Knot securely beneath the sole and trim excess.
- Melt the top end slightly and press flat to form a smooth surface.
You can braid or knot the cord for aesthetic appeal while maintaining function.
5. Epoxy and Fabric Patch Hybrid Method
For deep cracks or splits in thick straps, combine structural support with adhesion. This hybrid approach mimics industrial repair standards.
- Clean the damaged area thoroughly.
- Mix a two-part epoxy (such as J-B Weld PlasticBonder).
- Apply a thin layer to both sides of the break.
- Cut a small rectangle of denim, canvas, or fiberglass mesh.
- Press the patch into the wet epoxy, spanning the crack.
- Coat the patch with another layer of epoxy.
- Clamp gently with binder clips and allow 48 hours to cure.
This creates a composite structure that resists flexing and moisture.
Comparison of Repair Methods
| Method | Tools Needed | Durability | Time Required | Best For |
|---|---|---|---|---|
| Shoe Goo | Adhesive, cloth | High | 24 hrs (cure time) | Small cracks, early wear |
| Sewing | Needle, thread | Very High | 30–60 mins | Fabric straps, full detachment |
| Metal Ring | Ring, drill, epoxy | High | 1–2 hrs | Hole tear-out, heel straps |
| Paracord | Cord, lighter | Very High | 20 mins | Complete strap replacement |
| Epoxy + Patch | Epoxy, fabric, clamp | Very High | 48 hrs (cure) | Deep splits, thick soles |
Real-Life Example: Beach Trip Rescue
Last summer, Mark was halfway through a weeklong coastal trip when his favorite flip flop snapped between the toes. Without access to a store, he used a combination of super glue and a strip of fabric from an old t-shirt. He applied the glue, laid the fabric over the break, and topped it with another coat. After letting it dry overnight, the sandal held up for the rest of the vacation—even during daily swims and hikes. While not elegant, the fix lasted three weeks, proving that even improvised repairs can be effective with the right materials.
“Many people don’t realize how much stress flip flop straps endure. A well-executed repair can restore up to 90% of the original strength.” — Dana Ruiz, Footwear Repair Technician with 12 years of experience
Step-by-Step Checklist for Successful Repair
Your Repair Action Plan:
- Assess the damage: Is it a crack, tear, or complete detachment?
- Choose the appropriate method based on material and severity.
- Gather tools and materials beforehand.
- Clean the repair area thoroughly with alcohol or soap and water.
- Work in a dry, dust-free environment.
- Allow adequate curing time—rushing leads to failure.
- Test the repair gently before full use.
Frequently Asked Questions
Can I use regular glue instead of Shoe Goo?
Standard white or craft glue lacks flexibility and water resistance. It may crack under pressure. Use rubber-based adhesives like Shoe Goo, E6000, or Gorilla Glue for better bonding and elasticity.
How long will a repaired flip flop last?
A well-executed repair can last several months, depending on usage. Sewn or paracord fixes often outlast the original construction, especially if preventive care is applied.
Is it worth repairing cheap flip flops?
Yes—if they fit well and are comfortable. Many inexpensive models use decent materials initially; only the strap design is weak. Repairing them saves money and reduces waste.
Final Thoughts
Repairing a broken flip flop strap doesn’t require expertise—just attention to detail and the right materials. Whether you’re preparing for a vacation, extending the life of a favorite pair, or teaching kids basic self-reliance, these methods offer real value. Beyond saving money, home repairs reduce environmental impact by keeping usable items out of landfills. With a little effort, what seems like trash can become reliable footwear again.


 浙公网安备
33010002000092号
浙公网安备
33010002000092号 浙B2-20120091-4
Comments
No comments yet. Why don't you start the discussion?