
Crafting beaded keychains is a delightful way to express creativity while producing functional accessories. Whether you're looking to personalize your keys, create thoughtful gifts, or explore a new hobby, beading offers an accessible entry point into handmade crafts. With minimal tools and affordable supplies, anyone can design eye-catching keychains in under an hour. This guide walks through every stage—from selecting materials to finishing touches—so you can confidently begin your beading journey.
Gather Your Materials and Tools
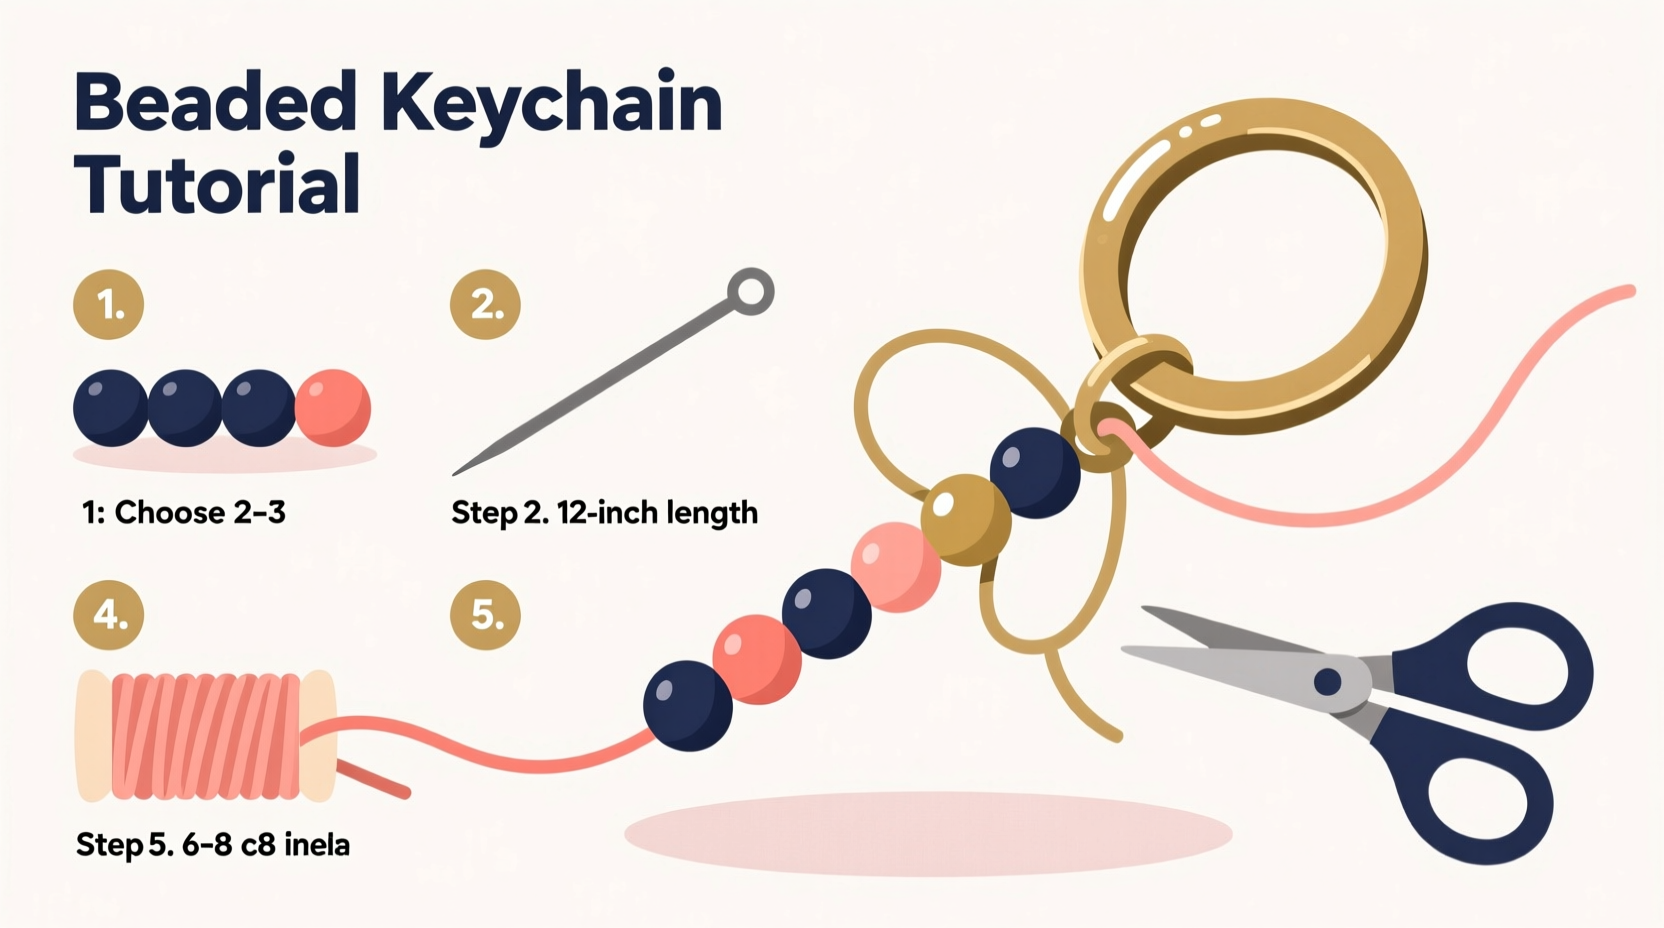
Before diving into creation, ensure you have the right components on hand. Beaded keychains require only a few essentials, most of which are reusable across future projects.
- Beads (glass, plastic, wood, or acrylic)
- Jewelry wire or stretchy cord (0.5–1mm thickness)
- Keychain ring (metal or plastic)
- Scissors or wire cutters
- Glue (optional: clear-drying jewelry adhesive)
- Beading needle (helpful for small beads)
- Ruler or measuring tape
Beads come in various sizes, typically measured in millimeters. For beginners, 6mm or 8mm round beads are easiest to handle. Larger beads reduce threading complexity and minimize frustration during early attempts.
Choose a Design Pattern
Design determines both aesthetics and structure. Simple patterns work best when learning. Consider symmetry, color harmony, and balance when planning your layout.
Popular beginner-friendly designs include:
- Solid Color Strand: Uniform beads in one hue for clean elegance.
- Alternating Two-Tone: Switch between two colors (e.g., black and white) for contrast.
- Gradient Fade: Use progressively lighter or darker shades of the same color family.
- Name Initial Keychain: Spell out initials using letter beads.
- Random Mix: Combine different shapes and colors freely for playful variety.
Lay out your chosen beads on a flat surface before stringing. This \"dry run\" helps visualize spacing and catch errors early.
“Design isn’t just about beauty—it’s about intention. Even simple patterns carry meaning when thoughtfully arranged.” — Lila Chen, Jewelry Designer & Craft Educator
Step-by-Step Assembly Process
Follow this timeline to assemble your first beaded keychain successfully.
- Measure and Cut the Cord: Cut a piece of wire or elastic cord approximately 30 cm (12 inches) long. Extra length allows room for tying knots without tension.
- Attach the Keychain Ring: Fold one end of the cord and thread it through the keyring. Pull about 5 cm (2 inches) through to form a loop.
- Secure with a Knot: Tie a tight overhand knot around the main strand to anchor the ring. Trim excess if needed, or leave it for additional bead wrapping later.
- Begin Stringing Beads: Slide your planned sequence of beads onto the longer end of the cord. Work slowly to avoid dropping beads.
- Check Length: Wrap the strand loosely around your fingers or measure against your palm. Most finished keychains range from 8–12 cm (3–5 inches) in dangling length.
- Finish the Top End: Once all beads are threaded, pass the free end back through the keyring or tie it directly above the top bead.
- Tie the Final Knot: Make a secure double or triple knot. If using stretchy cord, add a drop of jewelry glue to prevent loosening over time.
- Trim Excess Cord: Carefully snip off leftover material close to the knot, leaving no frayed ends.
If using non-stretch wire, consider crimp beads or clasps for professional finishes. However, for simplicity, knots suffice in basic designs.
Common Mistakes and How to Avoid Them
New crafters often encounter predictable challenges. Recognizing these pitfalls improves success rates significantly.
| Mistake | Why It Happens | Solution |
|---|---|---|
| Knots come undone | Insufficient knotting or lack of adhesive | Use triple knots and apply a tiny drop of glue |
| Beads slide around too much | Using stretchy cord without anchoring knots tightly | Ensure snug spacing and secure starting/ending knots |
| Cord breaks during stringing | Over-pulling or using thin, low-quality thread | Use durable nylon-coated wire or thicker elastic |
| Uneven appearance | Inconsistent bead order or misaligned center | Plan layout visually before threading |
Real Example: Sarah’s First Keychain Project
Sarah, a college student with no prior crafting experience, wanted to make personalized keychains for her roommates. She purchased a $5 starter kit containing assorted plastic beads, elastic cord, and metal rings. After reviewing online tutorials, she decided on a rainbow-themed design with red, orange, yellow, green, blue, and purple beads.
Her first attempt failed when the knot slipped after two days of use. Instead of giving up, she re-strung the beads using a triple knot and added a touch of craft glue. The second version held strong for months. Encouraged, she experimented with glow-in-the-dark beads and engraved initials. Within weeks, her dorm mates began requesting custom orders, turning a simple project into a small side hustle.
This illustrates how minor adjustments lead to dramatic improvements—and how even imperfect starts can evolve into rewarding outcomes.
Essential Checklist for Beginners
Use this checklist before starting each project to ensure preparedness:
- ☐ Choose bead type and color scheme
- ☐ Lay out design on a tray or towel
- ☐ Cut cord with extra length allowance
- ☐ Secure keyring with initial knot
- ☐ Thread beads in correct sequence
- ☐ Confirm total length fits desired size
- ☐ Finish with reinforced knot
- ☐ Apply glue if using elastic cord
- ☐ Trim cleanly and inspect for sharp edges
Frequently Asked Questions
Can I wash my beaded keychain?
Avoid submerging beaded keychains in water, especially those made with glued components or porous materials like wood or clay. Wipe gently with a damp cloth if dirty, then air dry completely.
What kind of cord is strongest for heavy beads?
For heavier beads (such as stone or large glass), use braided nylon jewelry thread or thin stainless steel wire. These resist stretching and snapping better than elastic cords.
How do I make a keychain that doesn’t tangle?
Keep the beaded section short (under 15 cm) and avoid excessive loops or dangling elements. A compact, linear design minimizes tangling with other items in pockets or bags.
Final Thoughts and Next Steps
Creating beaded keychains blends creativity with practicality, offering immediate satisfaction with lasting results. Each piece reflects personal taste, whether minimalist and modern or bold and colorful. As skills grow, so do possibilities—try incorporating charms, spacers, or layered strands for advanced flair.
The real magic lies not just in the final product, but in the process itself: the rhythmic threading, the tactile pleasure of beads sliding into place, and the quiet focus that comes with mindful making. These small creations build confidence, spark joy, and often become cherished tokens shared among friends.


 浙公网安备
33010002000092号
浙公网安备
33010002000092号 浙B2-20120091-4
Comments
No comments yet. Why don't you start the discussion?