
Urban living doesn’t mean giving up the joy of growing your own food. With limited floor space, a vertical herb garden is an efficient, attractive solution that brings greenery and flavor within arm’s reach—right on your kitchen wall, balcony, or patio. The best part? You can build one from common household materials in under half an hour. Whether you’re a seasoned gardener or a complete beginner, this guide walks you through every stage of assembling a compact, functional, and sustainable vertical herb garden using affordable, easy-to-find supplies.
Why Go Vertical?
Traditional gardening requires space, soil beds, and time. Vertical gardens bypass these limitations by utilizing vertical surfaces—walls, fences, or railings—to grow herbs upward instead of outward. This method maximizes yield per square foot, improves air circulation around plants, reduces pest exposure, and adds a living design element to any room or outdoor area.
Herbs like basil, thyme, oregano, parsley, cilantro, and mint thrive in vertical systems because they have shallow root structures and don’t require deep containers. When grown vertically, they also receive better light distribution and are easier to harvest daily for cooking.
“Vertical gardening transforms overlooked walls into productive ecosystems. It’s not just space-saving—it’s resource-smart.” — Dr. Lena Patel, Urban Horticulturist, Green Cities Initiative
What You’ll Need: Materials & Tools
The beauty of this project lies in its simplicity. Most components can be sourced from a local hardware store, dollar shop, or even repurposed from around your home. Below is a checklist of everything required for a standard three-pocket vertical herb garden suitable for indoor or sheltered outdoor use.
Materials List
- One fabric shoe organizer with clear pockets (canvas or polyester, minimum 6 pockets)
- Three 4-inch diameter plastic pots or nursery containers
- Organic potting mix (lightweight, well-draining)
- Three herb seedlings (e.g., basil, mint, thyme)
- Hanging hooks or command strips rated for 5+ lbs
- Scissors or utility knife
- Watering can with narrow spout
- Measuring tape or ruler
- Pencil or chalk marker
Optional Upgrades
- Drip tray or small saucer (to protect walls indoors)
- Landscape fabric liner (to prevent soil leakage)
- Slow-release organic fertilizer pellets
- Mini moisture meter
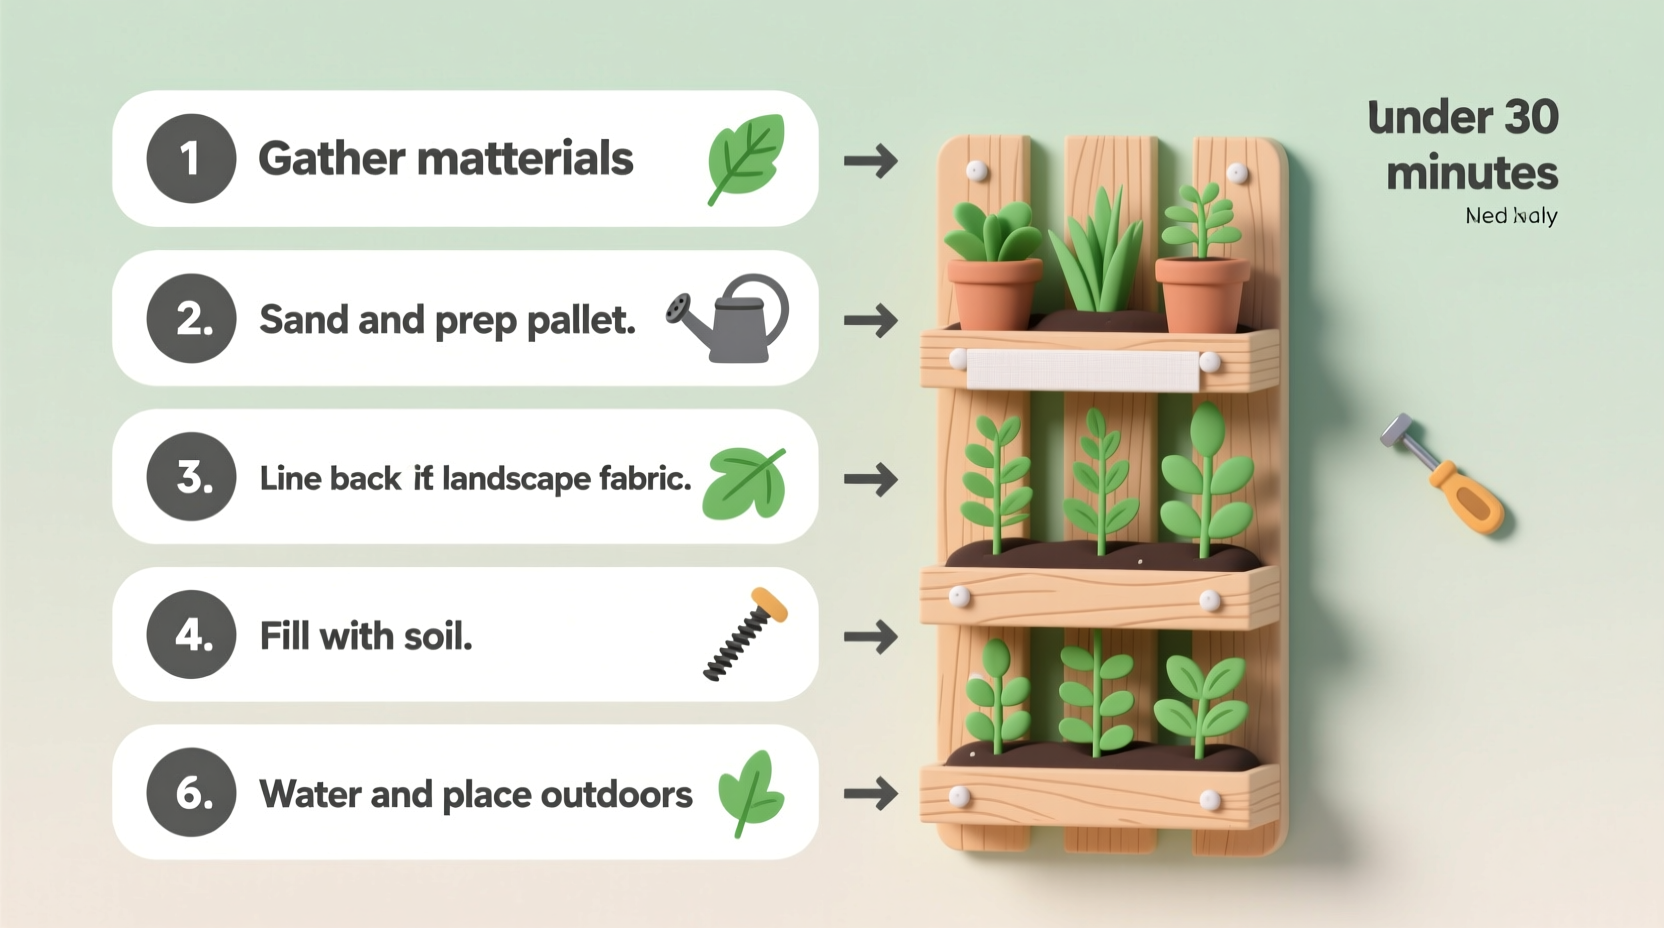
Step-by-Step Assembly Timeline
Follow this sequence to complete your vertical herb garden efficiently. Each step is designed to take no more than 5–7 minutes, keeping the entire process under 30 minutes from start to hanging.
- Prepare the Hanging Surface (3 min)
Select a location with access to at least 4–6 hours of indirect sunlight daily. Indoors, choose a south-facing window; outdoors, a covered porch or balcony works well. Mark two anchor points spaced 18–24 inches apart using a pencil. Install heavy-duty adhesive hooks or screw-in brackets depending on wall type. - Cut Drainage Openings (5 min)
Lay the shoe organizer flat on a cutting-safe surface. Using scissors, carefully cut a 1-inch diameter hole in the bottom center of each selected pocket (use every other pocket to avoid overcrowding). These holes allow excess water to escape and prevent root rot. If using a non-breathable material, line each pocket with a small square of landscape fabric before planting to retain soil while permitting drainage. - Insert Pots & Test Fit (4 min)
Place one plastic pot into each prepared pocket. Ensure the pot sits securely without tilting. Adjust cuts if necessary. Remove pots temporarily while filling with soil. - Fill with Soil & Plant Herbs (7 min)
Scoop organic potting mix into each pot, leaving about ½ inch from the rim. Gently loosen the root ball of each herb seedling and place it into the center of the pot. Cover roots with additional soil and press lightly to stabilize. Avoid compacting too tightly—herbs need loose, aerated soil for healthy growth. - Hanging & Final Positioning (4 min)
Reinsert filled pots into their respective pockets. Carefully lift the top of the organizer and hang it on the installed hooks. Make sure it hangs straight and does not pull on any seams. Place a drip tray beneath the lowest pocket if installing indoors. - Initial Watering & Setup Check (5 min)
Using a narrow-spout watering can, moisten each pot evenly until water begins to drain from the bottom. Observe for leaks or shifting. Wipe down exterior fabric if needed. Confirm all pots remain level and secure.
Choosing the Right Herbs for Vertical Growth
Not all herbs adapt equally well to vertical conditions. Success depends on matching plant habits with container depth, light needs, and moisture tolerance. The table below outlines ideal candidates and those to avoid.
| Herb | Root Depth Needed | Light Requirement | Water Needs | Vertical Suitability |
|---|---|---|---|---|
| Basil | 6–8 inches | Full sun (6+ hrs) | Moderate, consistent | High ✅ |
| Mint | 6 inches | Partial to full sun | High – likes moisture | High ✅ |
| Thyme | 4–6 inches | Full sun | Low – drought-tolerant | High ✅ |
| Parsley | 8–10 inches | Partial sun | Moderate | Medium ⚠️ |
| Oregano | 6 inches | Full sun | Low | High ✅ |
| Rosemary | 12+ inches | Full sun | Very low | Low ❌ |
| Cilantro | 6–8 inches | Partial sun | Moderate | Medium ⚠️ |
For beginners, start with mint, thyme, and oregano—they’re resilient, fast-growing, and forgiving of minor care mistakes. Rotate in more sensitive herbs like parsley once you’ve mastered watering rhythms.
Real-Life Example: Maria’s Kitchen Wall Transformation
Maria, a software developer living in a Chicago apartment, wanted fresh herbs but had zero outdoor space. She followed this exact guide one Saturday morning using a $12 canvas shoe organizer from a discount store, leftover pots from a previous houseplant, and seedlings from her local farmers market.
Within 25 minutes, she’d mounted the organizer beside her kitchen sink—just above her countertop. She planted basil, mint, and thyme. After two weeks, she clipped her first sprigs for a homemade pesto. “It feels like magic,” she said. “I cook almost every night now just to use what I’ve grown. Plus, my kitchen looks alive.”
Eight months later, her vertical garden remains productive. She credits success to consistent morning watering and rotating pots seasonally—bringing tender herbs indoors during winter.
Maintenance Tips for Long-Term Success
A vertical herb garden isn’t maintenance-free, but with smart routines, it stays vibrant year-round. Follow these guidelines to keep your herbs healthy and harvesting consistently.
- Check moisture daily: Stick your finger 1 inch into the soil. If dry, water. If damp, wait.
- Fertilize monthly: Use a diluted liquid seaweed or fish emulsion every four weeks during growing season (spring to fall).
- Prune regularly: Pinch off top leaves to encourage bushier growth and prevent legginess.
- Monitor for pests: Inspect undersides of leaves weekly. Treat aphids or spider mites with a mild soap spray (1 tsp dish soap + 1 quart water).
- Rotate position occasionally: If one side gets less light, turn the entire unit 180 degrees every few weeks for even growth.
“The key to thriving vertical gardens is observation. Plants tell you what they need—if you learn to listen.” — Carlos Mendez, Sustainable Gardening Educator
Troubleshooting Common Issues
Even quick builds can face challenges. Here’s how to identify and resolve frequent problems:
Yellowing Leaves
This usually indicates overwatering or poor drainage. Check that bottom holes aren’t clogged. Allow soil to dry between waterings, especially for thyme and oregano.
Leggy or Sparse Growth
Insufficient light is the culprit. Move the garden closer to a natural light source or supplement with a small LED grow light (3000–5000K) for 4–6 hours daily.
Soil Erosion or Leakage
If soil washes out during watering, insert a layer of coconut coir or landscape fabric beneath the soil but above the drainage hole. This stabilizes the medium without blocking flow.
Uneven Growth Between Pockets
Differences in microclimate—such as airflow or light angle—can affect growth rates. Swap pot positions every few weeks to balance exposure.
FAQ: Your Top Questions Answered
Can I make a vertical herb garden without power tools?
Absolutely. This design uses no drilling or electrical components. Adhesive hooks support lightweight organizers safely on drywall, tile, or wood. For heavier builds, use toggle anchors—but they’re unnecessary for fabric-based systems.
How often should I replace the soil?
Refresh potting mix every 12–18 months. Over time, nutrients deplete and soil structure breaks down. At renewal, gently trim old roots and transfer to fresh organic mix for renewed vigor.
Is this safe for rental apartments?
Yes, especially when using removable mounting solutions like Command™ strips or tension rods inside windows. Always confirm with your landlord if unsure, but most property managers approve temporary, non-damaging installations.
Conclusion: Start Small, Grow Daily
Building a vertical herb garden in under 30 minutes proves that sustainable living doesn’t require grand plans or expensive kits. With a few basic supplies and focused effort, you can cultivate a living pantry that enhances both your meals and your environment. The act of nurturing plants—even in minimal form—connects us to natural cycles, encourages mindful eating, and fosters pride in self-reliance.
Your kitchen wall, balcony railing, or hallway isn’t just usable space—it’s potential. Today, that potential can become productivity. Gather your materials, follow the steps, and within minutes, you’ll be growing something real, useful, and beautiful.


 浙公网安备
33010002000092号
浙公网安备
33010002000092号 浙B2-20120091-4
Comments
No comments yet. Why don't you start the discussion?