
Making the background of a photo pure white is essential for product photography, e-commerce listings, professional portraits, and design projects. A clean white background removes distractions, enhances visual consistency, and meets platform requirements like those on Amazon or Shopify. While it may seem technical, the process is straightforward when you know the right tools and techniques. This guide walks you through multiple reliable methods—ranging from beginner-friendly apps to advanced software—to achieve crisp, professional results without hiring a designer.
Why a Pure White Background Matters
A white background isn’t just about aesthetics; it’s functional. Online marketplaces often require uniform product images with no shadows or color variations. Designers use white-background images in catalogs, brochures, and websites for seamless integration. Photographers deliver cleaner edits when clients request studio-style finishes. Achieving true white (RGB 255, 255, 255) ensures your image appears consistent across devices and print media.
“Precise background removal elevates amateur photos to retail-ready quality.” — Daniel Reeves, Digital Imaging Specialist at StudioFlow Pro
Tools You Can Use
Different tools suit different skill levels and budgets. Whether you're editing one image or processing hundreds, there's a solution that fits.
| Tool | Skill Level | Cost | Best For |
|---|---|---|---|
| Remove.bg | Beginner | Free tier + paid plans | Quick automated background removal |
| Adobe Photoshop | Intermediate to Advanced | Paid (subscription) | Precision editing, batch processing |
| GIMP | Intermediate | Free | Open-source alternative to Photoshop |
| Canva | Beginner | Free + Pro features | Simple drag-and-drop editing |
| Figma | Beginner to Intermediate | Free + paid teams | Designers needing transparent layers |
Step-by-Step: Making a Background Pure White
The method you choose depends on your resources and desired outcome. Below is a universal workflow adaptable to most software.
- Prepare Your Image: Start with a high-resolution photo taken in good lighting. Avoid busy backgrounds and harsh shadows if possible.
- Upload to Editing Tool: Open your chosen software and import the image.
- Remove or Isolate the Subject: Use selection tools (like Magic Wand, Quick Selection, or AI detection) to separate the main subject from the background.
- Delete or Mask the Old Background: Once selected, delete the existing background or apply a layer mask to hide it.
- Add a New White Layer: Create a new layer beneath your subject and fill it with pure white (RGB: 255, 255, 255).
- Refine Edges: Zoom in and clean up fringes using the Refine Edge Brush or eraser tool to eliminate gray halos or residual colors.
- Adjust Lighting & Shadows (Optional): If needed, add subtle drop shadows or brighten edges to maintain realism.
- Export as PNG or JPEG: Save in a format that supports your needs—PNG for transparency support, JPEG for standard web use with white fill.
Using Remove.bg (No Installation Needed)
This AI-powered website automatically removes backgrounds in seconds.
- Go to remove.bg and upload your image.
- Wait for the AI to process and remove the background.
- Download the result with a transparent background.
- Open in any editor (like Canva or Photoshop), place a white layer underneath, and re-export.
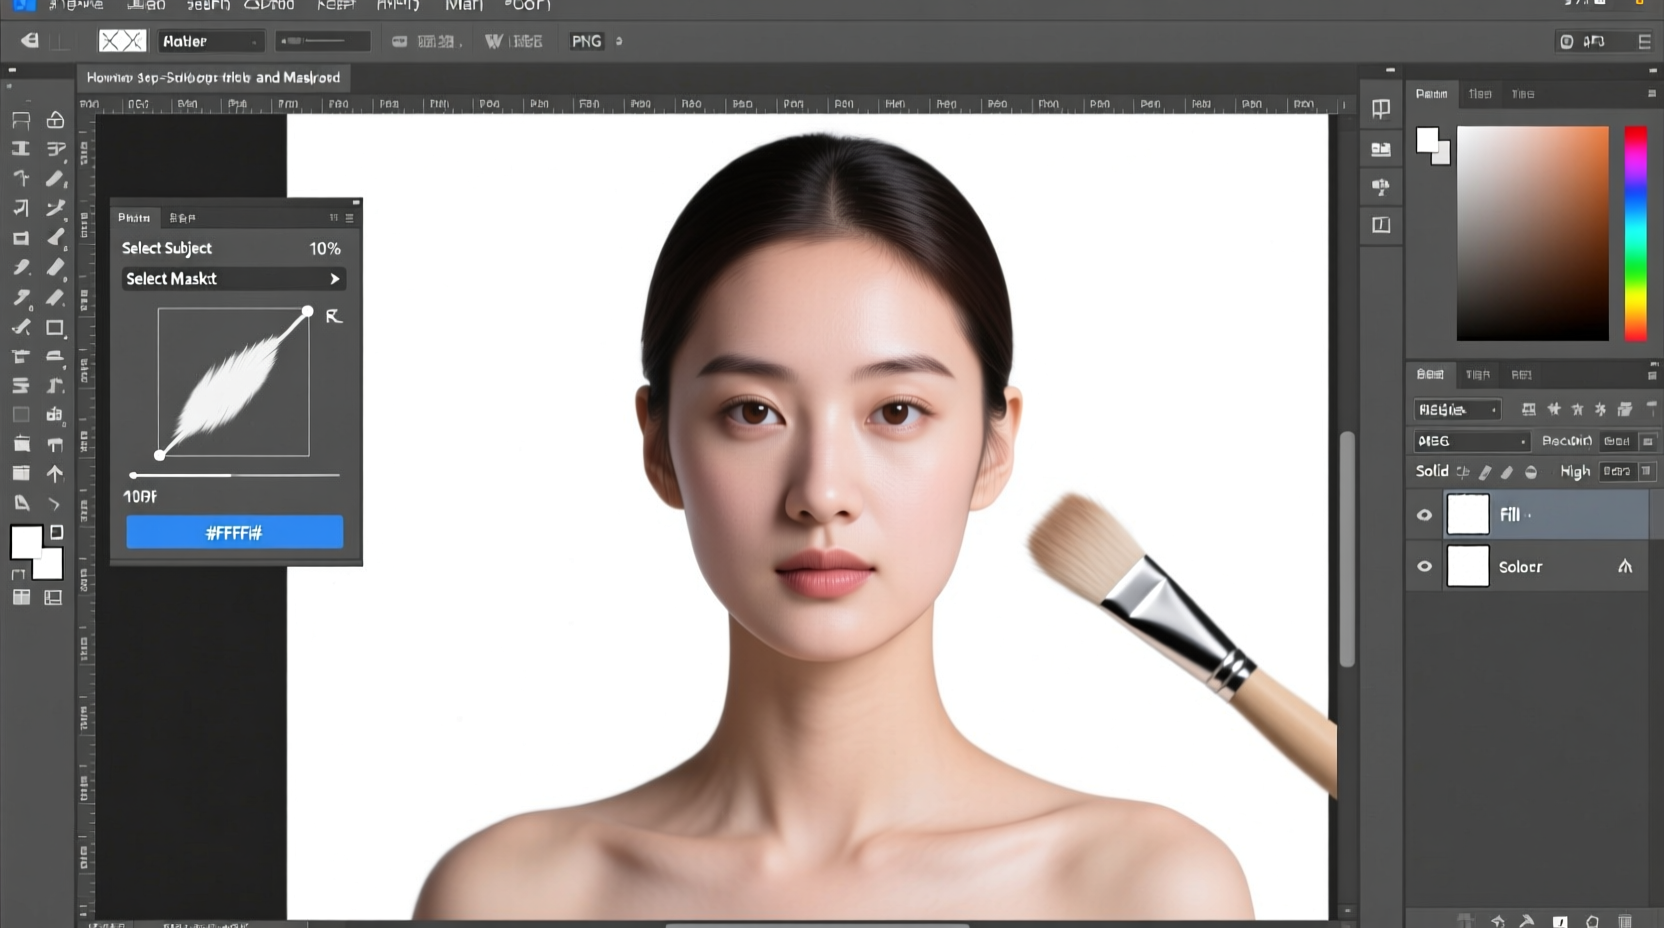
Using Adobe Photoshop (Professional Precision)
Photoshop offers the most control over the final output.
- Open your image in Photoshop.
- Select “Select Subject” from the Select menu to auto-detect the person or object.
- Invert the selection (Shift+Ctrl+I / Shift+Cmd+I) to target the background.
- Press Delete to remove it, leaving transparency.
- Create a new layer below your subject via Layer > New > Layer.
- With the Paint Bucket Tool, set foreground color to white (press D, then X until white is active), and click the new layer.
- Use Select and Mask workspace to refine hair or fabric edges with the Refine Edge Brush.
- Save as PNG (for transparency) or JPEG (with embedded white background).
Common Mistakes to Avoid
Even small errors can make an image look unprofessional. Watch out for these pitfalls:
- Leaving gray fringes: These appear when the background isn't fully removed. Use decontaminate color or edge refinement tools.
- Over-smudging edges: Excessive blurring makes subjects look fake. Keep edges sharp but natural.
- Incorrect white value: Off-white backgrounds (e.g., #F8F8F8) don’t count as pure white. Ensure RGB values are exactly 255,255,255.
- Ignoring resolution: Low-res exports degrade quality. Always export at minimum 72 DPI for web, 300 DPI for print.
“A single pixel of leftover green screen can undermine the credibility of an otherwise perfect product shot.” — Lena Park, E-commerce Visual Lead at Nordix Studios
Mini Case Study: Product Photography for Etsy
Sarah runs a handmade jewelry shop on Etsy. Her early product photos had cluttered home backgrounds, resulting in low engagement. After reading about white-background standards, she used Remove.bg to strip backgrounds from her phone-captured images, placed them on pure white layers in Canva, and uploaded the new versions. Within two weeks, her listing conversion rate increased by 40%. Buyers commented that the items looked “more professional” and “easier to visualize.”
Sarah now uses this workflow weekly, spending less than ten minutes per batch. She credits the change not just to better visuals, but to meeting customer expectations for polished presentation.
Checklist: Perfect White Background in 7 Steps
- Subject is fully separated from the original background
- No visible fringes or color halos around edges
- New background is filled with RGB 255,255,255 (pure white)
- Image resolution is appropriate (72+ DPI for web)
- File saved in correct format (PNG for transparency, JPEG for flat white)
- No compression artifacts or pixelation
- Double-checked against platform guidelines (Amazon, Etsy, etc.)
FAQ
Can I make a background white using my smartphone?
Yes. Apps like Snapseed, Pixelcut, or TouchRetouch allow you to remove backgrounds and replace them with white. Upload the image, use the cutout tool, erase the background, then add a white canvas behind it. Results vary based on image clarity.
Why does my white background look gray after saving?
This usually happens due to compression or incorrect RGB values. Make sure you’re filling the layer with true white (#FFFFFF). Also, avoid saving with transparency if you need solid white—ensure the background layer is locked and visible.
Is it better to shoot on a white backdrop or edit later?
Shooting on a physical white backdrop under even lighting gives the cleanest results and reduces post-processing time. However, editing digitally is more accessible and cost-effective for occasional use.
Conclusion
Transforming a photo’s background into a flawless white doesn’t require years of design experience. With intuitive tools like Remove.bg, Canva, or powerful software like Photoshop, anyone can produce professional-grade images in minutes. The key lies in attention to detail—ensuring clean edges, accurate color, and proper export settings. Whether you're managing an online store, preparing a portfolio, or enhancing social media content, mastering this technique adds polish and credibility to your visuals.


 浙公网安备
33010002000092号
浙公网安备
33010002000092号 浙B2-20120091-4
Comments
No comments yet. Why don't you start the discussion?