
Adding audio to a video is one of the most impactful ways to enhance storytelling, boost engagement, and deliver your message clearly. Whether you're creating social media content, educational videos, or personal projects, pairing the right sound with visuals can transform an average clip into something memorable. The good news? You don’t need expensive software or advanced skills to do it well. With the right approach, anyone can seamlessly integrate audio into their videos—quickly and professionally.
This guide walks through every essential stage: from choosing compatible audio formats to syncing sound perfectly with your footage. You’ll learn practical techniques, discover reliable tools, and avoid common pitfalls that degrade quality. By the end, you'll be equipped to produce polished videos with crisp, well-balanced audio.
Selecting the Right Audio and Video Formats
Before merging audio and video, ensure both files are in compatible formats. Mismatched codecs or container types can cause import errors, sync issues, or export failures. Most editing platforms support MP4 (video) and MP3 or WAV (audio), but knowing when to use which format matters.
| Format | Best For | Pros | Cons |
|---|---|---|---|
| MP4 + AAC Audio | Online sharing (YouTube, Instagram) | Widely supported, small file size | Slightly compressed audio |
| MOV + WAV | Professional editing and archiving | High quality, retains original data | Larger file sizes |
| AVI + MP3 | Legacy systems or older software | Good compatibility with Windows | Less efficient compression |
If your audio file isn’t playing in your editor, convert it first using free tools like Audacity (for audio) or HandBrake (for video). Always aim for a sample rate of 44.1kHz or 48kHz and stereo output unless working with surround sound.
Choosing the Right Editing Tool
The tool you choose depends on your technical comfort level and project needs. Here’s a breakdown of top options across skill levels:
- Beginner: iMovie (Mac), Clipchamp (web-based), Canva Video Editor – intuitive drag-and-drop interfaces with basic audio overlay features.
- Intermediate: DaVinci Resolve, Adobe Premiere Rush – more control over volume keyframes, transitions, and noise reduction.
- Advanced: Adobe Premiere Pro, Final Cut Pro – full multitrack editing, precise sync tools, and advanced audio effects.
For most users, DaVinci Resolve offers the best balance: it's completely free, supports high-resolution exports, and includes professional-grade audio tools like Fairlight for mixing.
“Audio clarity often matters more than video resolution. A viewer will forgive lower picture quality if the sound is clean.” — Mark Tran, Sound Designer & Post-Production Specialist
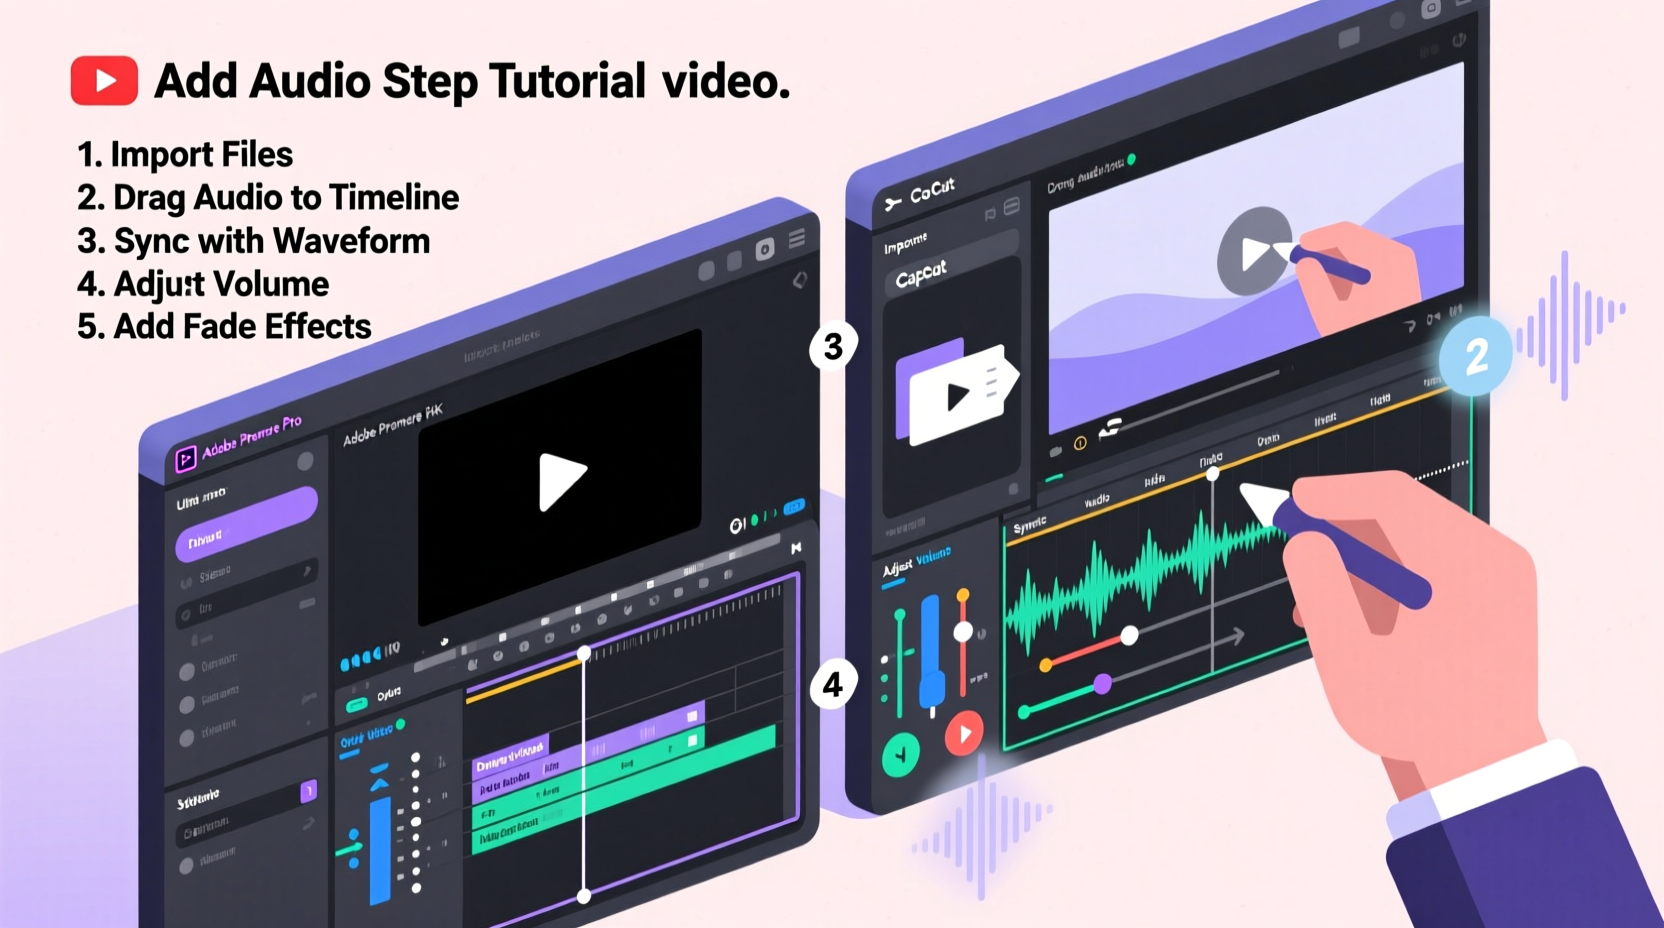
Step-by-Step Guide to Adding Audio to Your Video
Follow this universal workflow regardless of the software you use. While interface details vary, the core process remains consistent.
- Import Media: Open your editing software and import both the video and audio files into the project library.
- Create a New Project Sequence: Set the timeline settings to match your video’s resolution and frame rate (e.g., 1080p at 30fps).
- Add Video to Timeline: Drag the video clip onto the primary video track.
- Place Audio on Separate Track: Drag the audio file below the video on an audio track. Ensure it aligns correctly—usually starting at the same point as the video.
- Adjust Volume Levels: Use the volume envelope or keyframes to reduce background music when dialogue occurs. Aim for -6dB peak levels to prevent distortion.
- Synchronize If Needed: If audio was recorded separately, use waveform matching or clap sync points to align them precisely.
- Apply Audio Enhancements: Add noise reduction, equalization, or compression to improve clarity—especially important for voiceovers recorded on smartphones.
- Preview and Trim: Play back the entire sequence. Trim excess silence or overlap at the beginning and end.
- Export Final Video: Choose a high-quality preset (e.g., YouTube 1080p) and ensure audio is embedded in the output file.
Avoiding Common Audio-Video Sync Issues
Misaligned audio ruins viewer experience. Even a delay of 0.2 seconds can make speech feel “off.” Causes include inconsistent frame rates, variable recording speeds, or incorrect timecode settings.
To prevent sync drift:
- Record audio and video using devices set to the same sample and frame rate.
- Use external recorders with timecode synchronization when possible.
- In post-production, zoom into the timeline and manually align sharp transients (like claps or hand taps) between waveforms.
- Enable “ripple edit” to automatically close gaps when trimming clips.
If your audio consistently runs faster or slower than the video, check whether the original recording device had clock drift—a known issue with some DSLRs and audio recorders. Re-time the audio using stretch-to-fill features without altering pitch.
Mini Case Study: Podcast Trailer Production
Jessica, a freelance content creator, needed to turn a raw interview into a 60-second podcast teaser. She had a high-quality video of the host speaking but wanted to overlay upbeat background music and remove ambient noise.
She used DaVinci Resolve: imported the video and added royalty-free music on a second audio track. Using the EQ tool, she reduced low frequencies in the music to avoid masking the voice. Then, she applied noise reduction to the dialogue track, cutting HVAC hum from the original recording. Finally, she faded the music in and out smoothly and exported the video with embedded audio.
The result? A dynamic, professional-looking trailer shared across Instagram and LinkedIn that increased her client’s audience engagement by 40% within a week.
Checklist: Audio Integration Best Practices
Use this checklist before exporting any video with added audio:
- ✅ Confirm all media files are compatible with your editing software
- ✅ Back up original files before making edits
- ✅ Match audio sample rate to project settings (preferably 48kHz)
- ✅ Balance voice and background music levels (voice should dominate)
- ✅ Remove unwanted background noise or reverb
- ✅ Add crossfades between audio clips to eliminate pops
- ✅ Export a test version and play it on multiple devices
- ✅ Verify audio plays correctly on mobile, desktop, and silent autoplay platforms
Frequently Asked Questions
Can I add music to a video without losing quality?
Yes, as long as you export using a high-bitrate setting (e.g., 192kbps or higher for audio) and avoid repeatedly re-encoding the same file. Always work from original sources, not compressed versions.
How do I add voiceover to a video I already made?
Most editors allow you to record directly into the timeline. Position the playhead where narration should begin, create a new audio track, and use the built-in recording function. Alternatively, import a pre-recorded voiceover and align it manually.
Is it legal to use any music I find online?
No. Only use music licensed for your purpose. Royalty-free libraries like Pixabay, Free Music Archive, or paid services like Epidemic Sound provide safe options. Never pull audio from YouTube videos unless explicitly permitted.
Final Thoughts and Next Steps
Adding audio to a video doesn’t have to be complicated. With careful preparation, the right tools, and attention to detail, you can produce content that sounds as good as it looks. The key is consistency—establish a workflow that ensures clear dialogue, balanced levels, and perfect sync every time.
Now that you understand the fundamentals, try applying these steps to your next project. Experiment with different music styles, adjust pacing, and refine your technique. Great audio-video integration is a skill that improves with practice.


 浙公网安备
33010002000092号
浙公网安备
33010002000092号 浙B2-20120091-4
Comments
No comments yet. Why don't you start the discussion?