
Heel caps serve a crucial role in maintaining the structure and durability of dress shoes, boots, and other formal footwear. Over time, these rubber or leather components wear down, crack, or become detached—diminishing both function and appearance. Replacing them is often necessary, but removing the old heel cap without damaging the shoe requires precision and care. Done incorrectly, you risk warping the heel counter, splitting the sole, or weakening the bond between layers.
This comprehensive guide walks you through every phase of removing a heel cap safely and efficiently, whether you're preparing for replacement or restoring vintage footwear. From identifying materials to applying gentle heat and preserving structural integrity, each step ensures minimal impact on your shoe’s original form.
Why Remove a Heel Cap?
The most common reason for removing a heel cap is visible wear: fraying edges, separation from the sole, or deep grooves from pavement friction. But beyond aesthetics, damaged heel caps can lead to instability, uneven gait, and accelerated degradation of the midsole and shank. In some cases, moisture may seep into the heel stack, promoting internal mold or delamination.
Additionally, collectors and cobblers sometimes remove heel caps during full resoling or restoration projects. Vintage shoe enthusiasts may replace outdated rubber caps with period-accurate leather ones for authenticity. Regardless of intent, proper removal preserves the shoe's value and prolongs its usable life.
“Improper heel cap removal is one of the top causes of avoidable damage in repair shops. A few minutes of patience saves hours of reconstruction.” — Daniel Reeves, Master Clogger & Footwear Restorer
Tools and Materials You’ll Need
Before beginning, gather the right tools. Using improper instruments—like kitchen knives or pliers—can gouge leather or peel off finish. The following list covers essentials for a clean, controlled process:
- Plastic pry tool or wooden shoehorn – For lifting edges without scratching
- Heat gun or hair dryer – Softens adhesive without scorching material
- Cotton swabs or soft cloth – To apply solvents gently
- Isopropyl alcohol (70%) – Helps dissolve stubborn glue residues
- Fine-grit sandpaper (220–400) – Prepares surface for reattachment
- Small brush (toothbrush works) – Removes debris from crevices
- Protective gloves – Prevents skin contact with chemicals
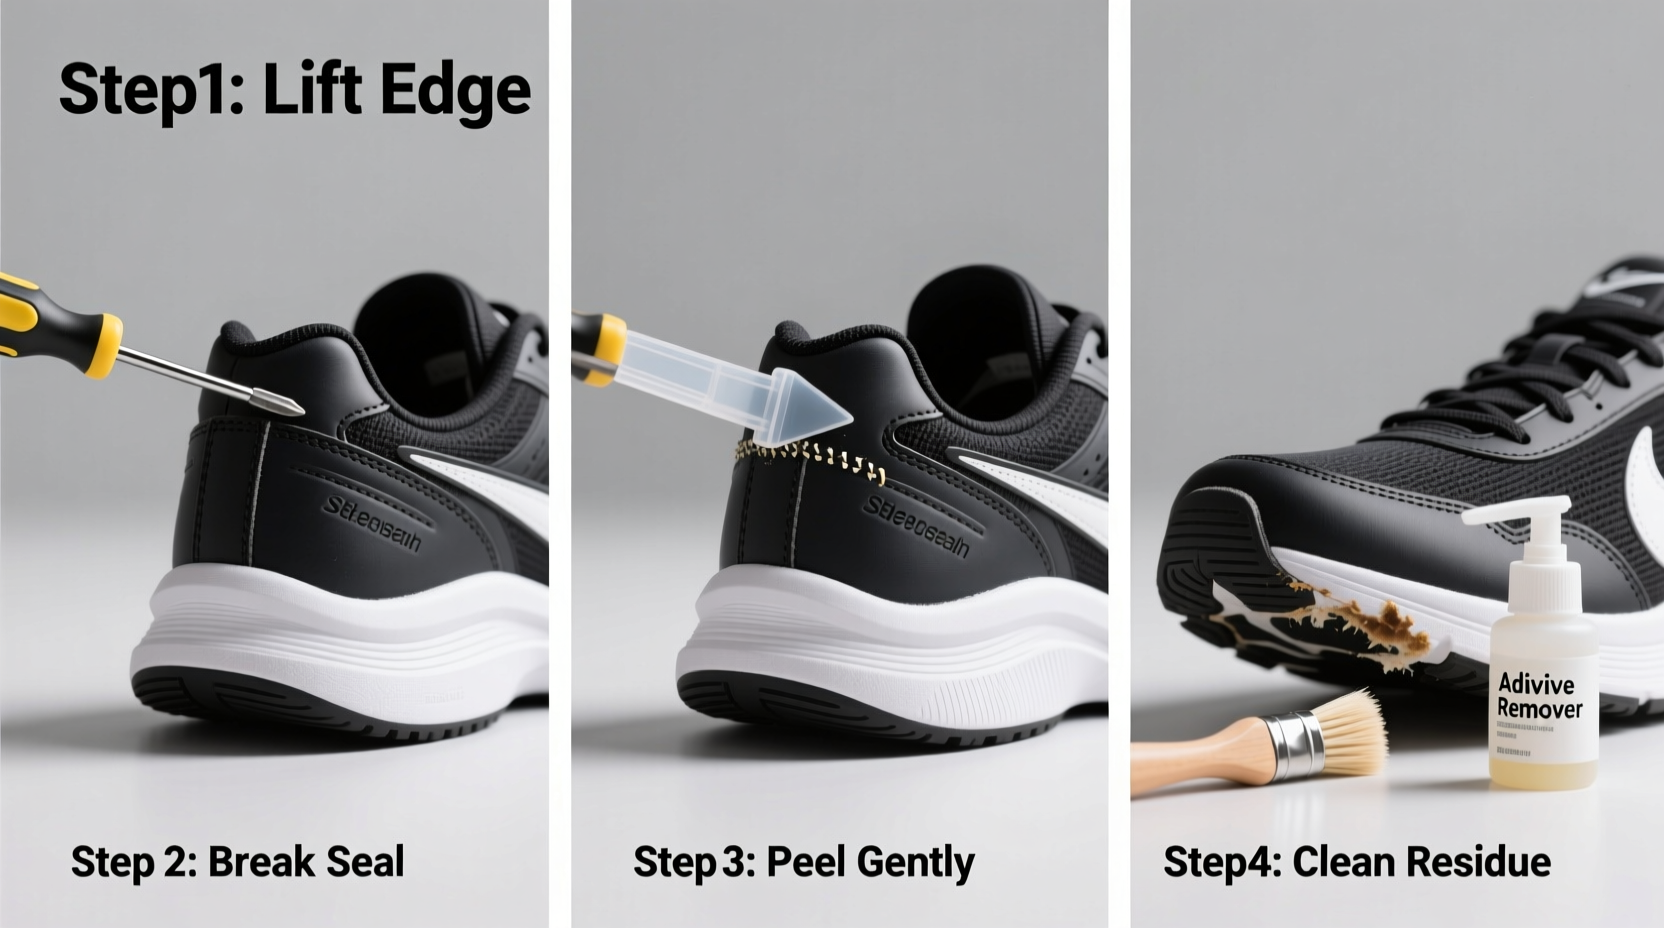
Step-by-Step Removal Process
- Inspect the heel cap
Determine if it’s fully adhered or already peeling. Note the material—rubber, thermoplastic, or leather—as each responds differently to heat and solvents. - Apply low heat evenly
Set your heat gun or hair dryer to medium (no higher than 150°F). Hold it 3–4 inches from the cap for 30–45 seconds. Rotate the shoe to distribute warmth uniformly. This softens the adhesive without melting surrounding materials. - Lift an edge carefully
Using a plastic tool, gently slide under a slightly raised corner. Work slowly—do not force it. If resistance occurs, reapply heat before proceeding. - Pull outward, not upward
Once lifted, pull the cap away from the heel at a shallow angle (about 30 degrees). This reduces stress on the bonding layer and prevents tearing the underlying leather. - Continue heating and peeling
Alternate between brief heating and slow peeling. Maintain steady tension. Avoid jerking motions that could rip embedded fibers. - Clean residual adhesive
After removal, use a cotton swab dampened with isopropyl alcohol to wipe away leftover glue. Let dry completely before sanding lightly to create a smooth bonding surface. - Inspect the heel base
Check for cracks, moisture damage, or exposed stitching. Address any structural issues before installing a new cap.
Do’s and Don’ts: Best Practices Summary
| Do’s | Don’ts |
|---|---|
| Use low, consistent heat to loosen adhesive | Apply direct flame or excessive heat (>180°F) |
| Pull the cap at a shallow angle | Yank vertically or use sharp metal tools |
| Clean residue with alcohol after removal | Soak the heel in liquid or scrub aggressively |
| Allow the shoe to cool and dry fully before next steps | Proceed immediately to gluing without surface prep |
| Wear gloves when handling solvents | Work in poorly ventilated areas with open chemicals |
Real Example: Restoring a Vintage Oxford
James, a vintage footwear collector in Boston, acquired a pair of 1950s Church’s Oxfords in need of refurbishment. The heel caps were cracked and flaking, but the uppers remained pristine. Rather than sending them to a cobbler, he attempted removal using a butter knife—and nearly split the stacked leather heel.
After pausing the project, he researched proper technique and restarted with a heat gun and plastic wedge. By reheating in 20-second intervals and pulling gently, he removed both caps intact within ten minutes. He cleaned the surface with alcohol, sanded lightly, and applied new leather heel protectors using contact cement. The result? A historically accurate restoration that preserved the shoe’s original character and extended its wearable life by years.
Tips for Different Shoe Types
Not all heel caps are created equal. The method varies depending on construction and material:
- Dress Shoes (Leather Soles): Most have thin rubber caps bonded with flexible adhesive. Heat sensitivity is high—use only a hair dryer on low setting.
- Work Boots: Often feature thick thermoplastic heel units riveted or heavily glued. May require longer heat exposure and solvent soaking.
- Suede or Nubuck: Extremely sensitive to moisture and heat. Limit exposure and avoid alcohol-based cleaners near the upper.
- Synthetic Footwear: Can melt easily. Keep heat below 130°F and work quickly once softening begins.
FAQ
Can I reuse the same heel cap after removing it?
Generally, no. Once detached, the shape often warps and the adhesive surface degrades. Even if it appears intact, reattaching it compromises durability. Always replace with a new cap designed for your shoe type.
Is it safe to remove a heel cap at home?
Yes—if done carefully with the right tools. Most failures occur due to impatience or incorrect equipment. With proper technique, even beginners can complete the task successfully. However, for rare, expensive, or structurally compromised shoes, consult a professional cobbler.
How long does the entire process take?
Plan for 20–40 minutes per shoe, including inspection, heating, removal, and cleanup. Allow additional drying time if using solvents or preparing for reattachment.
Final Checklist Before You Begin
- Identify the material of the heel cap and sole
- Gather all necessary tools (plastic pry tool, heat source, alcohol, brush)
- Work in a well-lit, ventilated area
- Test heat on a small, inconspicuous area first
- Ensure the shoe is clean and dry before starting
- Set aside enough time to avoid rushing
Conclusion: Take Control of Your Shoe Care
Removing a heel cap doesn’t require advanced skills—just attention to detail and respect for materials. By following this methodical approach, you protect your investment, maintain structural integrity, and gain confidence in handling future repairs. Whether you're restoring heirloom footwear or simply extending the life of everyday shoes, mastering this technique empowers you to act rather than replace.


 浙公网安备
33010002000092号
浙公网安备
33010002000092号 浙B2-20120091-4
Comments
No comments yet. Why don't you start the discussion?