
Switching your SIM card is a routine task—whether you're upgrading your phone, switching carriers, or traveling internationally. However, many users worry that replacing the SIM might erase personal data like contacts, messages, or account settings. The truth is, your SIM card stores only limited information, primarily your phone number, carrier details, and saved contacts (if you’ve chosen to store them there). Most of your data lives on your device’s internal storage or in cloud accounts. With the right approach, changing your SIM can be seamless and risk-free.
This guide walks you through the process with precision, offering best practices to ensure no critical data is lost during the transition. Whether you’re using an iPhone or an Android device, these steps will help you switch SIM cards confidently and securely.
Understanding What a SIM Card Does (and Doesn’t) Store
Before removing your old SIM or inserting a new one, it’s essential to understand what information resides on the SIM versus what’s stored elsewhere:
- Stored on SIM: Phone number, network authentication keys, and optionally, contacts (if manually saved to SIM).
- Not stored on SIM: Text messages, photos, apps, emails, app data, calendar events (unless synced via carrier), and passwords.
Your messages, media, and application data are either kept on your phone’s internal memory or backed up to services like iCloud (iOS) or Google Drive (Android). Therefore, swapping SIMs doesn’t inherently delete this information—provided you don’t factory reset your device accidentally.
Essential Pre-Switch Checklist
To avoid surprises when changing your SIM, follow this checklist before touching the tray:
- Back up all contacts to your cloud account (Google or iCloud).
- Verify your current phone number and carrier settings.
- Ensure your device is charged to at least 50% to prevent shutdowns during setup.
- Locate your SIM eject tool or use a paperclip.
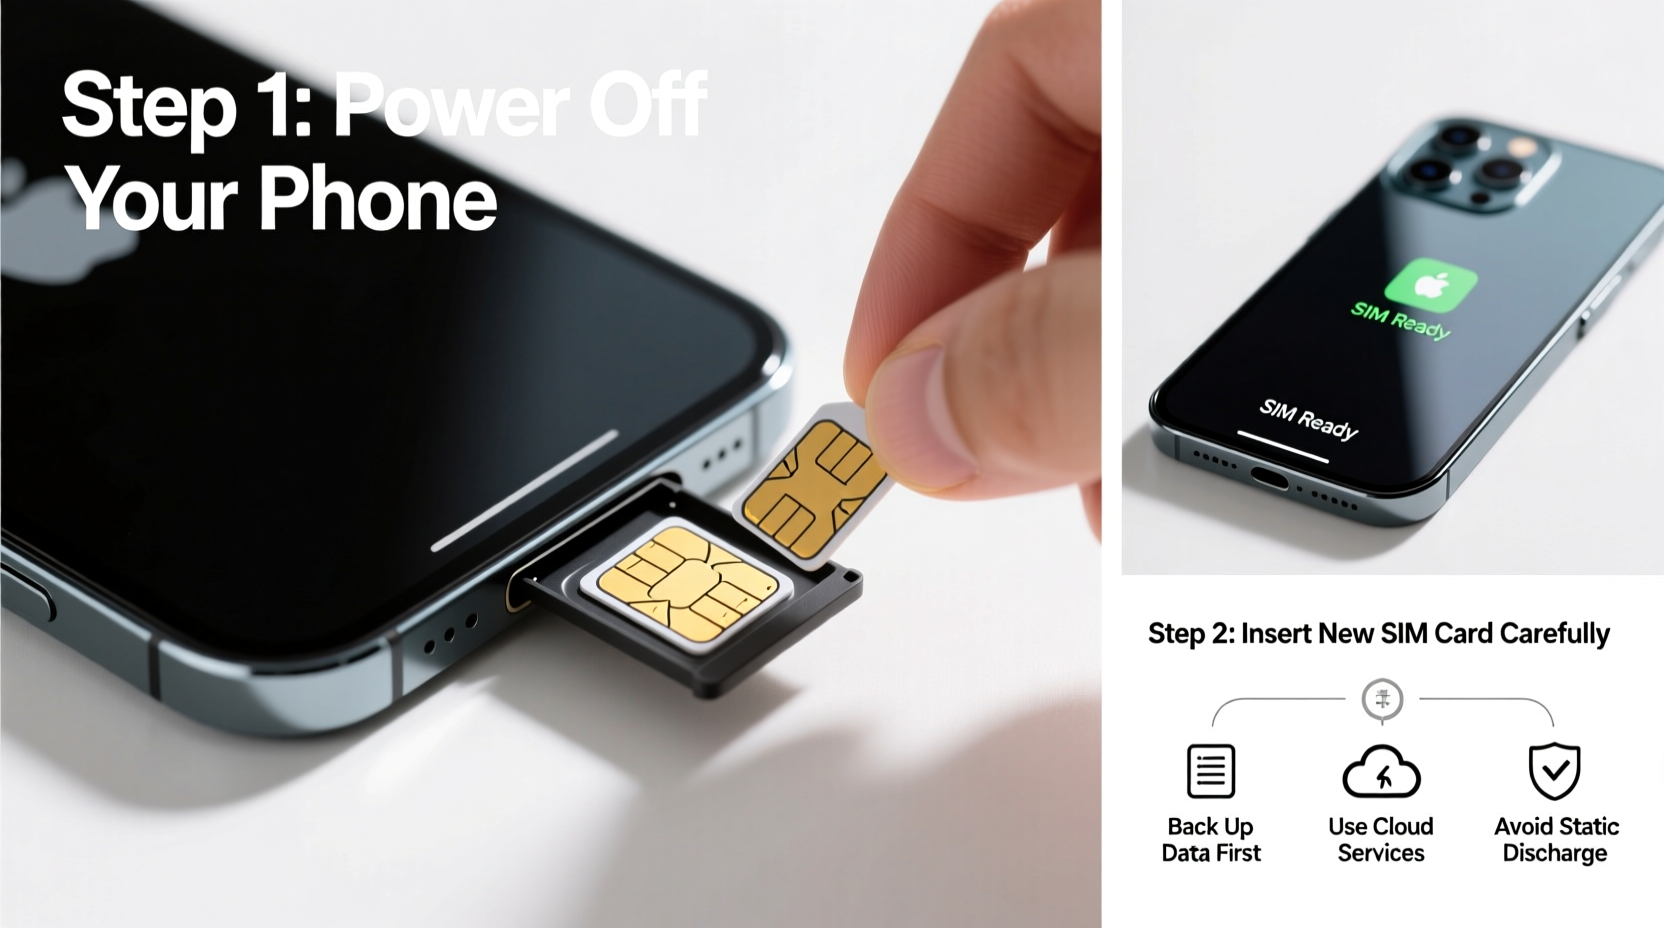
- Power off your phone before removing the SIM.
- Confirm the new SIM size (nano, micro, standard) matches your device’s requirement.
Skipping even one of these steps could result in temporary service loss, missing contacts, or confusion during activation. Taking ten minutes now saves hours of troubleshooting later.
Step-by-Step Guide to Safely Change Your SIM Card
Follow this detailed sequence to replace your SIM without data loss:
- Back Up Contacts
Go to Settings > Accounts > Google (or iCloud) and ensure contact sync is enabled. Manually trigger a sync if needed. For added safety, export contacts as a .vcf file and email it to yourself. - Power Down Your Device
Turn off your phone completely. Removing a SIM while powered on can cause system errors or corrupt carrier profiles. - Locate the SIM Tray
On most smartphones, the tray is on the side frame. Refer to your device manual if unsure. iPhones typically have it on the right edge; many Android phones place it on the top or bottom. - Eject the Tray
Insert the SIM eject tool (or bent paperclip) into the small pinhole next to the tray. Apply gentle pressure until the tray pops out. Handle it carefully to avoid dropping. - Remove Old SIM, Insert New One
Slide the old SIM out and replace it with the new one. Align the notch correctly—most nano-SIMs have a cut corner that matches the tray’s shape. Do not force it. - Reinsert the Tray
Gently push the tray back into the slot until it clicks. Avoid over-pushing, which can damage the connector. - Power On and Activate
Turn on your phone. It may take 1–2 minutes to detect the new SIM. If prompted, enter your carrier’s APN settings or allow automatic configuration. - Verify Service and Number
Make a test call, send a message, and check mobile data. Confirm your number appears correctly in Settings > Phone.
If your phone doesn’t recognize the SIM, try reseating it or contact your carrier for activation support.
Common Mistakes and How to Avoid Them
Even experienced users make avoidable errors when handling SIM cards. Here’s a comparison of best practices versus common pitfalls:
| Do’s | Don’ts |
|---|---|
| Back up contacts to cloud before switching | Assume contacts saved on SIM are sufficient |
| Power off device before ejection | Remove SIM while phone is running |
| Use proper lighting and clean surface | Work over carpet or cluttered areas where small parts can be lost |
| Verify SIM size compatibility | Force a larger SIM into a smaller slot |
| Contact carrier if activation fails | Repeatedly restart phone without checking signal settings |
Real-World Example: Traveler Avoids Data Loss Abroad
Sophie, a digital nomad from Seattle, travels frequently between the U.S. and Europe. Last year, she switched to a local European SIM to reduce roaming fees. Before landing, she backed up her contacts to Google, powered down her Android phone, and inserted the new SIM. Upon arrival, her phone connected instantly to the local network. Her WhatsApp messages, photos, and emails remained intact because they were tied to her Google and app accounts—not the SIM. She made calls using her new local number while keeping her U.S. number active on her smartwatch via eSIM. By planning ahead, Sophie avoided service gaps and preserved all her personal data.
“Your SIM is just a key to the network—it doesn’t hold your life. But without proper syncing, you might lose access to part of it.” — Raj Mehta, Mobile Network Engineer at T-Mobile
Frequently Asked Questions
Will I lose my text messages when I change my SIM?
No, text messages are stored on your phone’s internal memory, not the SIM card. As long as you don’t erase your device or skip backups, your messages will remain after the SIM swap.
Can I transfer WhatsApp to a new SIM with the same number?
Yes. If you keep the same phone number, WhatsApp will verify via SMS when you reinstall or restart the app. Your chat history stays on your device or in Google/iCloud backup, depending on your settings.
What should I do if my phone says ‘No Service’ after inserting the new SIM?
First, restart the phone. Then check if the SIM is properly seated. If the issue persists, go to Settings > General > About and wait 30 seconds—iOS and Android often refresh carrier settings automatically. If still unresolved, contact your carrier to confirm the SIM is activated.
Final Steps and Best Practices
After successfully changing your SIM, take a few extra moments to ensure everything functions as expected. Test voice calls, messaging, and mobile data. Double-check that your correct number appears in your phone app and messaging services. If you use two-factor authentication (2FA) linked to your phone number, verify that login codes still arrive properly.
For future-proofing, consider setting up an eSIM if your phone supports it. This digital SIM eliminates physical swaps entirely and allows dual-number functionality—ideal for travelers or business users.
Take Action Today—With Confidence
Changing your SIM card doesn’t have to be stressful. Armed with the right knowledge and preparation, you can switch carriers, upgrade devices, or travel internationally without losing a single contact or message. The key is proactive backup, careful handling, and understanding where your data truly lives. Don’t wait for an emergency to learn this—practice the steps now, even if you’re not switching immediately. That way, when the time comes, you’ll move with confidence, not caution.


 浙公网安备
33010002000092号
浙公网安备
33010002000092号 浙B2-20120091-4
Comments
No comments yet. Why don't you start the discussion?