
A well-chosen keychain charm can transform an ordinary purse into a personalized fashion statement. Beyond aesthetics, attaching a charm serves a practical purpose—making your bag instantly recognizable in crowded spaces and reducing the risk of misplacement. However, poorly attached charms often dangle loosely or detach completely, posing both a style and safety hazard. When a charm breaks free, it can not only be lost but also damage delicate linings or snag on clothing.
The goal is simple: achieve a secure, long-lasting attachment that enhances your bag’s appearance without compromising its integrity. Whether you’re accessorizing a leather tote, a crossbody sling, or a designer clutch, this guide walks you through the right tools, techniques, and materials to ensure your charm stays put—safely and stylishly.
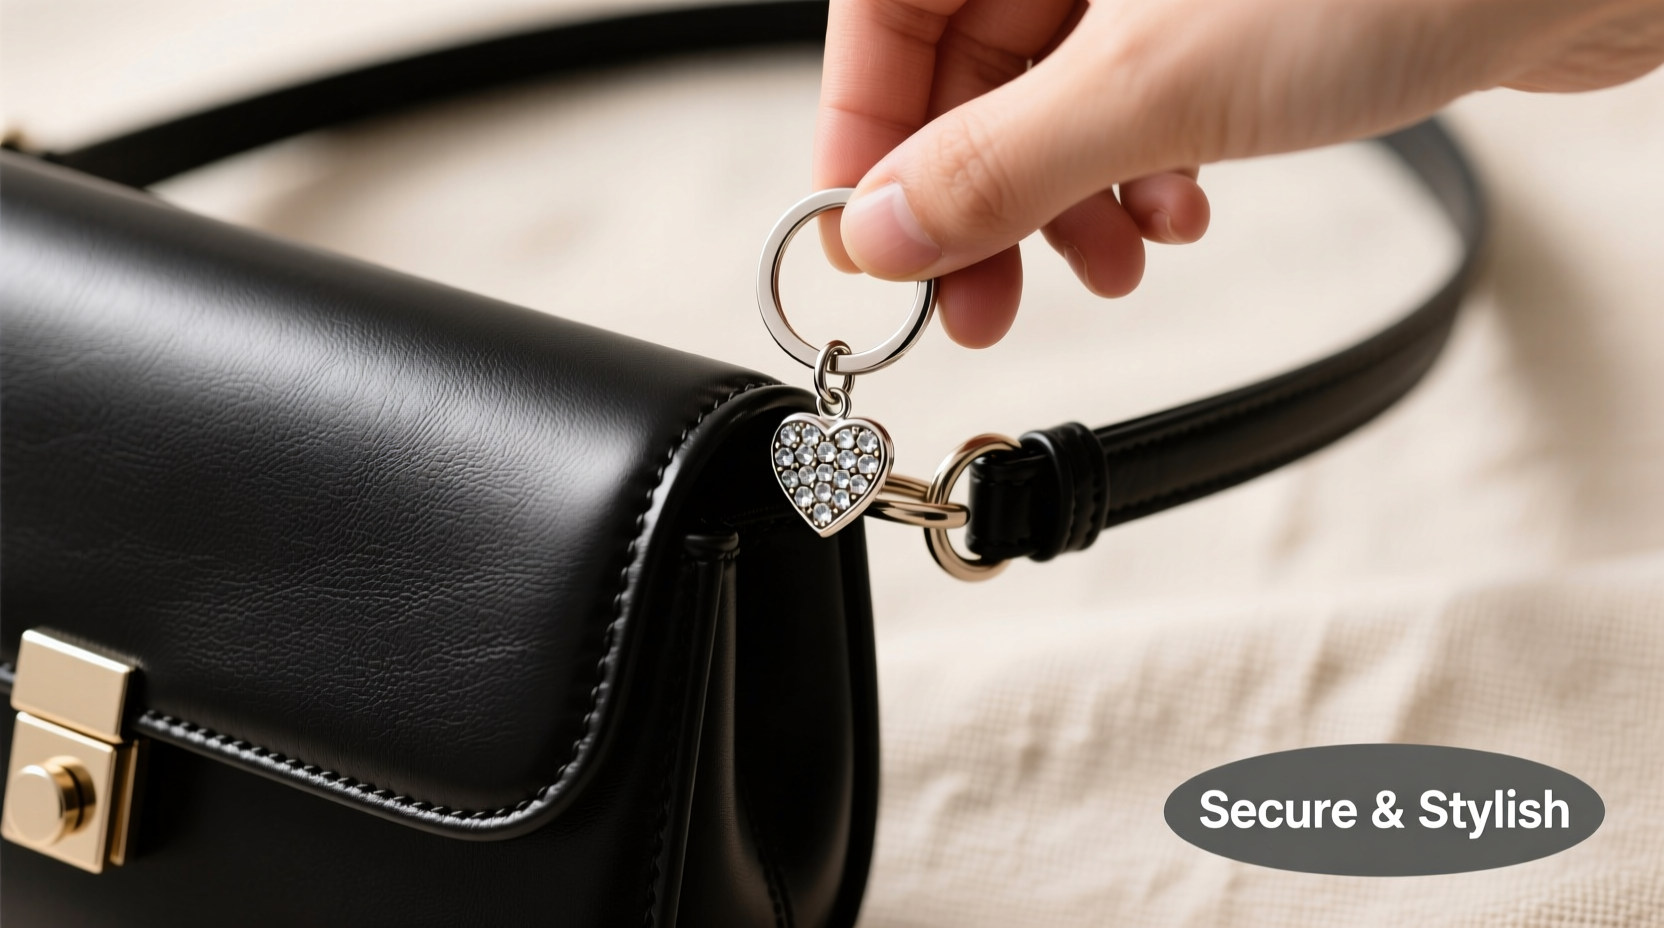
Why Secure Attachment Matters
Many people overlook the importance of proper charm installation, assuming a simple clip-on or loop-through method is sufficient. In reality, everyday movement, friction from sitting, and accidental tugs can weaken weak connections over time. A charm that detaches mid-commute isn’t just inconvenient—it could get caught in doors, machinery, or even cause injury if yanked suddenly.
Beyond safety, preserving your purse’s structure is crucial. Repeated stress on stitching or hardware from a heavy or swinging charm may lead to premature wear. High-end bags, especially those made with delicate fabrics or structured frames, require thoughtful customization to avoid voiding warranties or causing irreparable damage.
“Accessories should enhance, not endanger, your handbag. A securely fastened charm reflects both personal taste and responsible care.” — Lena Torres, Handbag Stylist & Accessory Consultant
Essential Tools and Materials
Before beginning, gather the necessary supplies. Using the right tools ensures a clean, professional result and reduces the risk of damaging your purse.
| Item | Purpose | Recommended Type |
|---|---|---|
| Split Ring or Lobster Clasp | Secure connector between charm and bag | Stainless steel, 8–10mm diameter |
| Jump Ring Pliers | Open and close metal rings safely | Chain-nose or bent-nose pliers |
| Keychain Charm | Decorative element | Lightweight (under 1 oz), with built-in loop or attachment point |
| Reinforcement Washer (optional) | Distributes pressure on fabric or soft straps | Small metal or plastic disc |
| Leather Punch (if needed) | Create clean holes in leather without tearing | Rotary hole punch, 3–4mm size |
Step-by-Step Installation Process
Follow this detailed sequence to attach your charm securely, whether using existing hardware or creating a new anchor point.
- Evaluate Attachment Options: Inspect your purse for natural anchor points—zippers, D-rings, strap rivets, or top handles. These are ideal because they’re already reinforced.
- Select Your Connector: Choose a split ring for durability or a lobster clasp for easy swapping. Ensure the opening mechanism works smoothly.
- Prepare the Charm: If your charm lacks a direct loop, use a small jump ring to connect it to the main ring. Open the jump ring sideways using pliers—never pull it apart, as this weakens the metal.
- Attach to Bag Hardware: Hook the split ring through the chosen D-ring or zipper pull. Rotate it fully closed using pliers to prevent gaps.
- Add Reinforcement (for Soft Materials): On canvas or fabric bags without hardware, consider installing a grommet or using a leather washer behind the attachment point to prevent tearing.
- Test Stability: Gently tug the charm to confirm it doesn’t slip or rotate freely. It should move slightly but remain firmly fixed.
- Final Check: Ensure the charm doesn’t interfere with zippers, clasps, or strap adjustments. Trim excess chain or links if necessary.
Common Mistakes and How to Avoid Them
Even experienced accessory enthusiasts make errors when attaching charms. Awareness of these pitfalls leads to smarter decisions.
- Using flimsy keyrings: Thin, decorative rings break easily under tension. Always opt for solid metal connectors.
- Overloading a single point: Attaching multiple heavy charms to one ring strains the connection. Distribute weight across separate anchors.
- Piercing unsupported areas: Drilling into thin leather or synthetic material without backing causes fraying. Use washers or consult a repair specialist.
- Ignoring daily wear patterns: A charm that swings near the floor while walking risks catching on stairs or furniture. Position it higher or choose a shorter chain.
Real-World Example: Sarah’s Commuter Tote Upgrade
Sarah, a graphic designer in Chicago, wanted to personalize her black vegan-leather tote used daily on public transit. She chose a minimalist brass star charm but initially attached it with a thin keyring clipped to the side D-ring. Within two weeks, the ring snapped during rush hour, and the charm vanished into a subway turnstile.
After researching secure methods, she replaced it using a stainless steel split ring and added a rubber stopper bead to limit swing. She now checks the connection monthly and swaps charms seasonally using a lobster clasp system. Her bag remains distinctive, and she hasn’t lost another accessory since.
Do’s and Don’ts Summary
| Action | Do | Don't |
|---|---|---|
| Attachment Method | Use split rings or lobster clasps | Clip on with flimsy carabiners |
| Charm Weight | Keep under 1.5 ounces | Add bulky metal pendants |
| Installation Location | Anchor to D-rings or reinforced seams | Pierce unlined fabric randomly |
| Maintenance | Inspect monthly for wear | Forget about it after installation |
Frequently Asked Questions
Can I attach a charm to a silk or delicate purse?
Yes, but avoid piercing the material. Instead, use a removable ribbon threaded through a secure handle or frame, then attach the charm to the ribbon. This preserves the fabric and allows for easy removal.
What if my purse has no D-rings or loops?
You can add a small metal ring via a grommet kit or have a leatherworker install a discreet anchor point. Alternatively, use a charm that clips onto the zipper pull—just ensure the clip is strong and lined with rubber to prevent slippage.
How do I clean a charm without removing it?
Wipe gently with a soft cloth dampened with water and mild soap. For metal tarnish, use a jewelry polishing cloth. Avoid submerging the charm or letting liquid seep into the connection point, which can corrode internal mechanisms.
Final Checklist Before You Attach
- ✅ Choose a lightweight, smooth-edged charm
- ✅ Confirm the presence of a secure attachment point (D-ring, zipper, handle)
- ✅ Use high-quality metal connectors (split ring or lobster clasp)
- ✅ Prepare tools: pliers, optional punch or grommet
- ✅ Test stability after installation
- ✅ Verify charm doesn’t obstruct functionality
- ✅ Schedule periodic inspections
Conclusion: Style Meets Smart Functionality
Attaching a keychain charm to your purse shouldn’t be a gamble between fashion and function. With the right approach, you gain both—a unique look and peace of mind knowing your accessory won’t vanish or cause harm. The process takes less than ten minutes but pays off in longevity, security, and personal expression.


 浙公网安备
33010002000092号
浙公网安备
33010002000092号 浙B2-20120091-4
Comments
No comments yet. Why don't you start the discussion?