
Creating an elegant, polished manicure at home no longer requires advanced nail art skills. Bowknot nail stickers offer a stylish shortcut to a sophisticated look, but their longevity and finish depend heavily on proper application. When applied correctly, these delicate designs can last over a week with minimal chipping—rivaling the results of a high-end salon visit. The key lies in meticulous prep, precise placement, and protective sealing. This guide walks you through every stage of the process, ensuring your bowknot nail stickers deliver both beauty and durability.
Why Bowknot Nail Stickers Are Gaining Popularity
Bowknots evoke timeless femininity and charm, making them a favorite motif in fashion and accessories. In nail art, they add dimension and elegance without requiring freehand painting or 3D sculpting. Nail stickers featuring bowknots are typically made from thin vinyl or gel-based materials that adhere smoothly to the nail surface. They come pre-designed in various colors, finishes (matte, glossy, metallic), and sizes, allowing customization for any occasion—from bridal showers to office wear.
The appeal isn’t just aesthetic. Compared to traditional polish layers or acrylic embellishments, bowknot stickers reduce drying time, eliminate smudging risks, and simplify removal. However, many users report peeling edges or premature lifting within days. These issues stem not from the product itself, but from improper preparation and finishing.
“Sticker-based nail art can last as long as dip or gel if the surface is properly prepped and sealed.” — Lila Nguyen, Master Nail Technician & Educator
Essential Tools and Materials Checklist
Before beginning, gather all necessary supplies. Having everything ready prevents interruptions that could compromise adhesion due to dust or partial drying.
- Nail file and buffer block (180/240 grit)
- Cuticle pusher or orange wood stick
- Acetone-free nail cleanser or rubbing alcohol
- Lint-free wipes or soft cloth
- Bowknot nail stickers (quality-assured brand recommended)
- Top coat (preferably quick-dry, ridge-filling formula)
- Base coat (optional but advised for added protection)
- UV/LED lamp (only if using gel top coat)
- Tweezers or toothpick (for precise sticker placement)
- Nail oil (jojoba or vitamin E-based, for post-application care)
Step-by-Step Application Process
Achieving a salon-quality result hinges on precision and patience. Follow this timeline carefully to maximize wear time and visual appeal.
- Remove old polish: Use acetone-free remover to avoid overdrying the nail plate. Wipe each nail thoroughly until clean.
- Shape and smooth: File nails into desired shape (almond, square, oval). Then use a buffer in one direction only to create a slightly matte surface—this increases sticker grip.
- Push back cuticles: Gently nudge cuticles using a cuticle pusher. Avoid cutting unless absolutely necessary, as fresh cuts increase infection risk and moisture exposure.
- Clean the nail bed: Apply nail cleanser or 70% isopropyl alcohol with a lint-free wipe. Let nails air dry completely; moisture is the enemy of adhesion.
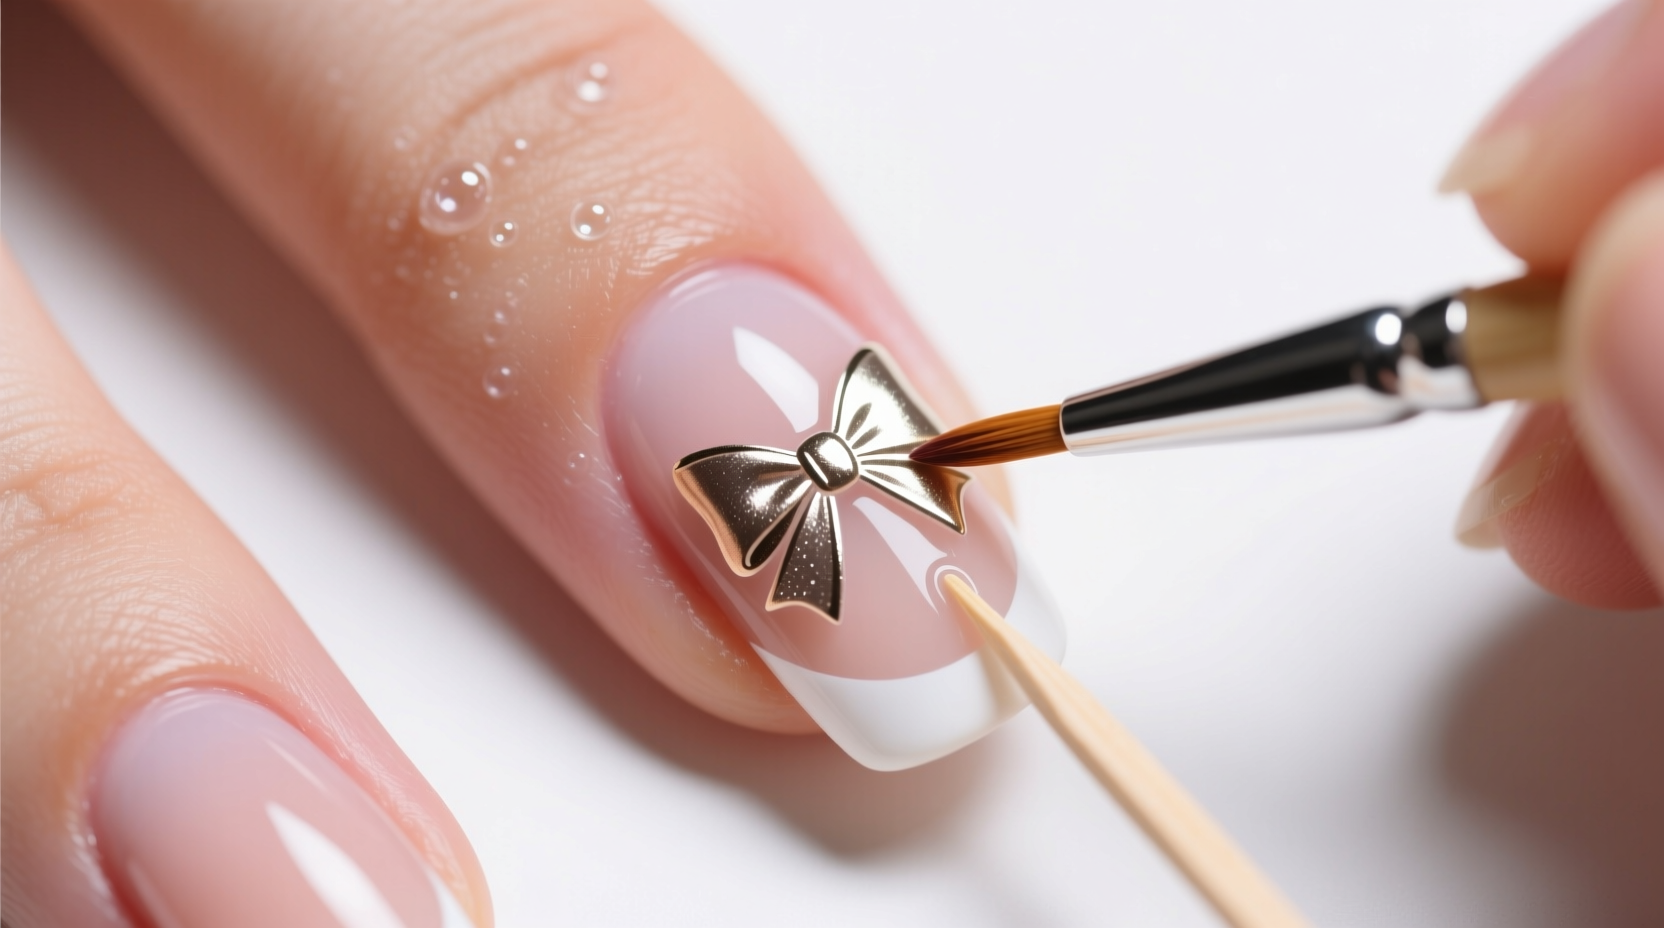
- Select and position the sticker: Using tweezers, lift the bowknot sticker from its backing. Hold it above the nail to visualize placement—typically centered near the tip or slightly offset for asymmetry.
- Apply with pressure: Place one edge down first, then slowly lower the rest like closing a book. Press firmly across the entire sticker, especially around the knot’s creases where air pockets form.
- Seal the edges: Run the rounded end of a toothpick along the perimeter to ensure full contact. Any lifted corner will catch on fabric and peel quickly.
- Apply base and top coats: For best results, apply a thin layer of base coat before sticking (if going for extra hold), then seal generously with two layers of top coat. Extend the top coat slightly over the sticker edges to “tuck” them in.
- Cure or dry: If using a gel top coat, cure under UV/LED light per manufacturer instructions (usually 30–60 seconds). With regular polish, allow 5 minutes between layers and 15 minutes after final coat before use.
- Maintain with nail oil: After the top coat has fully set, apply a drop of cuticle oil around each nail. This hydrates the skin without weakening the bond.
Do’s and Don’ts: Table of Best Practices
| Do’s | Don’ts |
|---|---|
| Buff nails lightly for better adhesion | Use excessive force when filing or buffing |
| Work in a dust-free environment | Touch stickers with oily fingers |
| Press stickers down with even pressure | Stretch or fold stickers during placement |
| Seal edges with thick, wrap-around top coat | Skip the top coat to “save time” |
| Reapply top coat every 2–3 days | Peel off stickers when removing—soak instead |
Real-World Example: From Frustration to Flawless Finish
Sophia, a marketing executive based in Portland, had tried bowknot stickers twice before giving up. “The first time, they started peeling after one day. The second time, the design bubbled near the cuticle,” she said. After following the full prep-and-seal method—including buffing, alcohol cleansing, and double-layered gel top coat—her third attempt lasted nine days with only minor tip wear. “I wore gloves washing dishes and reapplied top coat midweek. No one believed I did it myself.” Her experience underscores how technique outweighs product alone.
Frequently Asked Questions
Can I apply bowknot stickers over gel polish?
Yes, but only if the gel surface is lightly buffed first. Glossy gel acts as a barrier, preventing strong adhesion. A gentle scuff with a fine buffer creates micro-grip without damaging the underlying polish.
How do I remove bowknot stickers without damaging my nails?
Soak a cotton pad in acetone-free remover, place it over the nail, and wrap with foil for 5–8 minutes. Gently slide the sticker off with a wooden stick. Never pull or peel aggressively. Follow with moisturizer to restore hydration.
Are bowknot stickers suitable for short nails?
Absolutely. Opt for mini-sized bowknots or place them vertically near the side edge to create the illusion of length. Avoid oversized stickers that extend beyond the nail edge, as they’ll snag easily.
Final Tips for Long-Lasting Results
Durability begins long after the sticker is placed. Daily habits play a crucial role. Wear gloves during chores involving water or cleaning agents. Reapply a clear top coat every few days to reinforce the seal. Avoid using your nails as tools—for opening packages or scratching surfaces—as impact stress leads to early lifting.
Also, consider your lifestyle when choosing sticker type. Flexible vinyl works well for active users, while thicker gel stickers offer more dimension but may be prone to catching on fabrics. Matching material to usage ensures both comfort and longevity.
Conclusion: Elevate Your At-Home Manicure Game
With the right approach, bowknot nail stickers transform from temporary decor into resilient, head-turning statements. The difference between a cheap-looking application and a salon-worthy finish lies in attention to detail—from nail prep to post-care. By treating the process with the same seriousness as a professional service, you invest not just in appearance, but in confidence. Whether you're preparing for a special event or simply want to feel polished in everyday life, this method empowers you to achieve lasting elegance on your own terms.


 浙公网安备
33010002000092号
浙公网安备
33010002000092号 浙B2-20120091-4
Comments
No comments yet. Why don't you start the discussion?