
A sturdy, well-designed grooming table arm is essential for safely securing dogs during grooming sessions. Whether you're setting up a home grooming station or outfitting a professional salon, the right arm ensures stability, reduces strain on the groomer, and keeps pets calm and secure. Commercial arms can be expensive and sometimes lack customization. Building your own allows you to tailor strength, height, reach, and adjustability to your specific needs. This guide walks through every phase of constructing a high-quality, long-lasting grooming table arm using accessible materials and tools.
Why Build Your Own Grooming Table Arm?
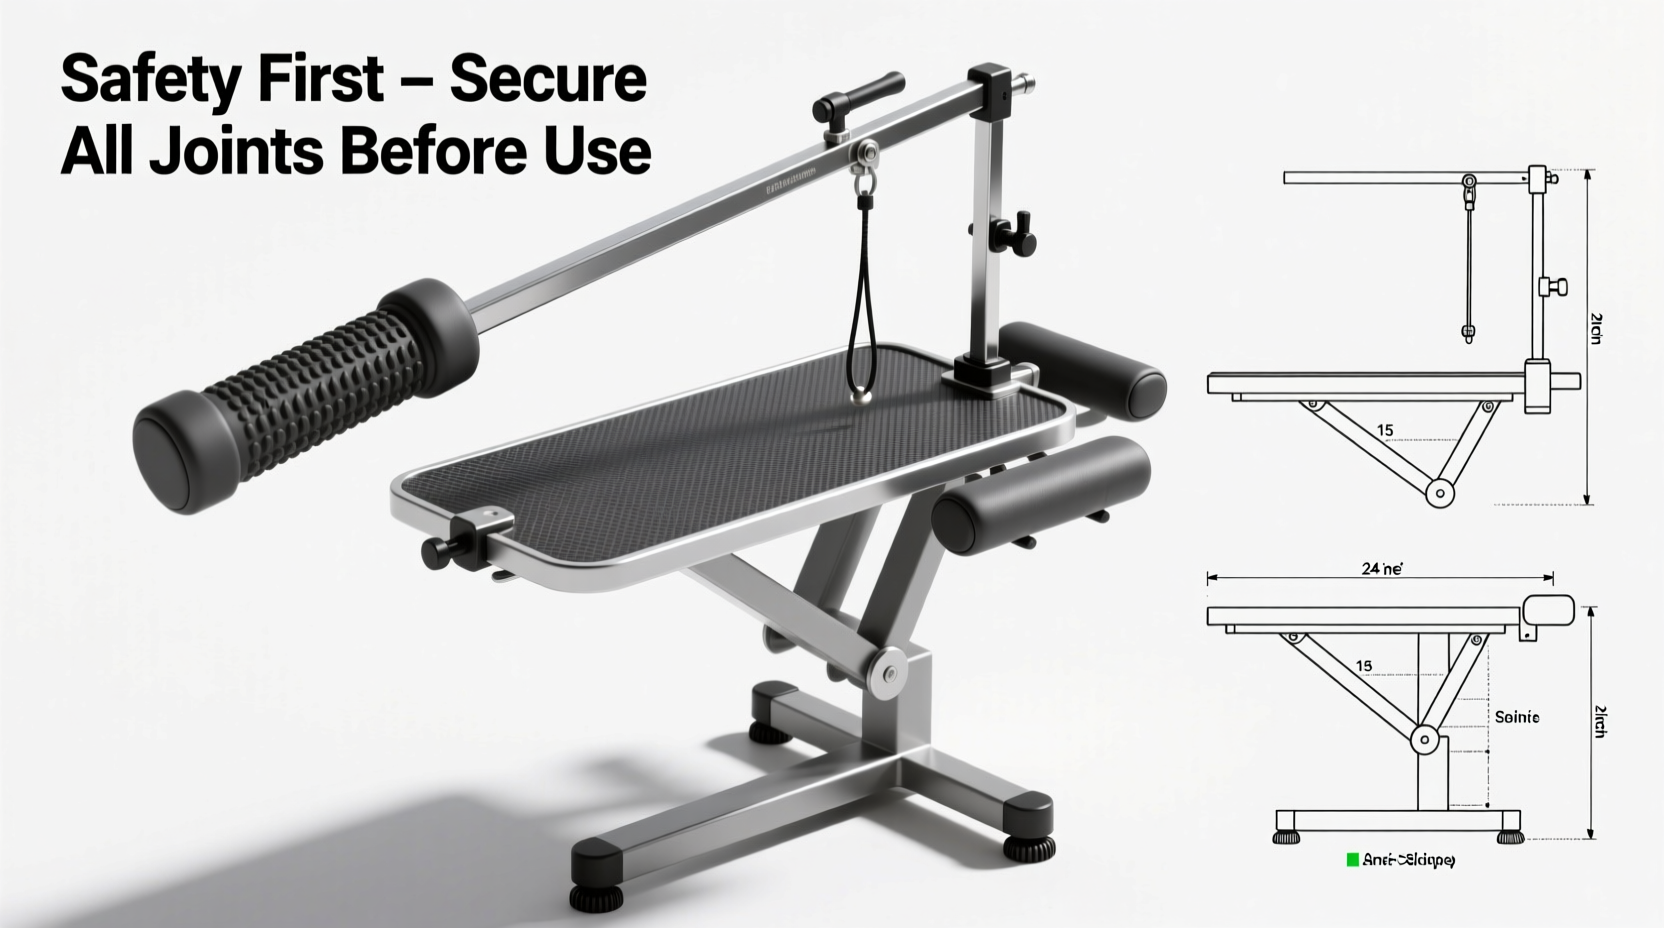
Prefabricated grooming arms often come with limitations—fixed lengths, weak clamps, or poor pivot points that wear out quickly. By building your own, you gain full control over durability, ergonomics, and adaptability. A custom arm can accommodate different table heights, support heavier dogs, and feature smoother adjustments. Additionally, DIY construction significantly reduces cost while increasing satisfaction and functionality.
“Custom-built grooming arms give professionals and pet owners alike the confidence that their equipment won’t fail mid-session.” — Carlos Mendez, Master Pet Groomer & Equipment Designer
Materials and Tools You’ll Need
Before starting construction, gather all necessary components. Choosing high-grade materials ensures longevity and safety under load. Below is a detailed list of recommended supplies:
| Component | Recommended Material/Specification | Quantity |
|---|---|---|
| Arm Tube | 1-inch diameter aluminum or steel pipe (wall thickness ≥ 0.120\") | 1 piece, 30–36 inches long |
| Mounting Clamp | Heavy-duty C-clamp rated for 50+ lbs (steel with rubber-lined jaws) | 1 |
| Pivot Bolt Assembly | ½-inch stainless steel bolt, lock nut, washers, and shoulder sleeve bearing | 1 set |
| Adjustment Knob | Knurled knob or lever clamp with threaded stud | 1 |
| Loop Attachment | Stainless steel O-ring or adjustable nylon loop with quick-release clip | 1 |
| Welding Hardware (optional) | Threaded inserts or weld-on flanges if permanently attaching | As needed |
Essential tools include a hacksaw or pipe cutter, drill with metal bits, wrenches, measuring tape, file, and optionally a metal sander or grinder for smoothing edges. If welding, use proper safety gear and equipment.
Step-by-Step Construction Process
- Measure and Cut the Arm Tube
Cut the metal tube to your desired length—typically 30 to 36 inches provides optimal reach without compromising rigidity. Use a miter box or pipe cutter for a clean, square cut. - Drill Mounting and Pivot Holes
Mark the center point about 2 inches from one end of the tube. Drill a ½-inch hole perpendicular to the tube axis for the pivot bolt. On the opposite side, near the same end, drill a smaller hole (¼ inch) for the adjustment knob that will lock rotation. - Prepare the Mounting Clamp
Ensure the C-clamp has a flat base or mounting plate. If it doesn’t, weld or bolt a steel plate to stabilize attachment. The clamp must grip tables up to 2.5 inches thick securely. - Attach the Pivot Mechanism
Insert the shoulder sleeve bearing into the ½-inch hole in the arm tube. Pass the stainless steel bolt through the clamp’s mounting hole, then through the bearing. Add washers on both sides and secure with a lock nut. Tighten enough to allow smooth rotation but eliminate wobble. - Install the Locking Mechanism
Drill a perpendicular hole through the clamp body aligned with the ¼-inch hole in the arm. Insert a threaded stud or bolt with a knurled knob. When tightened, this pin should press against the arm tube to prevent rotation. Use a nylon-tipped set screw to avoid damaging the tube. - Add the Grooming Loop
Attach a heavy-duty O-ring or adjustable nylon strap to the far end of the arm. Ensure the connection is swivel-mounted to prevent tangling as the dog moves. Test the clip for quick release under tension. - Test and Adjust
Secure the clamp to a table edge. Lift and rotate the arm through its full range. Check for smooth motion, secure locking, and zero lateral play. Make micro-adjustments to bolt tightness as needed.
Dos and Don’ts of Grooming Arm Design
| Do | Don’t |
|---|---|
| Use thick-walled metal tubing for rigidity | Use thin-walled or plastic pipes—they bend under pressure |
| Include a swivel joint at the loop end | Attach a fixed loop—this causes leash twisting |
| Choose stainless hardware to resist corrosion | Use regular steel bolts that rust easily |
| Test load capacity with weights before using on dogs | Assume strength without testing—always verify |
| Pad clamp jaws to protect table surfaces | Allow bare metal to scratch or dent furniture |
Real-World Example: Sarah’s Home Grooming Station Upgrade
Sarah, a mobile groomer based in Oregon, initially used a budget grooming arm that bent when restraining a large Australian Shepherd. After researching builds online, she constructed her own using a 32-inch steel tube and a reinforced C-clamp. She added a dual-lock system—one bolt for rotation, another for vertical tilt—and lined the clamp with neoprene padding. Since installation, she’s safely groomed over 70 dogs, including Saint Bernards, without any slippage or fatigue. “Knowing my arm won’t fail lets me focus on precision cuts instead of worrying about control,” she says.
Maintenance and Longevity Tips
Even the best-built arm requires routine care. Inspect all fasteners monthly for loosening due to vibration. Lubricate the pivot point quarterly with silicone-based grease—avoid petroleum products that degrade rubber components. Store the arm lowered when not in use to reduce stress on the clamp. Replace worn loops or clips immediately; frayed attachments are the most common failure point.
Frequently Asked Questions
Can I build a grooming arm without welding?
Yes. Most functional arms rely on bolted connections rather than welding. Use shoulder bearings, lock nuts, and high-tensile bolts to achieve strong, stable joints. Welding improves rigidity but isn't required for success.
How much weight should a homemade arm support?
A properly built arm should safely hold at least 50 pounds. For larger breeds, reinforce the clamp and consider bracing the table underside with a support bar to prevent tipping.
Is aluminum or steel better for the arm tube?
Steel offers superior strength and durability but is heavier. Aluminum is lighter and resists rust but may flex under extreme loads. Choose steel for salons; aluminum works well for mobile groomers prioritizing portability.
Final Checklist Before Use
- Clamp grips table firmly with no slippage
- Pivot bolt allows smooth 360° rotation
- Locking knob holds position under pressure
- Grooming loop swivels freely and clips securely
- All metal edges are smoothed and deburred
- Arm passes load test with 2x expected dog weight
Conclusion: Build Confidence Alongside Your Arm
A well-crafted grooming table arm does more than hold a dog in place—it builds trust between groomer and pet. When your equipment performs reliably, you work faster, safer, and with greater precision. This project combines practical engineering with animal welfare, resulting in a tool that enhances every grooming session. Whether you’re a hobbyist or a professional, taking the time to build a durable arm pays dividends in safety, efficiency, and peace of mind.


 浙公网安备
33010002000092号
浙公网安备
33010002000092号 浙B2-20120091-4
Comments
No comments yet. Why don't you start the discussion?