
Discord has evolved from a simple voice chat platform into a vibrant hub for communities, gaming groups, and developers. One of the most powerful tools available to server owners is the Discord bot—a programmable assistant that can moderate chats, play music, send alerts, or even run mini-games. Building your first bot might seem intimidating, but with the right guidance, it’s accessible to anyone with basic coding knowledge. This guide walks you through every stage, from creating your bot account to deploying a working version that responds to commands.
1. Setting Up Your Bot on Discord
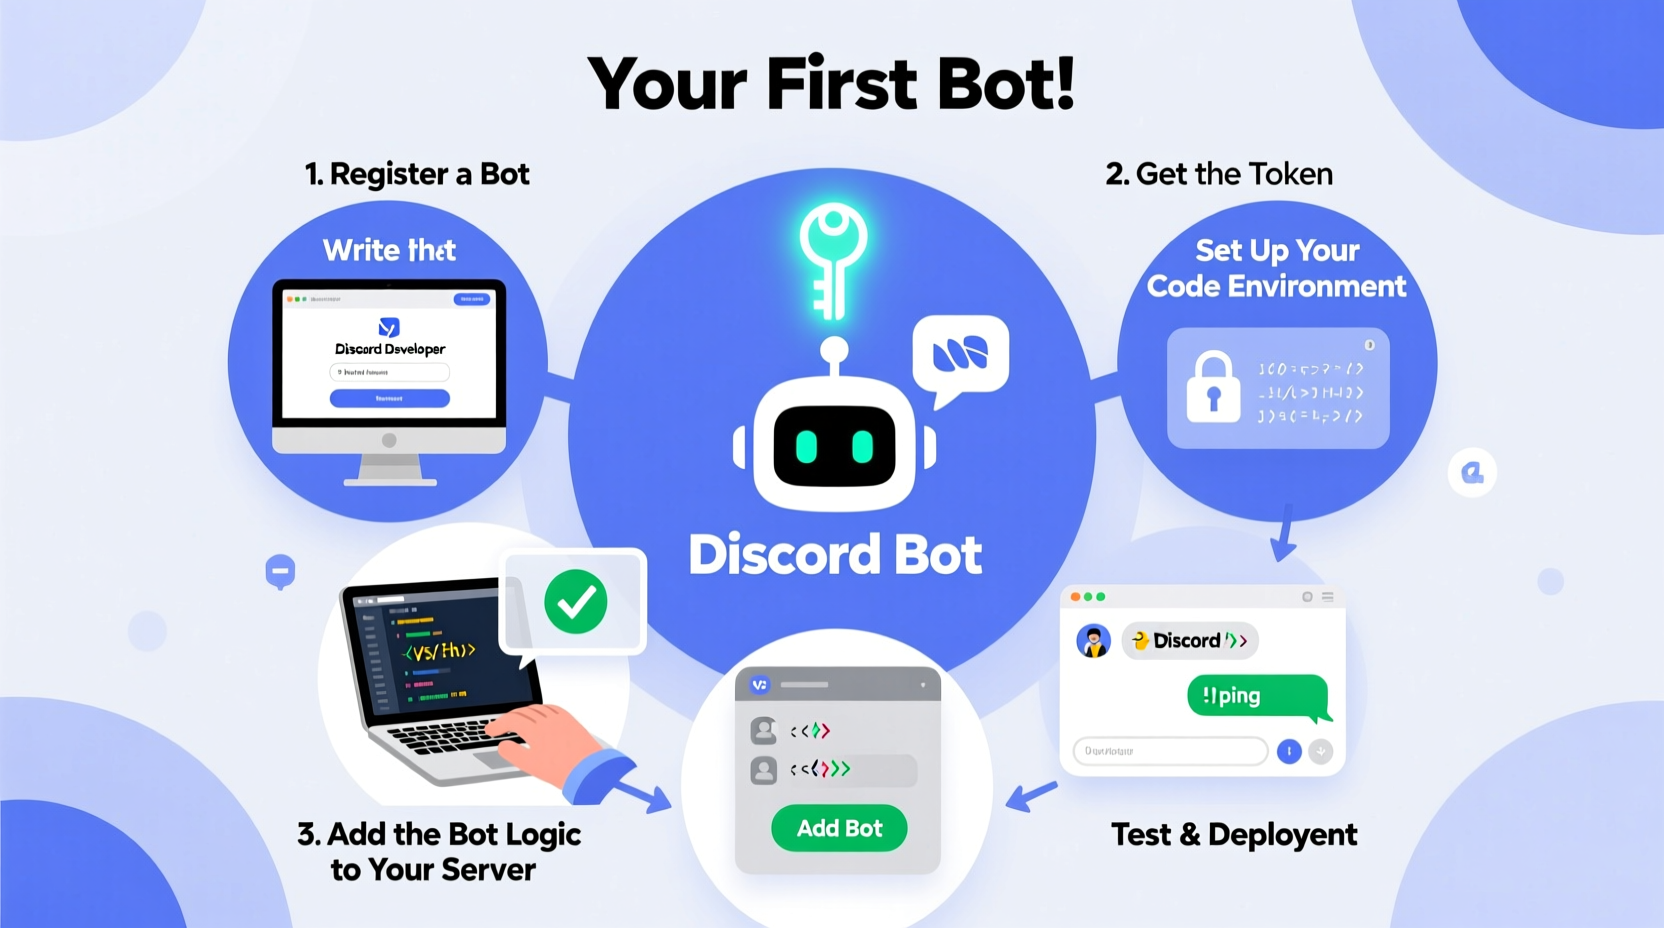
Before writing any code, you need to register your bot with Discord. This process creates a unique identity for your bot within the Discord ecosystem.
- Navigate to the Discord Developer Portal.
- Click “New Application” and give it a name (e.g., MyFirstBot).
- Go to the “Bot” tab on the left sidebar and click “Add Bot.” Confirm the action when prompted.
- Under the bot settings, toggle off “Public Bot” if you want to keep it private.
- Copy the bot token—this is like a password, so keep it secure and never share it publicly.
To invite your bot to a server, go to the “OAuth2” tab in the developer portal. Select “bot” under scopes, then choose the permissions your bot needs (e.g., Send Messages, Manage Roles). Copy the generated URL and open it in a browser while logged into Discord. Choose the server you’d like to add the bot to and confirm.
2. Preparing Your Development Environment
You’ll need a few tools installed before writing your bot:
- Python 3.8 or higher: The discord.py library requires at least Python 3.8.
- pip: Python’s package manager, used to install libraries.
- A code editor: Visual Studio Code, Sublime Text, or any text editor will work.
- discord.py library: Install it via terminal or command prompt:
pip install discord.py
Create a new project folder and initialize a Python file (e.g., bot.py). This will be the main entry point for your bot.
3. Writing Your First Bot Command
Now that your environment is ready, let’s write a simple bot that responds to a command. Open your bot.py file and start with the following code:
import discord
from discord.ext import commands

# Initialize the bot with a command prefix
intents = discord.Intents.default()
intents.message_content = True  # Required to read message content
bot = commands.Bot(command_prefix='!', intents=intents)

# Event: When the bot is ready
@bot.event
async def on_ready():
    print(f'{bot.user} is online and ready!')

# Command: !hello
@bot.command()
async def hello(ctx):
    await ctx.send('Hello! I’m your first Discord bot.')

# Run the bot
bot.run('YOUR_BOT_TOKEN_HERE')
Replace YOUR_BOT_TOKEN_HERE with the token you copied earlier. Save the file and run it from your terminal:
python bot.py
If everything is set up correctly, you should see a message in your console confirming the bot is online. In your Discord server, type !hello, and the bot should reply.
“We designed discord.py to make bot development intuitive for beginners while remaining flexible enough for advanced use cases.” — Rapptz, Creator of discord.py
4. Expanding Functionality with Useful Features
Once your bot responds to basic commands, consider adding more practical features. Here are three common enhancements:
Moderation: Clear Messages
Add a command to delete a specified number of messages:
@bot.command()
@commands.has_permissions(manage_messages=True)
async def clear(ctx, amount=5):
    await ctx.channel.purge(limit=amount + 1)
    await ctx.send(f'Cleared {amount} messages.', delete_after=3)
Automation: Welcome New Members
Use the on_member_join event to greet newcomers:
@bot.event
async def on_member_join(member):
    channel = discord.utils.get(member.guild.text_channels, name='welcome')
    if channel:
        await channel.send(f'Welcome, {member.mention}! Enjoy your stay.')
Utilities: Fetch Server Info
Create a command that displays server details:
@bot.command()
async def serverinfo(ctx):
    guild = ctx.guild
    await ctx.send(f\"\"\"
    **Server Name:** {guild.name}
    **Owner:** {guild.owner}
    **Members:** {guild.member_count}
    **Created On:** {guild.created_at.strftime('%b %d, %Y')}
    \"\"\")
5. Best Practices and Deployment Checklist
Before launching your bot publicly, ensure it follows best practices for security, performance, and usability.
| Do | Don’t |
|---|---|
| Use environment variables for tokens and secrets | Hardcode sensitive information in your source files |
| Test commands in a private server first | Deploy untested bots to production servers |
| Limit bot permissions to only what’s needed | Grant administrator privileges unnecessarily |
| Handle errors gracefully with try-except blocks | Let your bot crash on invalid input |
Deployment Options
For continuous uptime, host your bot on a cloud platform:
- Replit: Beginner-friendly, supports always-on containers with Pro plan.
- Heroku: Free tier available; ideal for lightweight bots.
- VPS (e.g., DigitalOcean, Linode): Full control over environment, suitable for advanced users.
Mini Case Study: From Idea to Live Bot
Jamie, a university student managing a study group server, wanted to automate daily reminders and trivia quizzes. Using this guide, Jamie created a bot named “StudyPal” in under two days. It started with a simple !remind command and evolved to include quiz rounds using JSON-stored questions. After setting up Replit for hosting, the bot ran 24/7 without issues. Within a month, engagement in the server increased by 40%, with members praising the interactive learning experience.
This example shows how even a modest bot can have a meaningful impact when built with purpose.
Frequently Asked Questions
Can I build a Discord bot without coding experience?
While some no-code bot builders exist, they offer limited customization. Learning basic Python unlocks full control and flexibility, making it worth the effort for long-term use.
Why does my bot not respond to commands?
Common causes include incorrect command prefix, missing intents (especially message_content), or syntax errors in the code. Double-check your bot’s gateway intents in the Developer Portal and ensure the prefix matches what you’re typing.
Is it safe to share my bot with others?
Yes, as long as you’ve restricted its permissions and secured your token. You can generate an invite link and distribute it to trusted servers. Avoid publicizing bots with elevated permissions unless thoroughly tested.
Conclusion
Building your first Discord bot is a rewarding milestone that blends creativity with technical skill. Whether you're automating tasks, enhancing community interaction, or just learning to code, the process equips you with valuable insights into APIs, event-driven programming, and user experience design. With the foundation laid here, you’re ready to explore advanced features like slash commands, databases, and web dashboards.


 浙公网安备
33010002000092号
浙公网安备
33010002000092号 浙B2-20120091-4
Comments
No comments yet. Why don't you start the discussion?