
Crafting handmade flower bracelets is a delightful way to blend creativity with wearable art. These dainty accessories, often made from polymer clay, paper, or fabric blossoms, add a whimsical touch to any outfit. For beginners, the process may seem intricate, but with the right tools and guidance, it becomes both accessible and deeply satisfying. Whether you're making them for personal use, gifts, or small-scale selling, this guide walks you through every stage—from gathering supplies to finishing your first bracelet with confidence.
Gathering Your Materials and Tools
Before shaping petals or threading beads, assemble everything you’ll need. The quality of your materials directly affects the final look and durability of your bracelet. Most beginner-friendly flower bracelets use lightweight components that are easy to shape and assemble.
| Material/Tool | Purpose | Beginner-Friendly Options |
|---|---|---|
| Polymer clay (or air-dry clay) | Creating flower petals and centers | Sculpey III or Fimo Soft – soft and easy to mold |
| Clay roller and blade | Rolling even sheets and cutting shapes | Acrylic roller and craft knife |
| Flower-shaped cutters (optional) | Uniform petal shapes | Mini metal cookie cutters or punch tools |
| Beads (4–6mm) | Connecting flowers or adding detail | Wood, glass, or plastic spacer beads |
| Elastic cord or stretchy wire | Bracelet base | 0.7–1mm clear elastic thread |
| Tweezers and toothpicks | Precision shaping and detailing | Any fine-point tweezers and wooden picks |
Designing and Crafting the Flowers
The heart of your bracelet lies in the handmade flowers. Start simple: three- to five-petal blooms are ideal for beginners. You don’t need artistic training—just patience and attention to subtle details like curve and layering.
- Condition the clay: Knead your chosen color until soft and pliable. This prevents cracking during baking.
- Roll a thin sheet: Use a roller to create a uniform layer about 2–3mm thick.
- Cut petal shapes: Use a cutter or freehand with a blade. For realism, make petals slightly oval with a pointed tip.
- Shape each petal: Drape them over a rounded object like a spoon or bottle cap to give natural curvature.
- Create the center: Roll a tiny ball of contrasting clay (e.g., yellow for white flowers) and press it gently into the middle.
- Bake according to instructions: Typically 25–30 minutes at 110°C (230°F). Let cool completely before handling.
For variety, try combining two shades in one flower—blend a darker edge into a lighter base using your fingertip for an ombre effect. Once baked, you can lightly sand rough edges with fine-grit paper and seal with a matte or glossy varnish for protection.
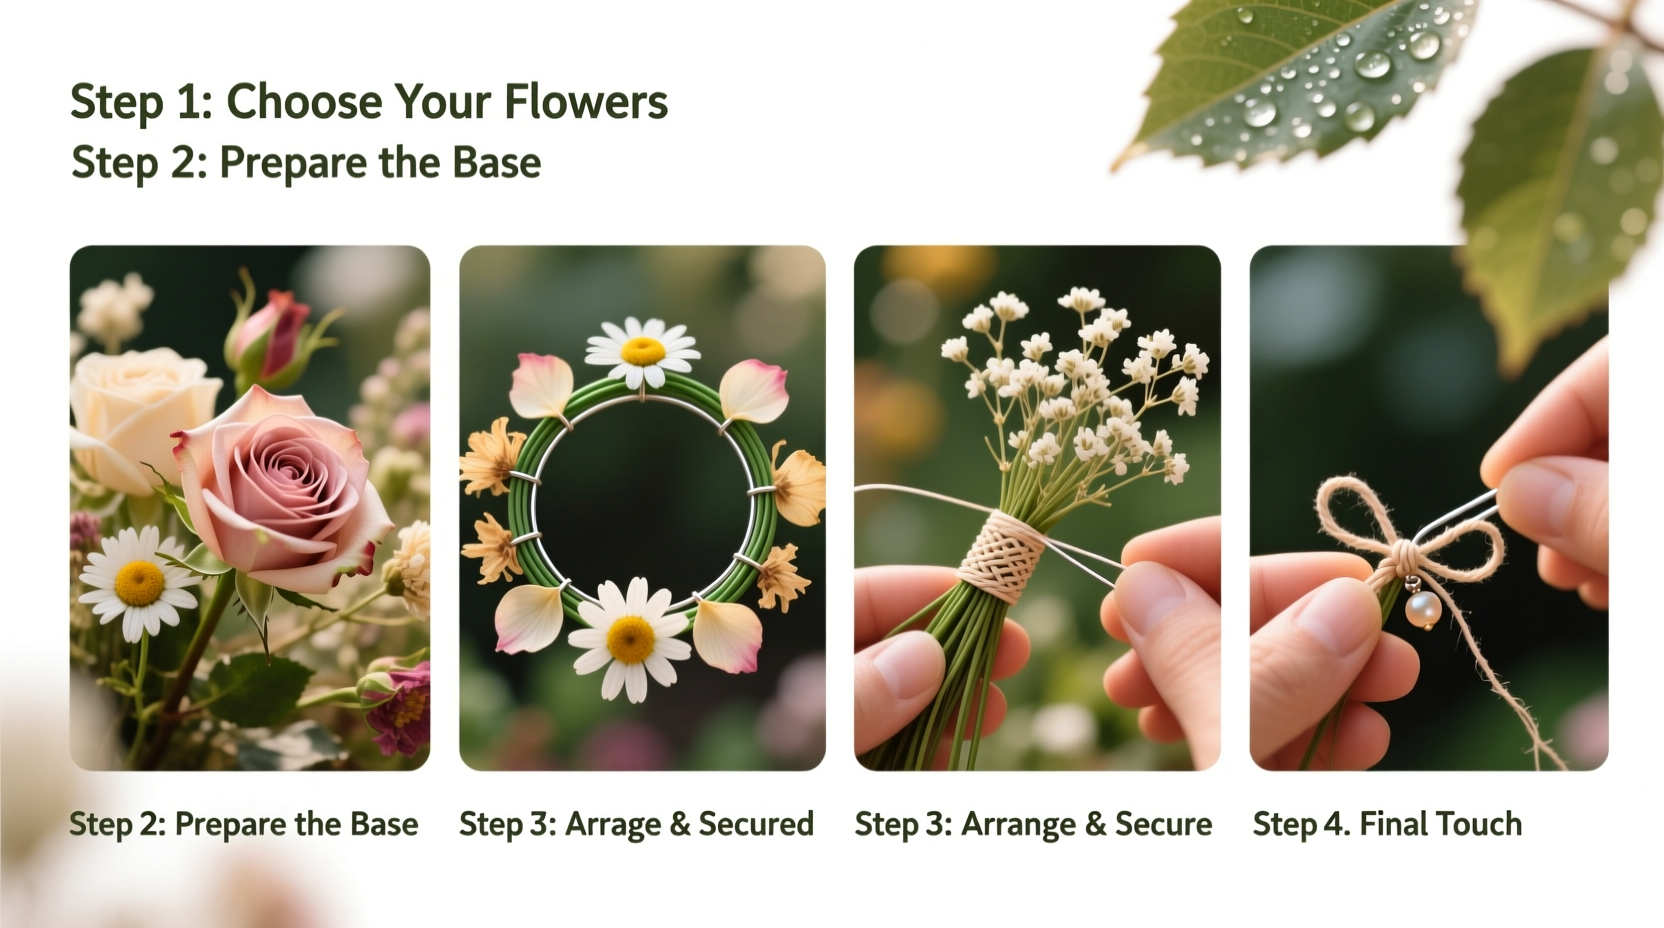
Assembling the Bracelet
Now that your flowers are ready, it’s time to string them into a cohesive design. The key is balance—flowers should be evenly spaced and oriented consistently for a polished look.
Step-by-Step Assembly Guide
- Measure wrist size: Wrap a flexible tape around the wrist just above the bone. Add 1 inch (2.5 cm) for comfort and knotting space.
- Cut the elastic: Leave extra length (about 6 inches / 15 cm) for tying.
- Thread beads and flowers alternately: Begin and end with a bead to frame the design. Example pattern: bead → flower → bead → flower → bead.
- Check fit as you go: Slide components along the cord to ensure even spacing before tying.
- Tie a secure knot: Use a surgeon’s knot (double overhand with an extra twist) for strength. Add a drop of clear glue to the knot before trimming excess.
- Hide the knot: Gently pull it into the nearest bead hole or between petals if possible.
Alternative Designs to Explore
- Single-stem style: Attach a single flower to a chain bracelet using a jump ring.
- Braided floral band: Weave three strands of elastic, placing a flower at each intersection.
- Vintage-inspired cluster: Group three small flowers together and attach as one unit between spacer beads.
“Handmade floral jewelry connects wearers to nature and craftsmanship in a way mass-produced items never can.” — Lila Chen, Artisan Jewelry Designer and Educator
Common Challenges and How to Solve Them
Even with careful planning, beginners encounter minor setbacks. Knowing how to troubleshoot ensures your project stays enjoyable and successful.
Floppy or Uneven Flowers
If petals droop after baking, the clay may have been too thin or unevenly rolled. Next time, use guide strips on either side of your roller to maintain consistent thickness. Slightly under-baking can also cause softness—follow manufacturer times precisely.
Broken Elastic After Tying
This usually happens due to weak thread or excessive tension. Always choose high-quality elastic designed for jewelry. When tying, moisten the knot slightly to reduce friction while pulling tight.
Unbalanced Design
Plan your layout on a flat surface before threading. Lay out all elements in order and take a photo for reference. This “mock-up” method prevents mistakes mid-stringing.
Real Example: Maria’s First Flower Bracelet
Maria, a hobby crafter from Portland, tried making her first bracelet using bright pink clay. She skipped conditioning the clay, resulting in cracked petals after baking. Undeterred, she researched proper techniques, prepped her materials carefully, and used a teaspoon to shape each petal. Her second attempt was symmetrical, vibrant, and became her signature gift for friends’ birthdays. “I realized the magic wasn’t in perfection,” she said, “but in learning how to grow from little failures.”
Essential Checklist for Beginners
- ☐ Choose clay color(s) and condition properly
- ☐ Prepare work surface and tools
- ☐ Roll, cut, and shape petals with care
- ☐ Bake flowers according to package instructions
- ☐ Sand and seal finished flowers (optional)
- ☐ Measure wrist and cut elastic with extra length
- ☐ Arrange design layout before stringing
- ☐ Thread flowers and beads in balanced sequence
- ☐ Tie secure knot and reinforce with glue
- ☐ Test fit and adjust if needed
Frequently Asked Questions
Can I make flower bracelets without polymer clay?
Yes. You can use folded tissue paper, felt scraps, or even pressed dried flowers sealed in resin. Each material offers a different aesthetic—paper gives a soft, vintage look, while felt is durable and great for kids’ crafts.
How long do handmade flower bracelets last?
With proper care, they can last years. Avoid prolonged water exposure, direct sunlight, and heavy physical activity while wearing them. Store in a padded box away from dust and pressure.
Are these safe for children to wear?
If using non-toxic materials and securing all parts tightly, yes. However, supervise young children, especially with small beads or glued joints that could loosen over time.
Final Thoughts and Inspiration
Creating handmade flower bracelets opens a world where imagination meets craftsmanship. What begins as a simple craft evolves into a personalized art form—each bloom reflecting your mood, style, or intention. With practice, you’ll develop your own techniques, color palettes, and signature patterns. Don’t rush perfection; embrace the slight imperfections that make each piece uniquely yours.


 浙公网安备
33010002000092号
浙公网安备
33010002000092号 浙B2-20120091-4
Comments
No comments yet. Why don't you start the discussion?