
In an age where smartphones are extensions of our identities, how we carry them matters just as much as how we use them. A personalized phone lanyard is more than a functional accessory—it’s a statement. Whether you're looking to keep your device secure during travel, add flair to your everyday look, or create a thoughtful handmade gift, designing your own lanyard offers full creative control. From selecting the right materials to adding meaningful embellishments, this guide walks you through every stage of crafting a durable, stylish, and one-of-a-kind phone lanyard.
Why Make Your Own Phone Lanyard?
Commercial lanyards often lack personality and may not suit your phone model or aesthetic preferences. Crafting your own allows you to choose colors, textures, and hardware that reflect your style while ensuring compatibility with your device. Custom lanyards also make excellent gifts—personalized with initials, favorite colors, or symbolic charms.
Beyond aesthetics, a well-made lanyard enhances practicality. It keeps your phone accessible, reduces pocket wear, and minimizes drop risks. With rising screen repair costs, a simple strap can be a cost-effective safeguard.
“Personalization transforms utilitarian objects into meaningful accessories. A lanyard isn’t just about function—it’s a reflection of identity.” — Jordan Lee, Accessory Designer & Craft Educator
Selecting the Right Materials
The foundation of a great lanyard lies in material choice. Durability, comfort, and appearance all depend on what you use. Below is a breakdown of common options and their ideal uses:
| Material | Pros | Cons | Best For |
|---|---|---|---|
| Paracord | Extremely strong, water-resistant, wide color range | Can feel stiff; requires sealing ends | Outdoor use, rugged designs |
| Satin Ribbon | Smooth, shiny, elegant look | Less durable, prone to fraying | Formal events, fashion-focused styles |
| Cotton Webbing | Soft, breathable, easy to sew | Stretches over time, absorbs moisture | Daily wear, lightweight phones |
| Nylon Strap | Durable, weather-resistant, low stretch | Limited decorative appeal | Active lifestyles, minimalist design |
| Leather (genuine or faux) | Luxurious texture, ages beautifully | Higher cost, less flexible | Elegant or vintage-inspired looks |
Essential Tools and Hardware
Before assembling your lanyard, gather the necessary tools and components. Precision and safety matter when working with small parts and sharp tools.
- Scissors or rotary cutter – Sharp blades prevent fraying.
- Lighter or fray check – Seal synthetic fibers like paracord or nylon.
- Jump rings and keychain clasps – Choose stainless steel or brass for longevity.
- Phone attachment adapter – Use a compatible connector such as a carabiner clip, magnetic ring, or screw-on plate depending on your phone case.
- Pliers (flat-nose and round-nose) – For opening and closing jump rings securely.
- Ruler or measuring tape – Ensure consistent length.
- Sewing needle and thread (optional) – For fabric-based lanyards requiring stitching.
Mini Case Study: The Festival-Ready Lanyard
Sophie, a frequent concert-goer from Austin, wanted a lanyard that could survive long festival days while expressing her vibrant style. She chose neon-colored paracord for its strength and UV resistance, added glow-in-the-dark beads near the clasp for visibility at night, and used a magnetic phone mount for quick access. After three festivals and countless uses, her lanyard remains intact—proof that smart material selection pays off.
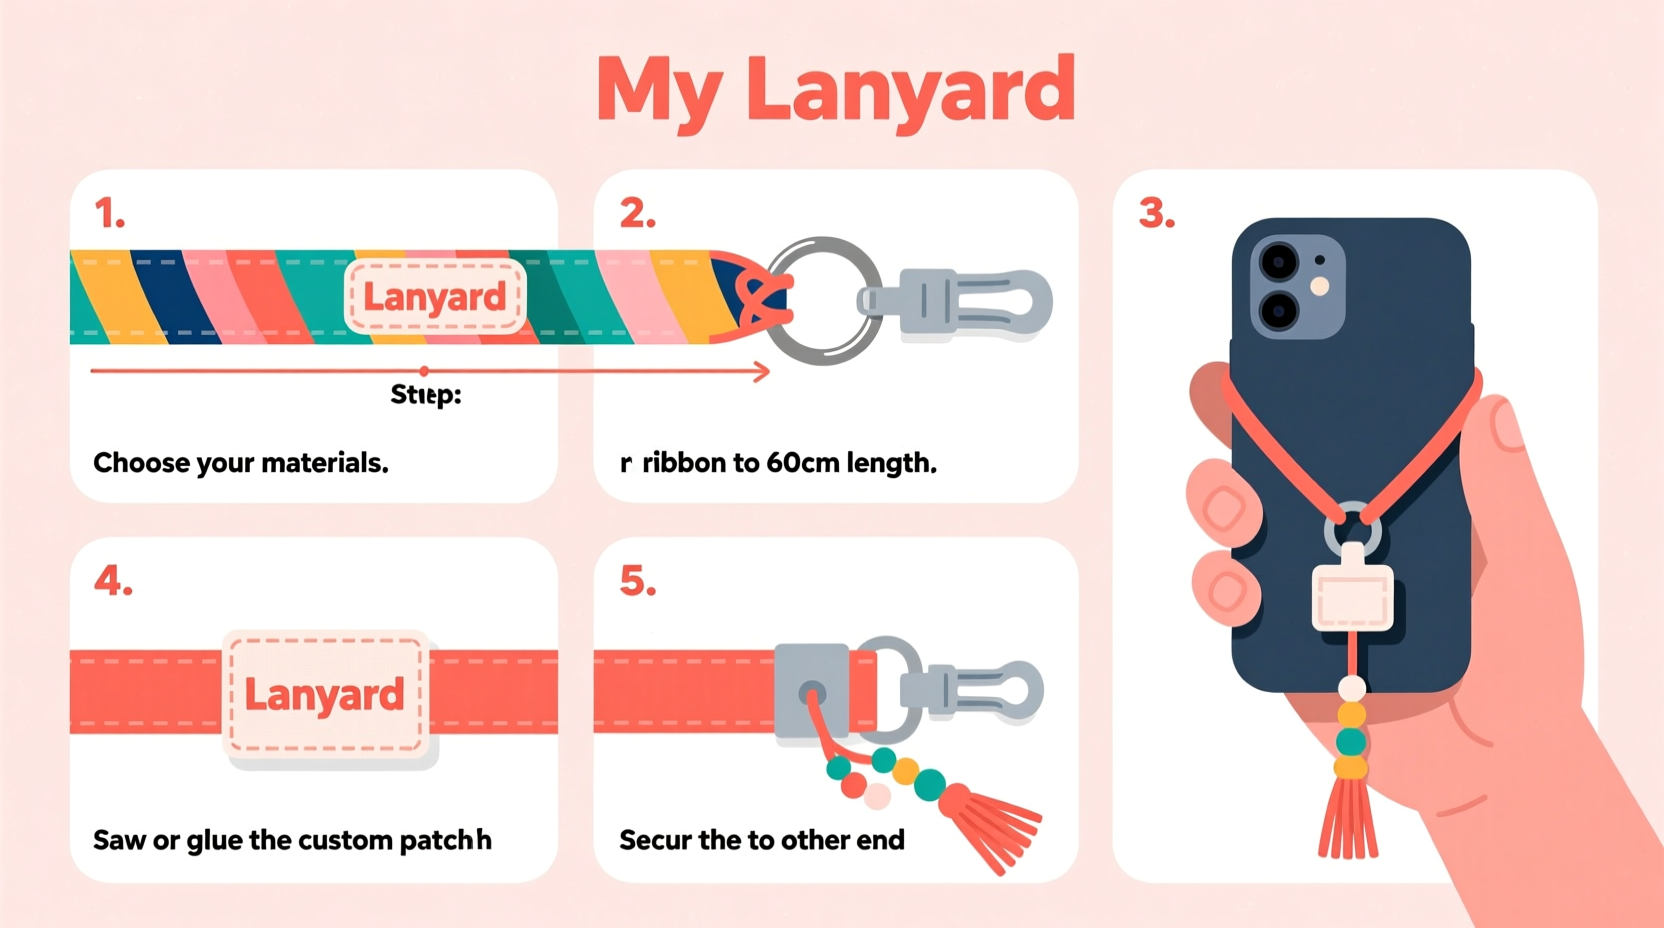
Step-by-Step Assembly Guide
Follow this detailed process to build a professional-quality lanyard tailored to your needs.
- Measure and cut your main strap: Determine desired length. A standard lanyard ranges from 24 to 36 inches. Add 2 inches for knots or loops. Cut your chosen material using sharp scissors.
- Seal the ends: If using synthetic cord, briefly pass the tip over a lighter flame until edges melt slightly. Press flat with tweezers to prevent unraveling.
- Add decorative elements: Slide on beads, spacers, or charms before attaching hardware. For braided designs, incorporate colored threads early in the weaving process.
- Attach the jump ring: Open a jump ring with pliers by twisting sideways (not pulling apart). Slide it through one end of the strap, then attach a keychain clasp or lobster hook. Close the ring securely.
- Connect the phone adapter: Attach the other end to a secure phone interface. Common options include:
- A metal loop sewn into the strap linked to a phone case with a screw-on eyelet.
- A carabiner clipping onto a case with a lanyard hole.
- A magnetic disc adhered to the back of the phone or case, paired with a magnetic clasp on the lanyard.
- Test functionality: Hang your phone and simulate movement. Check that the connection holds and the strap doesn’t twist uncomfortably.
- Finalize with personal touches: Embroider initials, attach a tassel, or use heat-transfer vinyl labels for a signature finish.
Design Inspiration and Customization Ideas
Your lanyard can reflect hobbies, cultural heritage, or seasonal themes. Consider these ideas:
- Travel-themed: Use map-print ribbon, add tiny souvenir charms (Eiffel Tower, airplane), and pick a quick-release clasp for airport security ease.
- Festival style: Incorporate reflective thread, LED fiber optics (battery-powered micro lights), or holographic tape.
- Minimalist luxury: Opt for black leather with a brushed gold clasp and discreet engraving.
- Kids’ version: Bright colors, cartoon beads, and soft cotton webbing with Velcro closure for safety.
“A lanyard should feel intentional—not just put together, but designed.” — Lena Ruiz, Product Stylist at Urban Gadget Co.
FAQ
Can I wash my handmade phone lanyard?
Yes, but method depends on materials. Cotton and satin can be hand-washed gently with mild soap. Paracord and nylon tolerate machine washing in a mesh bag. Never submerge electronic components or adhesives. Air dry completely before reuse.
Will a lanyard damage my phone case?
Not if properly designed. Avoid abrasive materials like rough metal edges or coarse weave rubbing against the case. Use padded connectors or smooth clasps. Regularly inspect contact points for wear.
How do I make a lanyard for someone else as a gift?
Match the recipient’s color preferences and lifestyle. Include a meaningful charm—birthstone, hobby symbol, or engraved tag. Package it coiled neatly in a small box with a note explaining its features.
Checklist: Build Your Lanyard in One Session
- ☐ Choose primary material and color scheme
- ☐ Measure and cut strap to desired length (+2” for finishing)
- ☐ Seal or hem ends to prevent fraying
- ☐ Thread on beads or decorative elements
- ☐ Attach jump ring and clasp with pliers
- ☐ Connect secure phone interface (clip, magnet, or loop)
- ☐ Test weight and movement with actual phone
- ☐ Add final personalization (initials, tag, tassel)
Conclusion
Crafting a personalized phone lanyard blends creativity with practicality. With the right materials, attention to detail, and a touch of imagination, you can create an accessory that protects your device and expresses who you are. Whether you're making one for daily convenience, special events, or as a heartfelt gift, each lanyard becomes a small masterpiece of functional art.


 浙公网安备
33010002000092号
浙公网安备
33010002000092号 浙B2-20120091-4
Comments
No comments yet. Why don't you start the discussion?