
Creating a vintage-style necklace at home is more than just a craft—it’s an act of storytelling. Each bead, charm, and clasp can reflect personal history, aesthetic taste, or nostalgic inspiration drawn from decades past. Whether you're channeling the elegance of the 1920s Art Deco era, the boldness of 1970s bohemian flair, or the delicate femininity of Victorian motifs, handmade vintage jewelry offers a deeply personal way to express yourself. With simple tools and a bit of creativity, you can design a one-of-a-kind piece that looks like it was unearthed from a Parisian antique market—without ever leaving your kitchen table.
Understanding Vintage Aesthetics: What Makes a Necklace “Vintage”?
The term \"vintage\" refers to authentic pieces typically at least 20–100 years old, but in fashion and design, it often describes items that emulate the styles of past decades. When crafting a vintage-style necklace, focus on design elements common in historical periods:
- Materials: Brass, copper, glass pearls, rhinestones, enamel, filigree metalwork, and natural stones.
- Colors: Muted tones, gold finishes, oxidized silver, deep reds, forest greens, and ivory.
- Shapes: Geometric patterns (Art Deco), floral pendants (Victorian), tassels and layered chains (boho 70s).
- Details: Cameos, lockets, clock parts, keys, religious symbols, and nature-inspired charms.
Authentic vintage appeal comes not from perfection, but from character—slight imperfections, patina, and asymmetry often enhance the look.
“Vintage jewelry isn’t about replicating the past exactly—it’s about capturing its soul.” — Lila Monroe, Independent Jewelry Designer & Historian
Essential Tools and Materials Checklist
Before beginning your project, gather the necessary supplies. Most can be found at craft stores or online retailers specializing in jewelry-making.
Basic Toolkit
- Jewelry pliers (chain-nose, flat-nose, and round-nose)
- Wire cutters
- Jump ring opener or micro screwdriver
- Ruler or measuring tape
- Soft cloth or jewelry mat (to prevent scratches)
Materials for Assembly
- Vintage-style chain (brass, oxidized silver, or gunmetal)
- Charms, pendants, or focal pieces (cameos, lockets, etc.)
- Beads (glass, crystal, pearl, or ceramic)
- Jump rings (5–6mm, matching metal tone)
- Clasp (lobster, toggle, or spring ring)
- Headpins or eyepins (for dangles)
- Chain extender (optional, for adjustable length)
Step-by-Step Guide to Building Your Necklace
Follow this detailed sequence to assemble a cohesive, professional-looking vintage necklace.
- Determine the Design Concept
Select a theme based on a specific era or mood—e.g., Edwardian romance, Jazz Age glamour, or rustic cottagecore. Sketch a rough layout or collect visual references on a mood board. - Measure and Cut the Chain
Decide on the desired length (typically 16–20 inches for a choker or princess length). Use wire cutters to snip the chain cleanly. Always leave room for the clasp and any additional connectors. - Add the Clasp
Attach a jump ring to one end of the chain. Open the jump ring slightly with pliers, slide on the clasp, then close securely. Repeat on the opposite end with a chain extender or matching jump ring. - Create Focal Elements
If using a pendant or locket, thread it onto a headpin, add a small spacer bead if desired, then create a simple loop above the pendant using round-nose pliers. Attach this dangle to the center of the chain via a jump ring. - Incorporate Charms and Beads
Layer smaller charms along the chain at irregular intervals for organic flow. For beaded sections, string beads onto eyepins, form loops, and connect them between chain links. Mix textures—try pairing smooth pearls with textured brass spacers. - Balance the Composition
Lay the necklace flat and assess symmetry. Vintage designs often favor intentional asymmetry, but ensure weight distribution feels comfortable when worn. - Final Inspection
Check all jump rings are fully closed, clasps function smoothly, and no sharp edges remain. Gently polish metal parts with a soft cloth to enhance luster.
Do’s and Don’ts of Vintage Necklace Crafting
| Do’s | Don’ts |
|---|---|
| Use consistent metal tones (e.g., all gold-toned or silver-toned components) | Mix polished and matte finishes without intention—can look mismatched |
| Include at least one statement element (large pendant, cluster charm) | Overcrowd the chain with too many focal points |
| Age metal parts slightly with vinegar or coffee for authentic patina | Force open jump rings sideways—always twist them open laterally to avoid weakening |
| Test wearability by draping the necklace before finalizing | Ignore comfort—ensure the length doesn’t pull or dig into the neck |
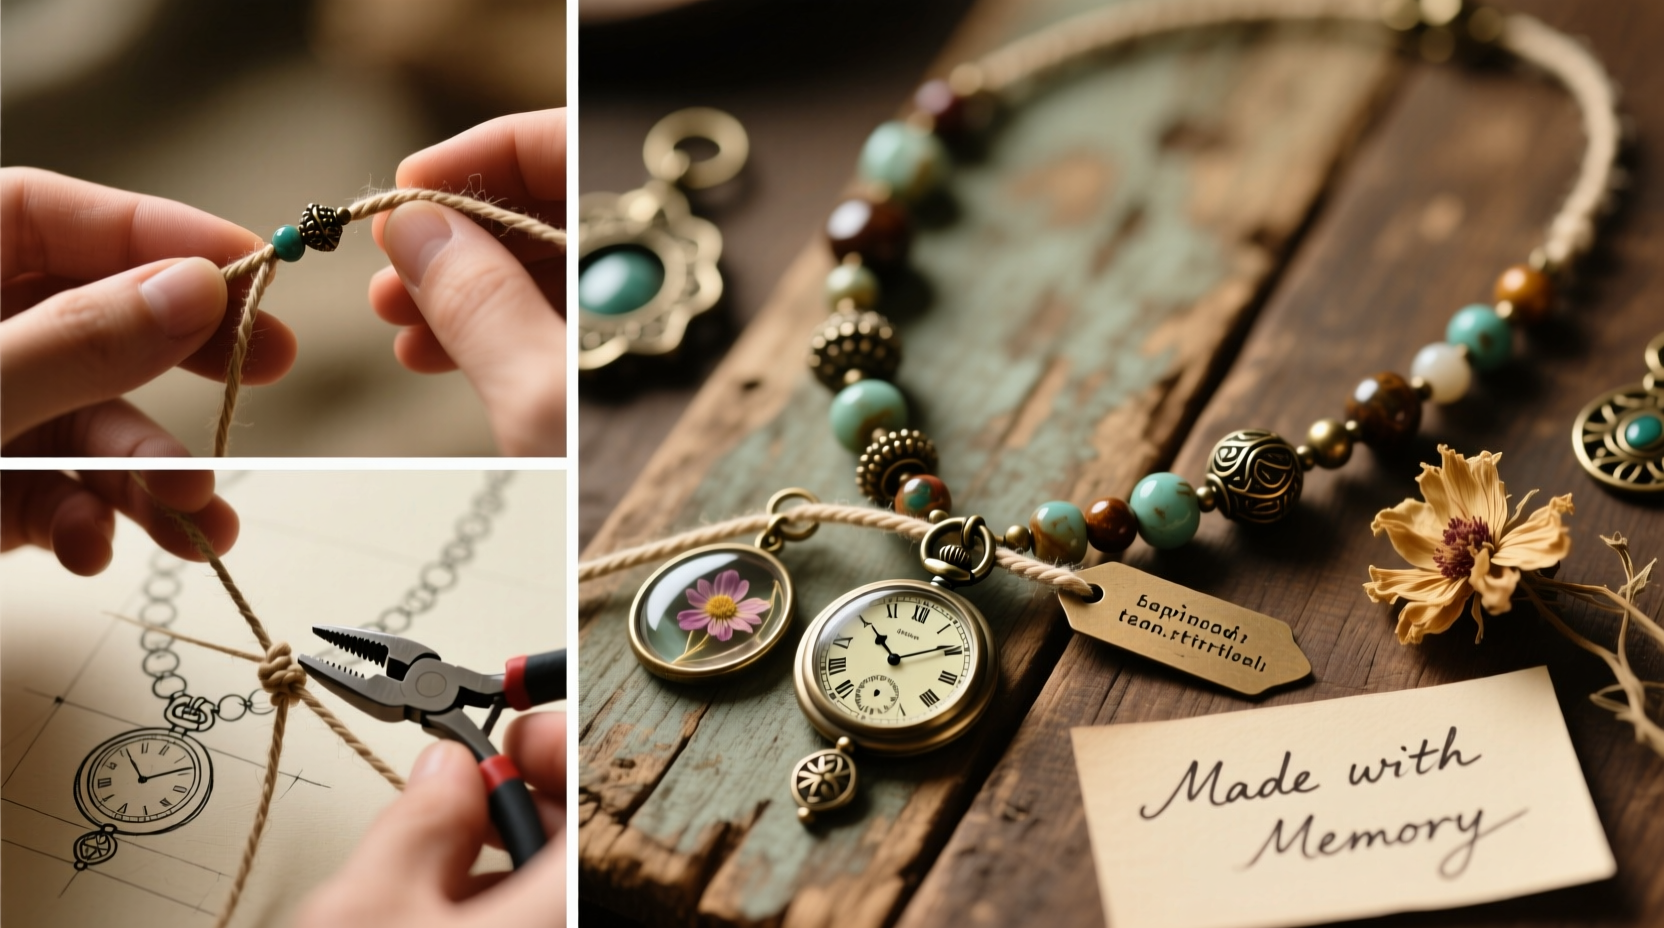
A Real Example: Clara’s Heirloom-Inspired Pendant Necklace
Clara, a teacher from Portland, wanted to honor her grandmother’s legacy by creating a wearable keepsake. She started with a vintage locket found at a flea market, then sourced amber-colored glass beads reminiscent of those in old family photos. Using a delicate brass chain, she centered the locket and flanked it with two small feather charms symbolizing freedom and memory. She darkened the brass links slightly with a tea bath for warmth and attached a vintage-style toggle clasp. The result was a deeply personal piece that looked centuries old but told a very modern story of connection.
This approach exemplifies how vintage-style jewelry transcends mere decoration—it becomes heirloom-in-the-making.
Frequently Asked Questions
Can I use non-vintage materials to achieve a vintage look?
Absolutely. Many modern suppliers offer “antiqued” findings, faux ivory beads, and reproduction cameos that mimic vintage aesthetics. The key is thoughtful arrangement and finishing techniques like light distressing or tonal layering.
How do I prevent my homemade necklace from tarnishing?
Store it in an airtight bag with anti-tarnish strips. Avoid exposure to moisture, perfume, and lotions. For occasional cleaning, use a polishing cloth designed for silver or brass—never abrasive cleaners.
Is it safe to use old jewelry parts in my design?
Yes, as long as they’re structurally sound. Inspect for weak links, cracked stones, or corroded metal. Clean gently with mild soap and water, and reinforce fragile elements with new jump rings if needed.
Final Thoughts: Wear Your Story with Pride
Crafting a vintage-style necklace at home is both an artistic endeavor and a mindful practice. It invites you to slow down, curate meaningfully, and celebrate beauty in imperfection. Unlike mass-produced accessories, your handmade piece carries intention—from the choice of a single tarnished key charm to the rhythm of hand-linked chains. There’s no need for expensive tools or years of training. All you need is curiosity, a few hours, and the courage to make something uniquely yours.


 浙公网安备
33010002000092号
浙公网安备
33010002000092号 浙B2-20120091-4
Comments
No comments yet. Why don't you start the discussion?