
Photographs capture moments, but videos bring them to life. Turning your favorite still images into a dynamic video can evoke emotion, preserve memories, and even communicate stories in ways that static pictures cannot. For beginners, the process may seem intimidating—especially with the wide range of software, effects, and editing options available. But with the right approach, anyone can create visually compelling photo videos using accessible tools and a bit of creativity.
Whether you're compiling vacation snapshots, building a wedding slideshow, or crafting a tribute video, this guide walks you through every stage—from selecting your photos to exporting a polished final product.
1. Gather and Prepare Your Photos
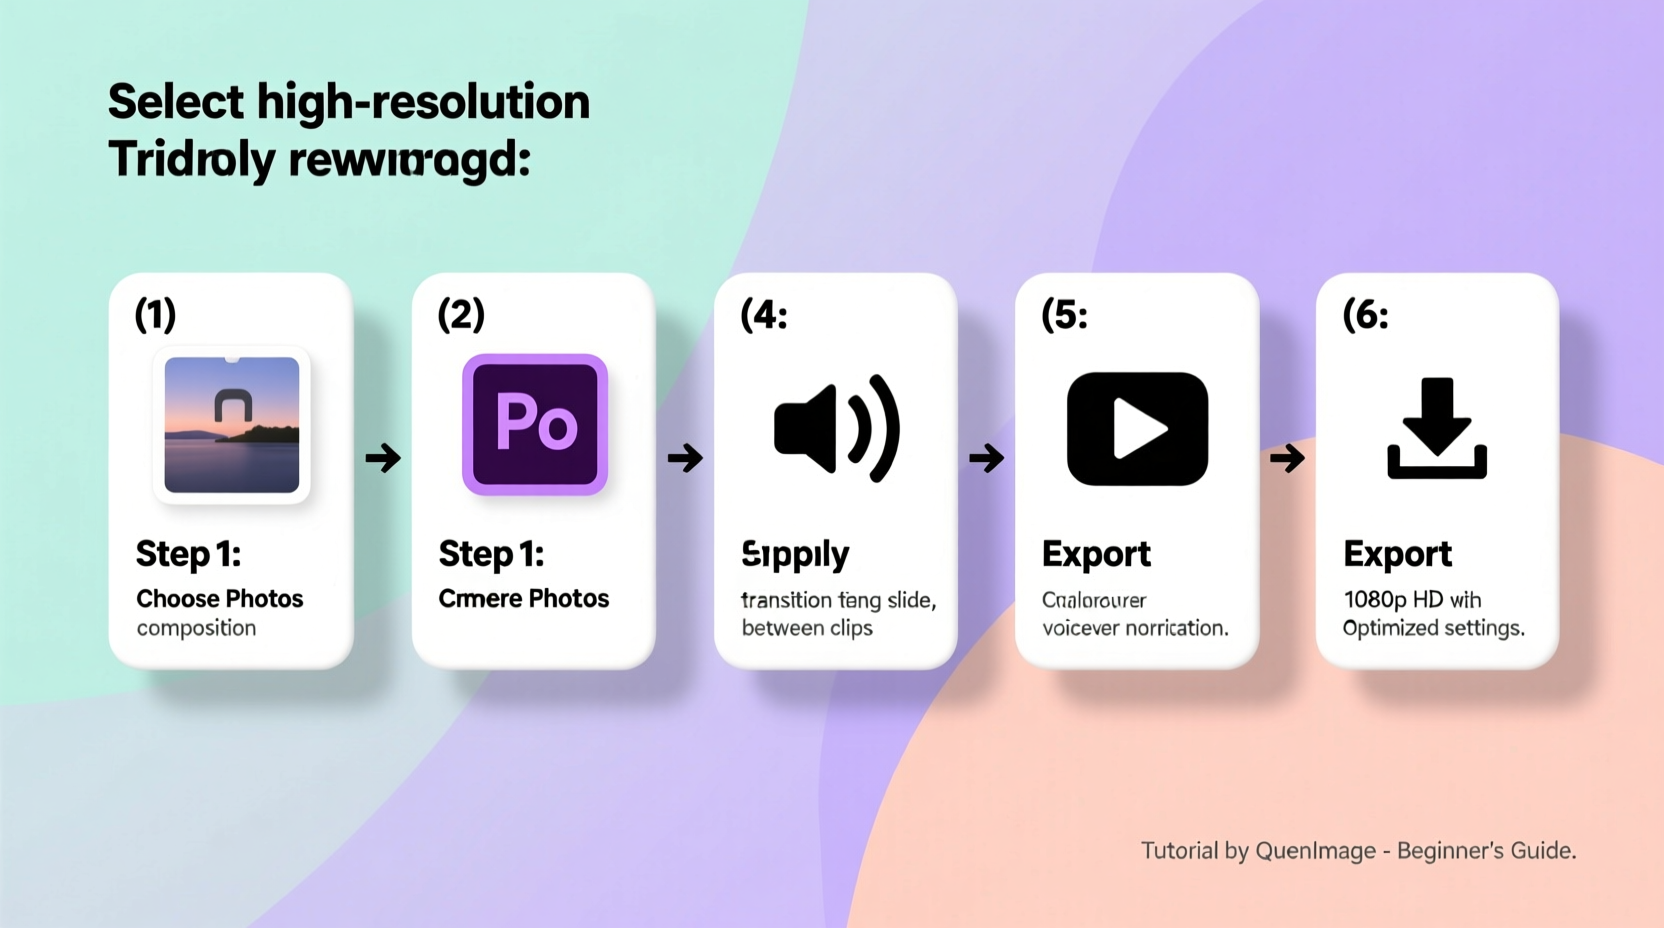
The foundation of any great photo-to-video project is high-quality source material. Begin by collecting all the images you want to include. Organize them into a dedicated folder on your computer, ideally sorted chronologically or thematically (e.g., “Beach Trip,” “Family Reunion”).
Before importing them into editing software, review each photo for clarity, composition, and relevance. Avoid blurry or poorly lit images unless they carry strong sentimental value. If needed, make minor adjustments using free tools like Google Photos, Canva, or GIMP to correct brightness, contrast, or cropping.
Photo Preparation Checklist
- Select 10–30 high-resolution images for a 2–5 minute video
- Ensure proper lighting and focus
- Crop or resize to match your video’s aspect ratio
- Remove duplicates and low-quality shots
- Name files sequentially (e.g., “photo_01.jpg”) for easier management
2. Choose the Right Editing Software
Beginners don’t need expensive or complex software to create beautiful videos. Many user-friendly tools offer drag-and-drop interfaces, built-in transitions, music libraries, and export presets tailored for social media or personal viewing.
| Software | Best For | Platform | Cost |
|---|---|---|---|
| iMovie | Mac/iOS users, intuitive interface | macOS, iOS | Free |
| Clipchamp | Windows 10/11, online editor | Web, Windows | Free + premium plans |
| Canva Video Editor | Quick social media videos | Web, mobile | Free + Pro features |
| DaVinci Resolve | Advanced color grading and audio | Windows, macOS, Linux | Free (Studio version paid) |
| Adobe Premiere Rush | Cross-device syncing, professional look | All platforms | Paid (free trial) |
For absolute beginners, iMovie or Canva are excellent starting points due to their simplicity and pre-designed templates. As you gain confidence, consider upgrading to more powerful tools like DaVinci Resolve for finer control over timing, effects, and sound mixing.
3. Structure Your Story with a Timeline
A compelling video isn’t just a sequence of photos—it tells a story. Think about the narrative arc: Where does it begin? What emotions do you want to evoke? How does it conclude?
Start by sketching a rough timeline on paper or in a notes app. Divide your video into three parts:
- Opening (0:00–0:30): Set the tone with a title card or a powerful image.
- Middle (0:30–3:00): Develop the story—chronological events, themed sections, or emotional progression.
- Ending (3:00–end): Conclude with a memorable photo, message, or call to action (e.g., “Thank You,” “Forever in Our Hearts”).
Allocate time per photo based on its importance. Typically, 3–5 seconds works well for standard images, while key moments (like a first kiss or birthday surprise) can linger for 6–8 seconds.
“People remember how you made them feel, not every detail you showed.” — Sarah Lin, Visual Storytelling Coach
4. Enhance with Transitions, Music, and Text
Now that your structure is set, elevate the viewing experience with subtle enhancements.
Transitions: Avoid overusing flashy effects like spin or explode. Instead, opt for smooth fades, dissolves, or gentle zooms (also known as the Ken Burns effect). These add motion without distracting from the content.
Music: A well-chosen soundtrack sets the mood. Match the tempo and genre to your theme—upbeat pop for travel videos, soft piano for memorials. Use royalty-free music from sources like YouTube Audio Library, Pixabay, or Free Music Archive to avoid copyright issues.
Text Overlays: Add captions, dates, or short quotes to provide context. Keep fonts clean and readable. Animate text gently to appear and disappear without abrupt jumps.
Real Example: A Family Reunion Video
Lena wanted to surprise her parents with a video recap of their 25th family reunion. She selected 24 photos ranging from group shots to candid moments. Using iMovie, she arranged them chronologically: arrival → games → dinner → speeches → farewell hugs.
She added a soft acoustic track, applied slow zoom effects to each image, and inserted text cards like “Laughter Around the Fire” and “Another Chapter Together.” The result was a 3-minute video that moved her entire family to tears at the next gathering. The key? Emotional pacing—not perfection.
5. Export and Share Your Video
Once editing is complete, it’s time to export. Choose a format compatible with your intended platform:
- MP4 (H.264): Best for YouTube, Instagram, email, and most devices.
- MOV: Ideal for Apple users or further editing in professional software.
Set resolution to at least 1080p for crisp quality. If sharing online, keep file size under 500MB to ensure smooth uploads. Most editors offer presets like “YouTube,” “Instagram,” or “Mobile” to simplify this step.
After exporting, preview the video on multiple devices (phone, tablet, TV) to check for audio sync, text readability, and overall flow. Make small tweaks if needed before finalizing.
Common Export Settings for Beginners
| Setting | Recommended Value |
|---|---|
| Format | MP4 |
| Resolution | 1920x1080 (Full HD) |
| Frame Rate | 30 fps |
| Bitrate | Medium to High |
| Audio Format | Stereo, 44.1kHz or 48kHz |
Frequently Asked Questions
How many photos do I need for a 3-minute video?
Aim for 15–25 photos, allowing 5–8 seconds per image depending on pacing. You can include shorter clips if using transitions or motion effects.
Can I use copyrighted music?
It’s best to avoid copyrighted music unless you have explicit permission. Platforms like YouTube may mute your video or issue takedown notices. Stick to royalty-free or licensed tracks.
Why does my exported video look blurry?
This often happens when source photos are low resolution or when export settings use excessive compression. Ensure your original images are at least 1200 pixels wide and select “High Quality” during export.
Final Thoughts
Creating a stunning video from photos doesn’t require technical expertise—just intention, patience, and a clear vision. By curating meaningful images, structuring them into a narrative, and enhancing with music and motion, you transform still memories into living stories.
Every photo holds a moment frozen in time. When strung together with care, they form a moving tribute to life’s most precious chapters. Don’t wait for the “perfect” occasion. Start today with the tools you already have. Your first video might not be flawless, but it will be yours—and that makes it valuable.


 浙公网安备
33010002000092号
浙公网安备
33010002000092号 浙B2-20120091-4
Comments
No comments yet. Why don't you start the discussion?