
Drawing can feel intimidating at first, especially when facing a blank page. But starting with simple subjects like a basic fish helps build foundational skills in shape recognition, proportion, and line control. Fish are ideal beginner subjects because their forms rely on smooth curves and recognizable silhouettes. With just a pencil, eraser, and paper, anyone can learn to draw a convincing fish in under 30 minutes. This guide breaks down the process into manageable steps, offering practical tips, structure, and encouragement for those just beginning their artistic journey.
Gathering Your Tools
Before you begin, ensure you have the right materials. You don’t need expensive supplies to start drawing effectively. A few basic tools will suffice:
- A standard #2 pencil (HB) for light sketching and darkening lines
- An eraser (preferably a kneaded eraser for gentle corrections)
- A sheet of plain white paper (printer paper works fine)
- A ruler (optional, for alignment or symmetry checks)
- A soft cloth or tissue (to smudge or blend if needed)
Understanding Basic Fish Anatomy
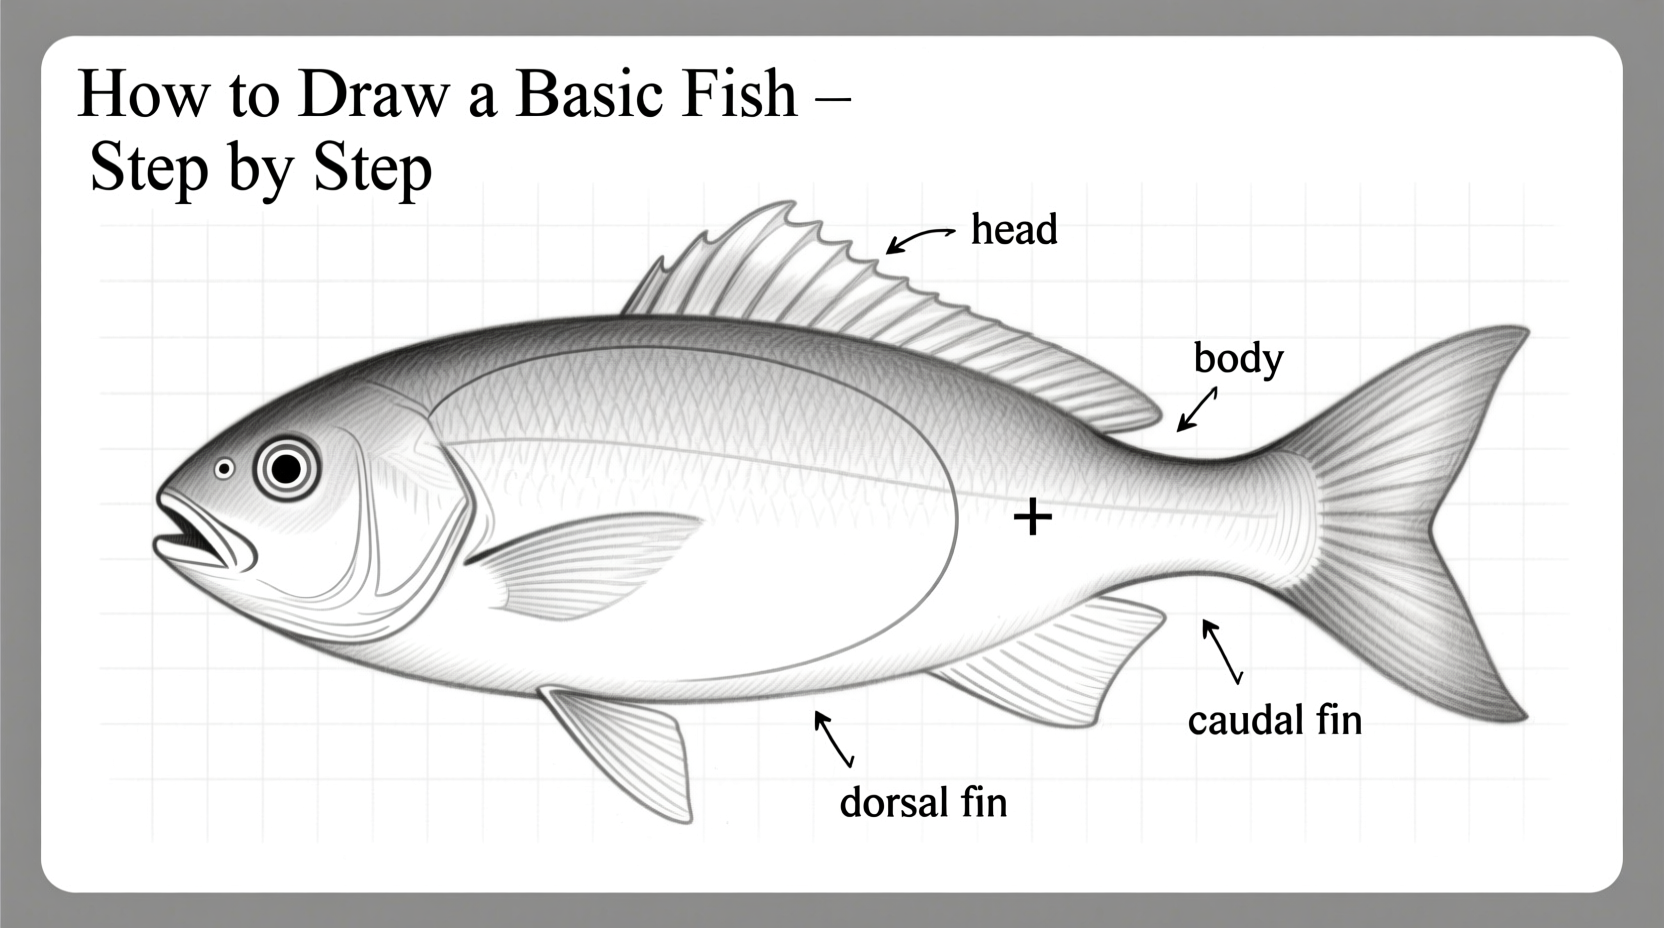
You don’t need to be a marine biologist, but knowing a few key features of a fish’s body will help your drawing look natural. Most common fish—like goldfish, guppies, or perch—share similar structural elements:
- Body: Oval or teardrop-shaped, wider in the middle and tapering toward the tail
- Head: Contains the eye and mouth, usually rounded with a slight point at the snout
- Fins: Dorsal (top), pectoral (side), pelvic (lower side), anal (under tail), and caudal (tail fin)
- Eye: Positioned near the front of the head, often large relative to body size in cartoon-style drawings
- Mouth: Can be upturned, downturned, or neutral depending on species and expression
“Beginners benefit most from simplifying complex forms. Focus on capturing the gesture and flow of the animal, not every scale.” — Daniel Rivera, Art Instructor and Wildlife Sketch Specialist
Step-by-Step Guide to Drawing a Basic Fish
Follow these seven steps to create a clean, balanced fish drawing. Take your time, and remember that practice improves accuracy more than perfection.
- Draw the main body shape. Lightly sketch an elongated oval tilted diagonally across the page. This will form the central mass of the fish. Imagine it as a stretched egg leaning slightly upward.
- Add the tail guideline. At the narrow end of the oval, extend two gently curving lines outward to form a V-shape. This marks where the tail fin will go. Keep the lines symmetrical unless aiming for motion.
- Sketch the head and eye. At the opposite (wider) end, round out the head slightly. Draw a small circle for the eye about one-third from the front. Add a smaller circle inside for the pupil.
- Outline the dorsal fin. Near the top center of the body, draw a triangular or scalloped shape rising above the oval. It should be proportional—not too tall or long.
- Add the pectoral and pelvic fins. On either side of the head, draw two small curved fins pointing backward. Below the midsection, add one small fin on each side for the pelvic fins.
- Refine the outer silhouette. Go over your guidelines and connect the shapes into a single flowing outline. Smooth the curves between the body and tail, ensuring no sharp angles unless stylistic.
- Erase guidelines and add details. Gently remove construction lines. Then, draw a curved line across the body for the gill, a smile-like line for the mouth, and a few wavy lines inside the tail and dorsal fin to suggest texture.
Common Mistakes and How to Avoid Them
Even simple drawings can go off track. Here are frequent beginner errors and how to correct them:
| Mistake | Why It Happens | Solution |
|---|---|---|
| Fish looks flat or stiff | Rigid lines and lack of curve variation | Use flowing, organic lines; vary line weight for depth |
| Fins are misaligned or disproportionate | Added without reference to body position | Sketch light guide lines from body center to fin placement |
| Head appears too small or too large | Poor proportion relative to body | Ensure the head takes up roughly 1/4 of total length |
| Overworking the drawing | Too many erased areas damage paper | Work lightly at first; save heavy lines for final pass |
Practice Exercises to Build Confidence
Drawing one fish is great—but practicing variations strengthens your skills. Try these exercises weekly:
- Draw five fish in different positions: side view, slightly angled, tail-facing, swimming upward
- Vary the species: Try a rounder goldfish, a slender trout, or a flat-bodied manta ray using the same base method
- Trace over your favorite drawing: Place a new sheet over your best attempt and redraw it to reinforce muscle memory
- Add simple shading: Use soft pencil strokes along one side of the body to suggest light coming from above
“Confidence in drawing comes not from talent, but repetition. The more you draw, the more you see.” — Lila Chen, Founder of Beginner Sketch Collective
Mini Case Study: From Scribbles to Success
Jamie, a 32-year-old office worker with no prior art experience, decided to try drawing during a weekend staycation. Initially frustrated by crooked fins and lopsided bodies, Jamie followed this step-by-step method over three days. By breaking the fish into simple shapes and focusing on one element at a time, the results improved dramatically. On day four, Jamie completed a symmetrical fish with balanced fins and added subtle shading. “I didn’t think I could do it,” they said. “But once I stopped trying to make it perfect and just followed the steps, it clicked.”
Checklist: Drawing a Basic Fish Successfully
Use this checklist before and after your next drawing session:
- ✅ Gather pencil, eraser, and paper
- ✅ Start with a light sketch—don’t press hard
- ✅ Draw the main oval body shape first
- ✅ Position the eye and tail early for balance
- ✅ Check fin symmetry using light guide lines
- ✅ Refine the outline before adding details
- ✅ Erase unnecessary construction lines
- ✅ Add simple textures like gills, mouth, and fin lines
- ✅ Step back and assess proportions
- ✅ Practice again tomorrow
Frequently Asked Questions
Can I use a pen instead of a pencil?
Yes, but pencils are recommended for beginners because they allow erasing and adjusting. If using a pen, accept that mistakes are part of the learning process and can add character to your sketch.
How do I make my fish look like it’s swimming?
Add motion by curving the body slightly into an S-shape, angling the fins asymmetrically, and extending the tail fin with dynamic lines. Avoid perfectly straight postures—they look static.
Do I need to draw scales?
Not for a basic drawing. Scales can clutter the image. Instead, suggest texture with a few curved lines along the body or a subtle shadow along the top edge.
Final Thoughts and Next Steps
Drawing a fish may seem minor, but it introduces essential skills: observing shapes, maintaining proportion, and building confidence through repetition. Every artist starts somewhere, and mastering simple forms lays the groundwork for more complex subjects. Once you’re comfortable with this basic fish, challenge yourself to draw two fish together, add bubbles, or place your fish in a simple underwater scene with plants or rocks.


 浙公网安备
33010002000092号
浙公网安备
33010002000092号 浙B2-20120091-4
Comments
No comments yet. Why don't you start the discussion?