
Glitter phone cases are a popular choice for adding flair and personality to smartphones. With their sparkling rhinestones, adhesive-backed sequins, and layered embellishments, they turn an everyday device into a fashion statement. However, when it’s time to switch styles, upgrade your phone, or simply clean your device, removing a bling glitter case can feel like a high-stakes operation. One wrong move could leave residue, scratch the phone, or even dislodge decorative elements onto the screen. The good news is that with the right approach, you can remove these intricate cases cleanly and safely—without compromising your phone’s finish or your peace of mind.
Why Glitter Cases Are Tricky to Remove
Unlike standard silicone or plastic cases, bling glitter cases often use multiple layers of adhesives, glue dots, or heat-bonded materials to secure decorative elements. These adhesives are designed to be durable, which means they resist normal peeling forces. Additionally, the thin plastic base of many glitter cases can crack or tear if pulled too quickly. If not handled carefully, the removal process can result in:
- Residue buildup on the phone’s surface
- Scratches from embedded glitter particles
- Sticky patches where rhinestones were attached
- Damage to buttons or ports if force is misapplied
Understanding the construction of your case is the first step toward safe removal. Most glitter cases consist of a flexible TPU (thermoplastic polyurethane) or hard polycarbonate shell decorated with glued-on glitter, beads, or foil layers. The challenge lies not in the shell itself, but in the stubbornness of the embellishment adhesives.
Essential Tools for Safe Removal
Having the right tools on hand makes a significant difference in outcome. Avoid using sharp objects like knives or box cutters—they increase the risk of scratching or puncturing your phone. Instead, use soft, non-abrasive instruments that provide leverage without damage.
| Tool | Purpose | Recommended Alternative |
|---|---|---|
| Plastic pry tool | Lift edges gently without scratching | Old credit card or gift card |
| Microfiber cloth | Wipe away dust and protect surface | Cotton cloth (lint-free) |
| Isopropyl alcohol (70%) | Clean adhesive residue | Commercial adhesive remover (non-oily) |
| Tweezers (fine-tip) | Remove stray glitter or stuck beads | Toothpick (for light debris) |
| Warm water and mild soap | Final cleaning after removal | Pre-moistened electronics wipe |
Before beginning, ensure all tools are clean and dry. Any dirt or grit on your tools can act like sandpaper on your phone’s coating.
Step-by-Step Guide to Removing Your Bling Glitter Case
- Power down your device – Turn off your phone completely to avoid accidental input during handling.
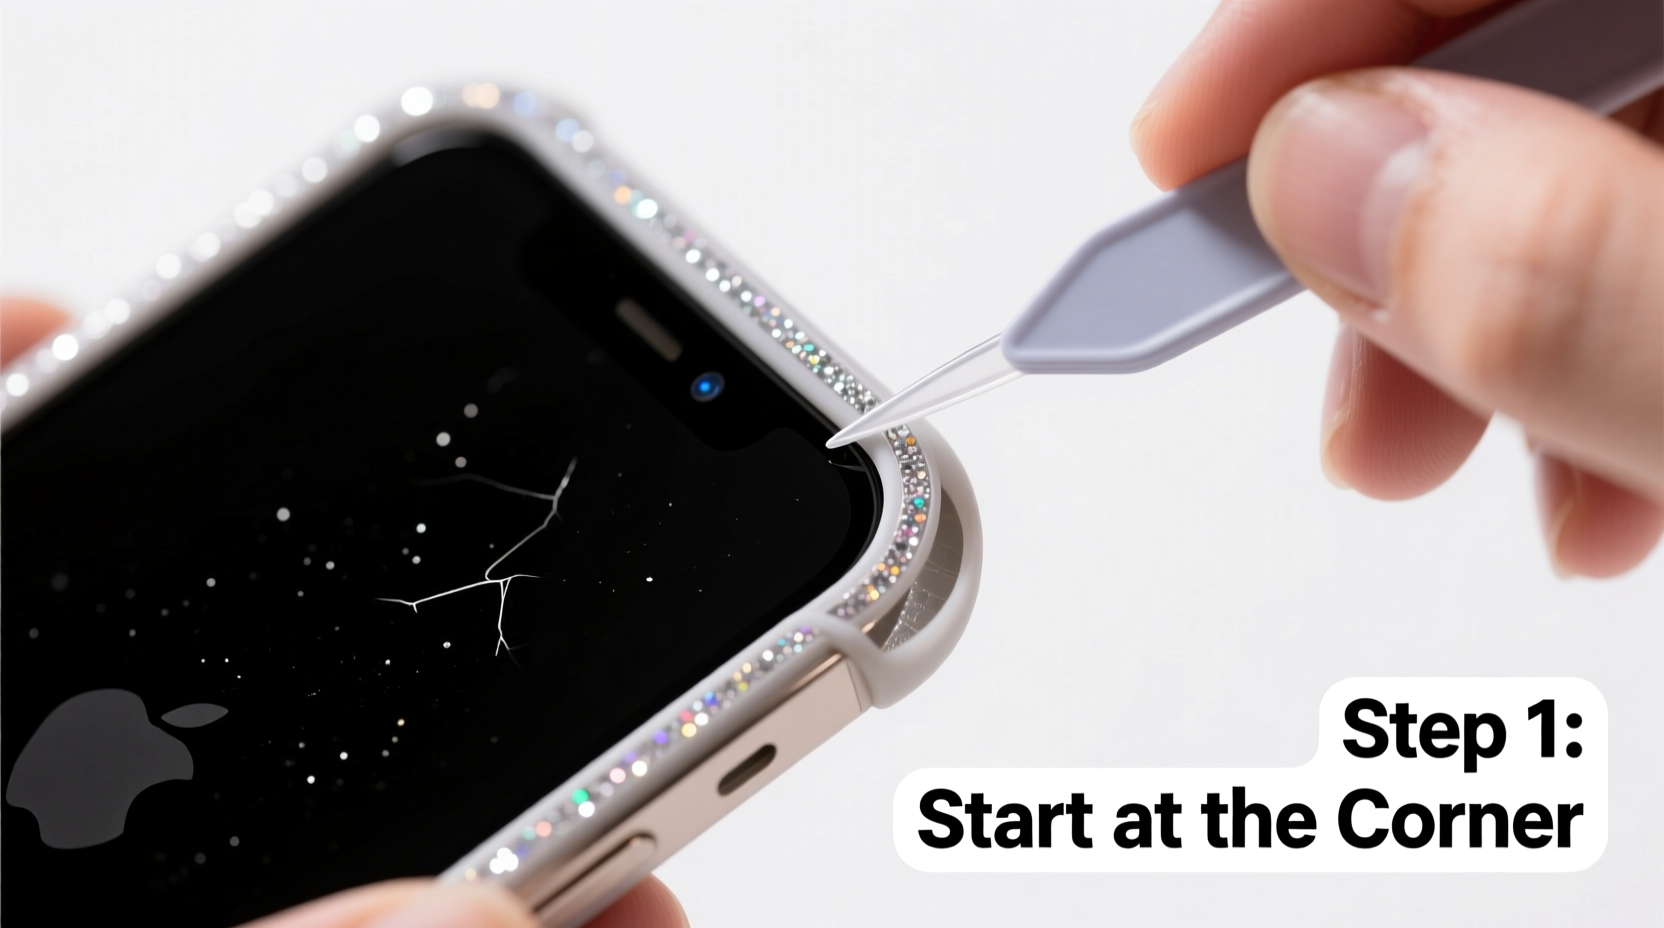
- Inspect the case – Look for seams, weak points, or areas where the case may already be lifting. Start at the least decorated edge, usually the bottom near the charging port.
- Insert a plastic tool – Slide a credit card or plastic pry tool between the case and the phone at the bottom edge. Apply gentle upward pressure to create a small gap.
- Work around the perimeter – Slowly move the tool along the sides, prying incrementally. Do not force large sections open at once. Focus on creating a consistent separation.
- Check for internal clips or ridges – Some glitter cases have internal plastic tabs that snap into place. Listen for subtle clicks as you release each one.
- Remove the case slowly – Once fully loosened, pull the case away from the phone at a low angle (about 30 degrees) to minimize stress on any remaining adhesive points.
- Inspect the phone – Immediately check for leftover glue, embedded glitter, or sticky spots, especially around the camera bump and speaker grilles.
- Clean the device – Use a microfiber cloth dampened with isopropyl alcohol to gently wipe down the phone. For stubborn residue, hold the cloth against the spot for 10–15 seconds to soften the adhesive before wiping.
- Remove loose glitter – Use tweezers or a dry toothbrush to dislodge any tiny particles trapped in ports or crevices.
- Final rinse with dry cloth – Wipe the entire phone again with a dry microfiber cloth to restore shine and remove lint.
“Patience is the most important tool when removing decorated cases. Rushing leads to scratches, but slow, steady pressure preserves both the phone and the case if you plan to reuse it.” — Jordan Lee, Mobile Device Technician with 12 years of repair experience
Mini Case Study: Removing a Rhinestone-Encrusted Case from an iPhone 14
Sophia, a college student and frequent phone accessorizer, purchased a heavily embellished glitter case covered in tiny rhinestones bonded with industrial-strength glue dots. After three months, she wanted to switch to a protective matte case but found the glitter case wouldn’t budge. She tried pulling it from the corner with her fingernail, which caused a small crack in the case and left sticky residue near the volume buttons.
Following online guidance, she used a plastic spudger from a repair kit, started at the charging port end, and worked her way around the phone over 12 minutes. When she noticed resistance near the camera module, she paused and applied a warm, damp cloth to soften the adhesive. This allowed the case to release cleanly. She then cleaned the back of her iPhone with a 70% alcohol wipe and removed six tiny glitter fragments from the SIM tray using tweezers. The phone emerged unharmed, and Sophia was able to resell the glitter case intact due to careful removal.
Common Mistakes to Avoid
- Using metal tools – Even a butter knife can leave micro-scratches on glass or aluminum surfaces.
- Rushing the process – Sudden force can break the case and trap shards between the phone and shell.
- Ignoring environmental conditions – Cold temperatures make adhesives more brittle; warm environments soften them. Room temperature is ideal.
- Not cleaning ports afterward – Glitter particles can interfere with charging and audio functions if left inside connectors.
Frequently Asked Questions
Can I reuse my glitter phone case after removing it?
Yes, if removed carefully without tearing or warping. However, adhesive strength will diminish over time, especially if glue dots were used. Reattachment may require double-sided tape or new glue dots.
Will alcohol damage my phone’s finish?
No, 70% isopropyl alcohol is safe for glass, metal, and coated plastic surfaces commonly used in smartphones. Avoid excessive application near speaker grilles or ports, and never submerge the device.
What should I do if glitter gets inside my phone’s charging port?
Do not use compressed air—it can push debris deeper. Instead, turn off the phone and gently scrape out particles with a wooden toothpick. If the port remains obstructed, seek professional cleaning to avoid short circuits.
Final Checklist for Safe Removal
- ✅ Power off the phone
- Prevents accidental touches or inputs.
- ✅ Gather non-metallic tools
- Use plastic cards, pry tools, or tweezers.
- ✅ Work slowly and evenly
- Start at the bottom and progress around the edges.
- ✅ Clean adhesive residue immediately
- Use alcohol wipes or a damp microfiber cloth.
- ✅ Inspect ports and camera area
- Ensure no glitter or debris remains trapped.
- ✅ Store or dispose of the case properly
- If reusing, keep in a sealed bag. If discarding, wrap in paper to contain loose glitter.
Conclusion
Removing a bling glitter phone case doesn’t have to be a stressful ordeal. With patience, the right tools, and a methodical approach, you can free your phone from even the most stubbornly decorated shell—safely and completely. Whether you’re switching styles, preparing for a repair, or just craving a minimalist look, this process ensures your device stays pristine underneath. Take your time, follow each step deliberately, and treat your phone with the care it deserves.


 浙公网安备
33010002000092号
浙公网安备
33010002000092号 浙B2-20120091-4
Comments
No comments yet. Why don't you start the discussion?