
Hosting a website directly from your personal computer is entirely possible—and often more affordable than commercial hosting for small-scale projects. Whether you're testing a development environment, running a personal blog, or managing a home automation dashboard, self-hosting gives you full control. But it comes with risks: exposure to attacks, inconsistent uptime, and network complexity. Done right, however, it can be both secure and reliable. This guide walks through the process with clear, actionable steps to ensure your locally hosted webpage runs smoothly without compromising safety.
Why Host a Webpage from Your Computer?
Self-hosting offers several advantages. You retain complete control over your data, avoid subscription fees, and gain deeper insight into how web servers operate. Developers use local hosting to test applications before deployment. Hobbyists host internal tools like media dashboards or IoT controllers. Small businesses might temporarily host landing pages during early development.
Still, public-facing self-hosting requires careful configuration. Unlike cloud providers that offer built-in DDoS protection and redundancy, your home system is exposed directly to the internet unless properly secured.
“Self-hosting teaches fundamental networking and server management skills that are invaluable in today’s tech landscape.” — Raj Patel, Network Systems Engineer
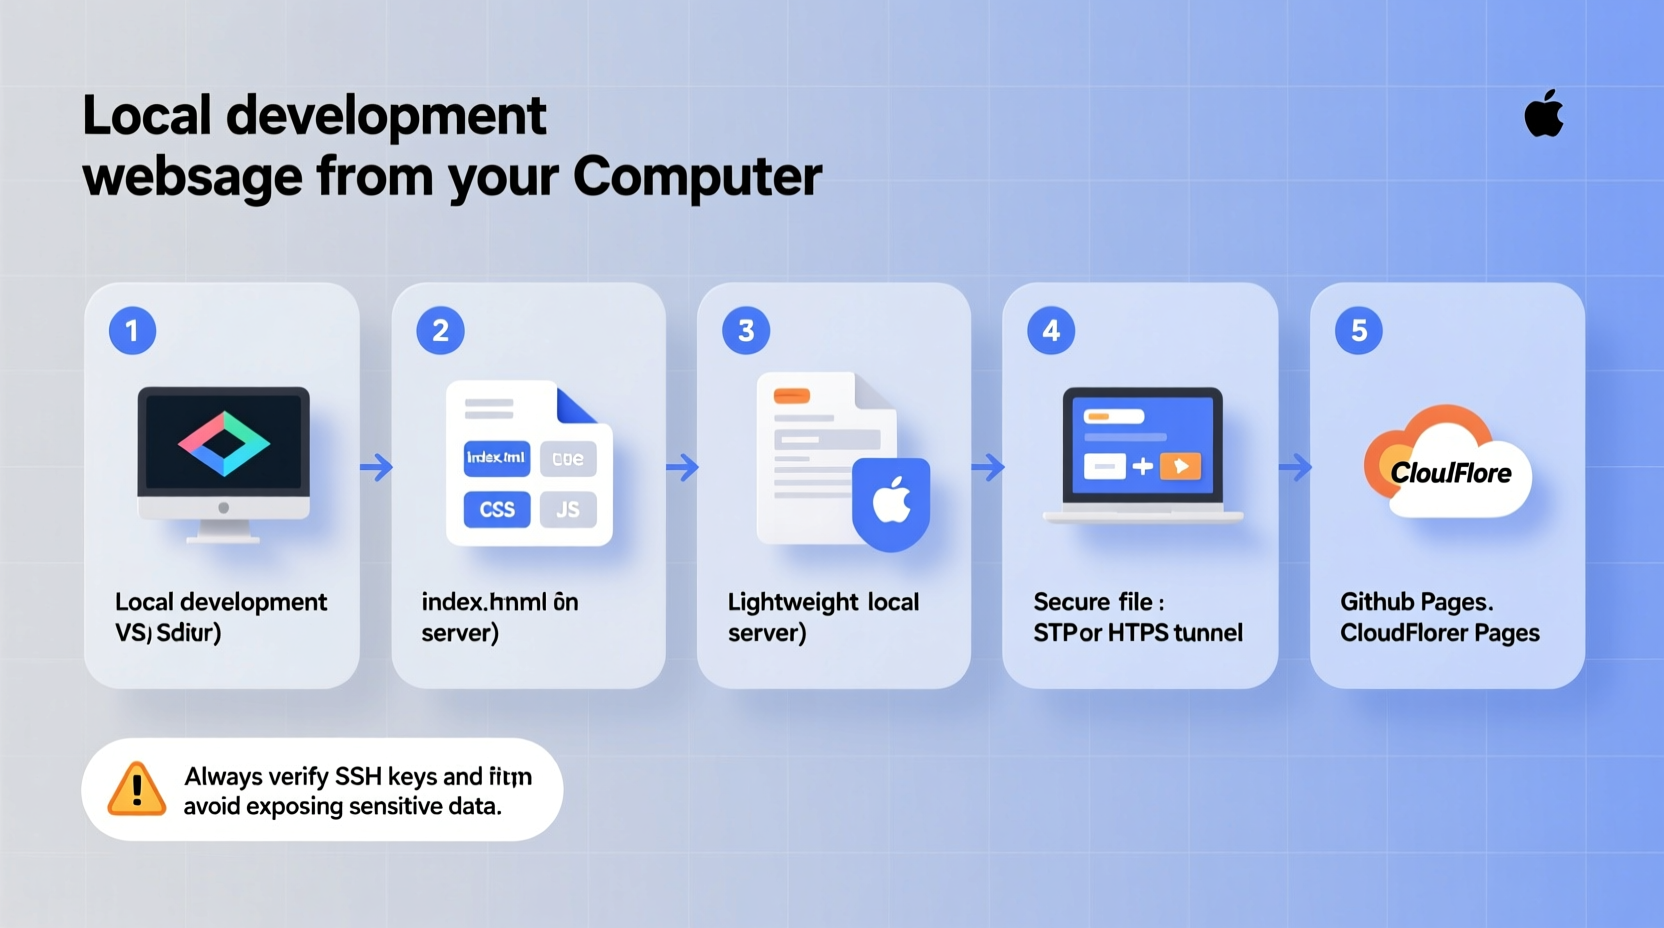
Step-by-Step Setup Process
Follow this sequence to deploy a functional, secure web server from your machine:
- Choose a Web Server Software: Popular options include Apache, Nginx, and lightweight alternatives like Python’s HTTP server for basic needs.
- Install and Configure the Server: Set up the software on your operating system and point it to your website files.
- Test Locally: Access your site via
http://localhostto confirm it works within your machine. - Enable Port Forwarding: Configure your router to forward external requests on port 80 (HTTP) or 443 (HTTPS) to your computer’s local IP.
- Secure with a Firewall: Restrict incoming connections and only allow necessary ports.
- Obtain a Static or Dynamic DNS Address: Use a DDNS service if your ISP assigns dynamic IPs.
- Set Up HTTPS with Let’s Encrypt: Encrypt traffic using free SSL certificates.
- Monitor and Maintain: Regularly update software and check logs for suspicious activity.
Security Best Practices for Self-Hosting
Exposing your computer to the internet increases attack surface. Implement these safeguards to reduce risk:
- Keep software updated: Patch your OS, server software, and any scripts regularly.
- Disable unused services: Close unnecessary ports and background daemons.
- Use strong passwords: Apply complex credentials for SSH and admin panels.
- Enable logging: Monitor access logs to detect unusual behavior.
- Isolate the server: If possible, use a separate device or virtual machine dedicated to hosting.
A common misconception is that “no one will target my small site.” Automated bots scan the entire internet daily for open ports and known vulnerabilities. Even low-traffic sites attract attention.
Essential Security Checklist
- ✅ Install a firewall (e.g., UFW on Linux, Windows Defender Firewall)
- ✅ Disable remote root login via SSH
- ✅ Set up automatic security updates
- ✅ Use fail2ban or similar intrusion prevention tool
- ✅ Regularly back up website files and configurations
Port Forwarding and Network Configuration
To make your local server accessible from outside your network, you must configure port forwarding on your router. Here's how:
- Find your computer’s local IP address (e.g.,
192.168.1.100) via command line (ipconfigon Windows,ifconfigon Linux/macOS). - Log in to your router’s admin panel (usually
192.168.1.1or similar). - Navigate to “Port Forwarding” under Advanced Settings.
- Create a new rule:
- Service Name: Web Server
- External Port: 80 (HTTP) or 443 (HTTPS)
- Internal IP: Your computer’s local IP
- Internal Port: 80 or 443
- Protocol: TCP
- Save and restart the router if required.
After setup, test access by visiting your public IP address in a browser from a mobile network or another location. You can find your public IP by searching “what is my IP” in any search engine.
| Port | Purpose | Security Risk Level | Recommendation |
|---|---|---|---|
| 80 | HTTP traffic | Medium | Only forward if redirecting to HTTPS |
| 443 | HTTPS encrypted traffic | Low (when configured correctly) | Always use for public sites |
| 22 (SSH) | Remote administration | High | Change default port; disable password login |
| 8080 | Alternate HTTP | Medium | Use for internal testing only |
Real-World Example: Hosting a Personal Portfolio
Sophie, a freelance designer, wanted to showcase her work without paying for hosting. She installed Nginx on an old laptop running Ubuntu, placed her HTML/CSS portfolio files in the web directory, and tested it locally. After configuring port forwarding on her home router, she signed up for a free Dynamic DNS service (DuckDNS) to map a memorable domain to her changing public IP. Using Certbot, she obtained a free SSL certificate and enabled HTTPS. She also set up UFW to block all ports except 443 and 22 (on a non-standard port). Now, clients access her portfolio securely at sophiedesign.duckdns.org, and she maintains full control over updates and backups—all at no cost beyond her existing internet plan.
Enabling HTTPS with Let’s Encrypt
Modern browsers flag HTTP sites as “Not Secure.” To avoid this and protect data, use HTTPS. The easiest way is with Let’s Encrypt, a free, automated certificate authority.
Steps to install SSL via Certbot:
- Ensure your domain (or DDNS hostname) resolves to your public IP.
- Install Certbot:
sudo apt install certbot python3-certbot-nginx(for Nginx on Ubuntu). - Run:
sudo certbot --nginx -d yourdomain.duckdns.org. - Follow prompts to configure encryption.
- Test auto-renewal:
sudo certbot renew --dry-run.
Certbot automatically renews certificates every 90 days. Set up a cron job to run renewal checks weekly.
Frequently Asked Questions
Can I host a website from my computer 24/7?
Yes, but your computer must remain powered on and connected to the internet. For true uptime, consider using a low-power device like a Raspberry Pi or repurposed mini PC that can run continuously without high electricity costs.
Will my ISP block web hosting?
Some residential ISPs prohibit running servers in their terms of service. While enforcement varies, they may throttle traffic or issue warnings. Check your agreement. If restricted, consider a VPS for production sites, or use peer-to-peer hosting tools like Tailscale or PageKite for secure tunneling.
How do I handle a dynamic IP address?
Use a Dynamic DNS (DDNS) service such as No-IP, DuckDNS, or Dynu. These tools automatically update your domain’s DNS record whenever your public IP changes, ensuring consistent access.
Final Recommendations
Hosting a webpage from your computer is a powerful skill that blends networking, security, and system administration. Start small—serve a static page locally, then gradually expose it to the web with proper safeguards. Prioritize security over convenience: always use HTTPS, keep systems patched, and monitor access logs. As your needs grow, you can scale to reverse proxies, load balancing, or containerized deployments.
The knowledge gained from self-hosting extends far beyond a single webpage. It builds confidence in managing infrastructure, understanding firewalls, and troubleshooting connectivity—skills valuable in both personal projects and professional IT roles.


 浙公网安备
33010002000092号
浙公网安备
33010002000092号 浙B2-20120091-4
Comments
No comments yet. Why don't you start the discussion?