
Modern car key fobs are sophisticated electronic devices that unlock, lock, start engines, and even activate alarms. Despite their utility, they’re vulnerable to drops, moisture, and daily wear. A high-quality key case cover not only shields the fob from damage but also adds a personalized touch of style. Yet, many drivers either skip using one or install it incorrectly, defeating the purpose. This guide walks through the complete process of selecting and installing a car key case cover properly—ensuring long-term protection and aesthetic appeal.
Why Use a Key Case Cover?
A car key fob is both functional and expensive to replace. Most automakers charge over $200 for a new fob, including programming. Even minor physical damage can compromise internal circuitry or buttons. A well-fitted case acts as a shock absorber, reduces friction from keys in pockets, and prevents liquid exposure. Beyond protection, cases come in various colors, textures, and materials—from silicone to leather—that reflect personal taste without altering the vehicle’s original equipment.
“Over 60% of key fob failures stem from preventable physical damage. A protective case is the simplest, most cost-effective insurance.” — Jason Reed, Automotive Electronics Technician
Selecting the Right Case: Compatibility Matters
Not all key covers fit every model. Installing a mismatched case leads to poor button alignment, reduced signal range, or accidental disassembly. Before purchasing, verify compatibility using your car’s make, model, and year. Many manufacturers like Toyota, Honda, BMW, and Ford have distinct fob shapes—even within the same brand.
Consider these factors when choosing:
- Material: Silicone offers flexibility and grip; TPU provides slim durability; leather gives premium aesthetics.
- Button responsiveness: Look for precision-cut openings that allow full depression without obstruction.
- Signal transparency: Avoid metallic or thick shielding materials that may interfere with wireless signals.
- Retention design: Some cases snap shut; others use magnetic closures or sliding mechanisms. Choose based on how often you access the fob.
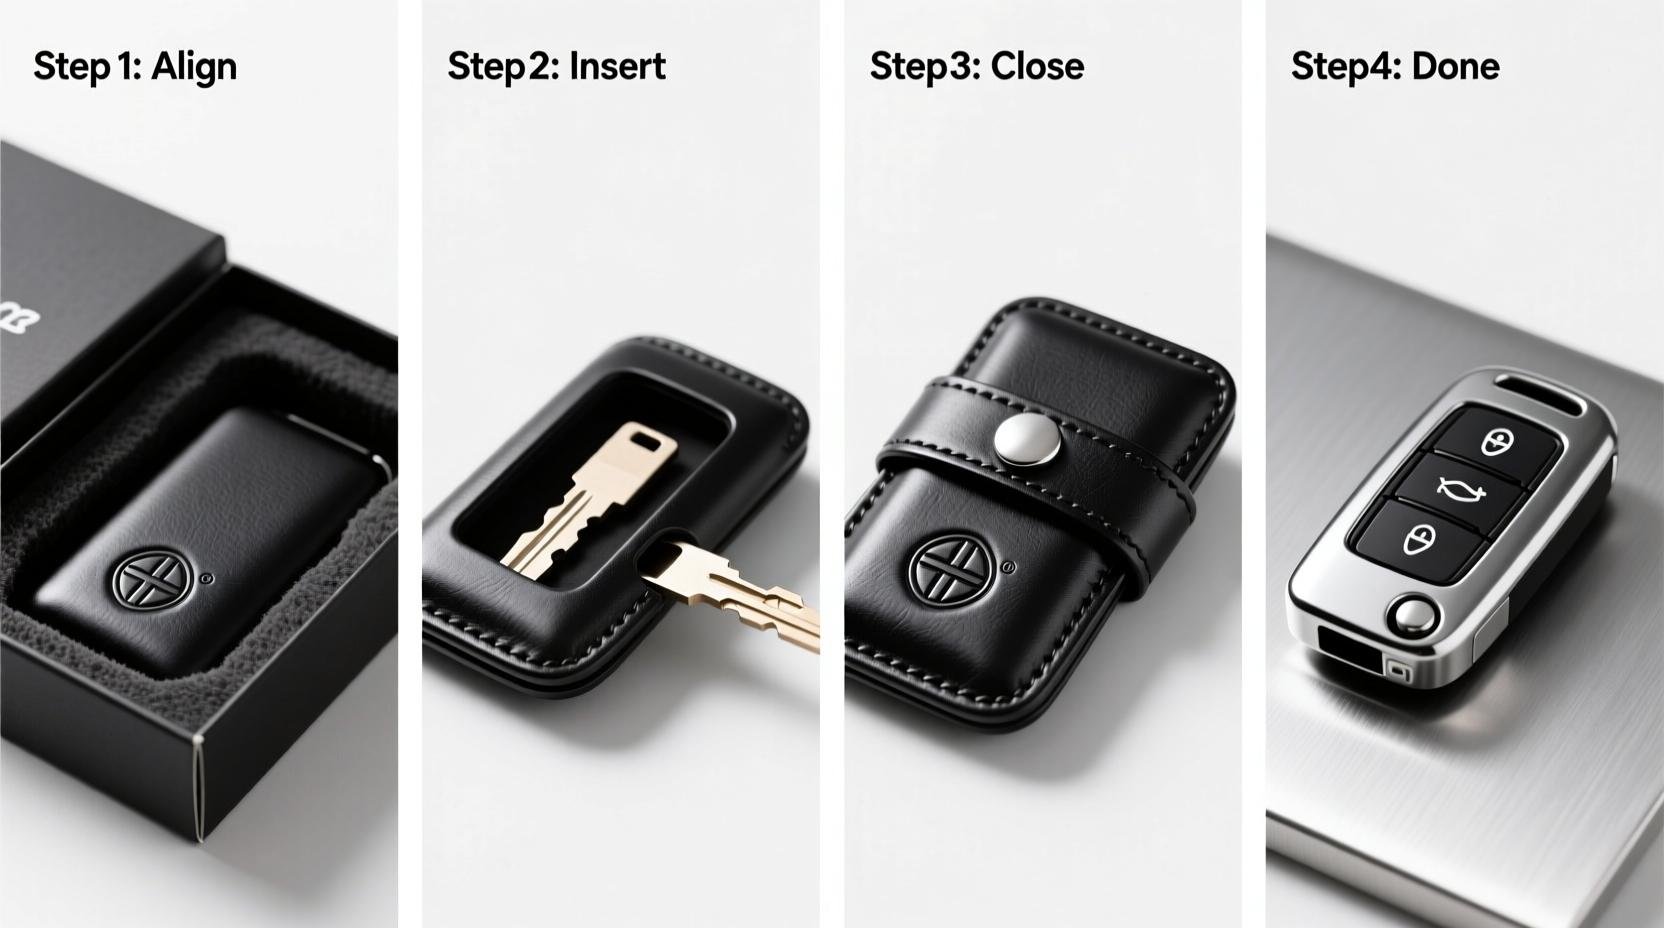
Step-by-Step Installation Guide
Installing a key case isn’t just about slipping the fob inside—it requires attention to detail to maintain function and longevity. Follow this timeline for optimal results.
- Power down (if applicable): While rare, some programmable smart keys can register changes during installation. Remove the battery only if replacing it simultaneously; otherwise, keep the fob active to test functionality afterward.
- Clean the fob: Wipe the entire surface with a microfiber cloth dampened with isopropyl alcohol (70%). Let dry completely. Dust or grease trapped under the case can cause abrasion over time.
- Inspect the case interior: Run your finger along the inner lining. Ensure no loose threads, sharp edges, or debris remain from manufacturing.
- Align the fob correctly: Match the buttons precisely with the cutouts. For two-piece hard-shell cases, place the fob into the lower half first, ensuring the logo faces upward as intended.
- Secure the case: For snap-on models, press evenly around the edges until you hear or feel a secure click. For silicone sleeves, gently stretch and roll the material over each end, avoiding twisting.
- Test all functions: Press each button to confirm unobstructed movement. Stand near your car and verify locking, unlocking, trunk release, and panic functions work normally.
- Check edge seal (optional): On waterproof-rated cases, ensure gaskets sit flush and there are no gaps where moisture could seep in.
Post-Installation Checkpoints
| Function | Expected Result | Troubleshooting Tip |
|---|---|---|
| Lock Button | Car locks immediately | If delayed, reposition fob in case—may be misaligned |
| Unlock Button | All doors open | Ensure case isn’t compressing button spring mechanism |
| Start/Remote Start | Engine starts wirelessly | Thick cases may reduce signal; consider thinner alternative |
| Physical Fit | No wobbling or partial coverage | Return case if gaps exist at corners or buttons |
Common Mistakes and How to Avoid Them
Even experienced users make errors when installing key covers. Awareness helps prevent avoidable issues.
- Forcing the fob into a tight case: Stretching silicone too aggressively can tear seams. Warm the case slightly with hands before insertion.
- Ignoring button travel: A case that restricts full button depression causes missed commands. Test repeatedly after installation.
- Using adhesive-backed cases: These degrade over time and trap moisture. Opt for mechanical retention instead.
- Choosing flashy designs over practicality: Overly large or dangling accessories increase pocket snag risk and stress on the fob casing.
Real-World Example: Sarah’s Experience
Sarah, a sales executive in Chicago, commuted daily via public transit and kept her key fob in her jacket pocket alongside coins and her phone. Within eight months, the plastic housing cracked, and the unlock button stopped responding. She replaced it at a cost of $240. Afterward, she researched durable solutions and purchased a dual-layer TPU-silicone hybrid case designed specifically for her 2021 Honda CR-V. She followed precise installation steps, tested functionality thoroughly, and now rotates the case monthly for cleaning. Two years later, her fob works flawlessly, and she credits the case with saving her hundreds in potential repairs.
Essential Maintenance Tips
A case is only effective if maintained. Dirt buildup, sweat, and oils degrade materials and impair performance over time.
- Weekly:
- Wipe exterior with a dry microfiber cloth. Remove lint from button crevices using a soft-bristle toothbrush.
- Monthly:
- Remove the fob and clean both components separately. Use mild soap and water for silicone; avoid soaking electronics.
- Every Six Months:
- Inspect for wear—cracks, fading, or stretched seams. Replace if structural integrity is compromised.
Frequently Asked Questions
Can a key case block the signal?
Yes, especially if made from metal-lined or overly thick materials. Most quality silicone or TPU cases are signal-transparent. If your car doesn’t respond consistently, remove the case temporarily to test signal strength.
Should I leave the key ring attached?
It depends. Heavy keychains add stress to the fob’s lanyard hole, potentially cracking the shell. If using a ring, attach it to the case’s designated loop, not the fob itself, and keep additional keys minimal.
Are waterproof cases worth it?
For drivers in rainy climates or those who frequently wash cars, yes. Fully sealed cases with O-rings offer excellent splash resistance. However, they may feel bulkier and require more careful installation to maintain the seal.
Final Checklist Before You Begin
- ✅ Confirm your key fob model matches the case specifications
- ✅ Clean the fob and let it dry completely
- ✅ Inspect the case for defects or misalignment
- ✅ Align buttons and ports accurately before closing
- ✅ Test every function post-installation
- ✅ Schedule routine cleaning and inspection every month
Conclusion
Protecting your car key fob with a well-installed case is a small action with significant long-term benefits. It preserves functionality, avoids costly replacements, and expresses personal style. By following the right selection criteria and installation process, you ensure seamless operation and lasting durability. Don’t wait until damage occurs—take preventive action today. Your future self will appreciate the foresight when your key still works perfectly years from now.


 浙公网安备
33010002000092号
浙公网安备
33010002000092号 浙B2-20120091-4
Comments
No comments yet. Why don't you start the discussion?