
Upgrading your Apple Watch with a sleek metal strap can dramatically change its look—adding elegance, durability, and a premium feel. Whether you’ve just purchased a stainless steel Milanese loop, a link bracelet, or a two-tone metal band, proper installation is key to both comfort and safety. While the process is straightforward, small differences in design between Apple Watch models—from Series 1 through Series 3 and the SE—can influence how smoothly the band attaches. This guide walks you through every detail, ensuring a secure, scratch-free setup regardless of your model.
Understanding Your Apple Watch Band Mechanism
All Apple Watch models from Series 1 through Series 3 and the SE use the same proprietary quick-release spring bar system. This mechanism allows bands to be swapped without tools. A small spring-loaded pin inside the watch case connects to grooves in the band’s attachment end. When pressed correctly, the pin retracts, freeing the band. The metal strap will have one end with a fixed connector and another with a sliding adjustment or clasp that locks into place once attached.
The consistency across these models means that any official or compatible third-party metal band designed for 38mm or 40mm cases will fit all of them. However, always verify compatibility before purchase—especially if your metal band includes special lugs or integrated adapters.
What You’ll Need Before Starting
No tools are required for standard metal band installation. However, having a clean, well-lit workspace helps avoid losing small parts or damaging your device. Most metal straps come with additional links, a link removal tool (if adjustable), and sometimes a pin pusher for resizing.
Before beginning, inspect your new metal strap for any manufacturing defects or sharp edges. Also, confirm that the connectors align with the slot width on your Apple Watch. Mismatched connectors may force improper insertion, risking internal damage.
Installation Checklist
- Apple Watch (Series SE, 1, 2, or 3)
- Metal band compatible with your case size (38mm or 40mm)
- Clean, flat surface
- Microfiber cloth (optional, for handling)
- Link adjustment tool (if resizing needed)
Step-by-Step Installation Process
- Power Down (Optional but Recommended): While not necessary, turning off your Apple Watch prevents accidental input during handling. Press and hold the side button, then slide to power off.
- Remove the Existing Band: Locate the release button on the underside of the watch near the band connection point. Press it firmly while gently pulling the band away from the case. Repeat for the other side. Keep fingers clear—the spring releases quickly.
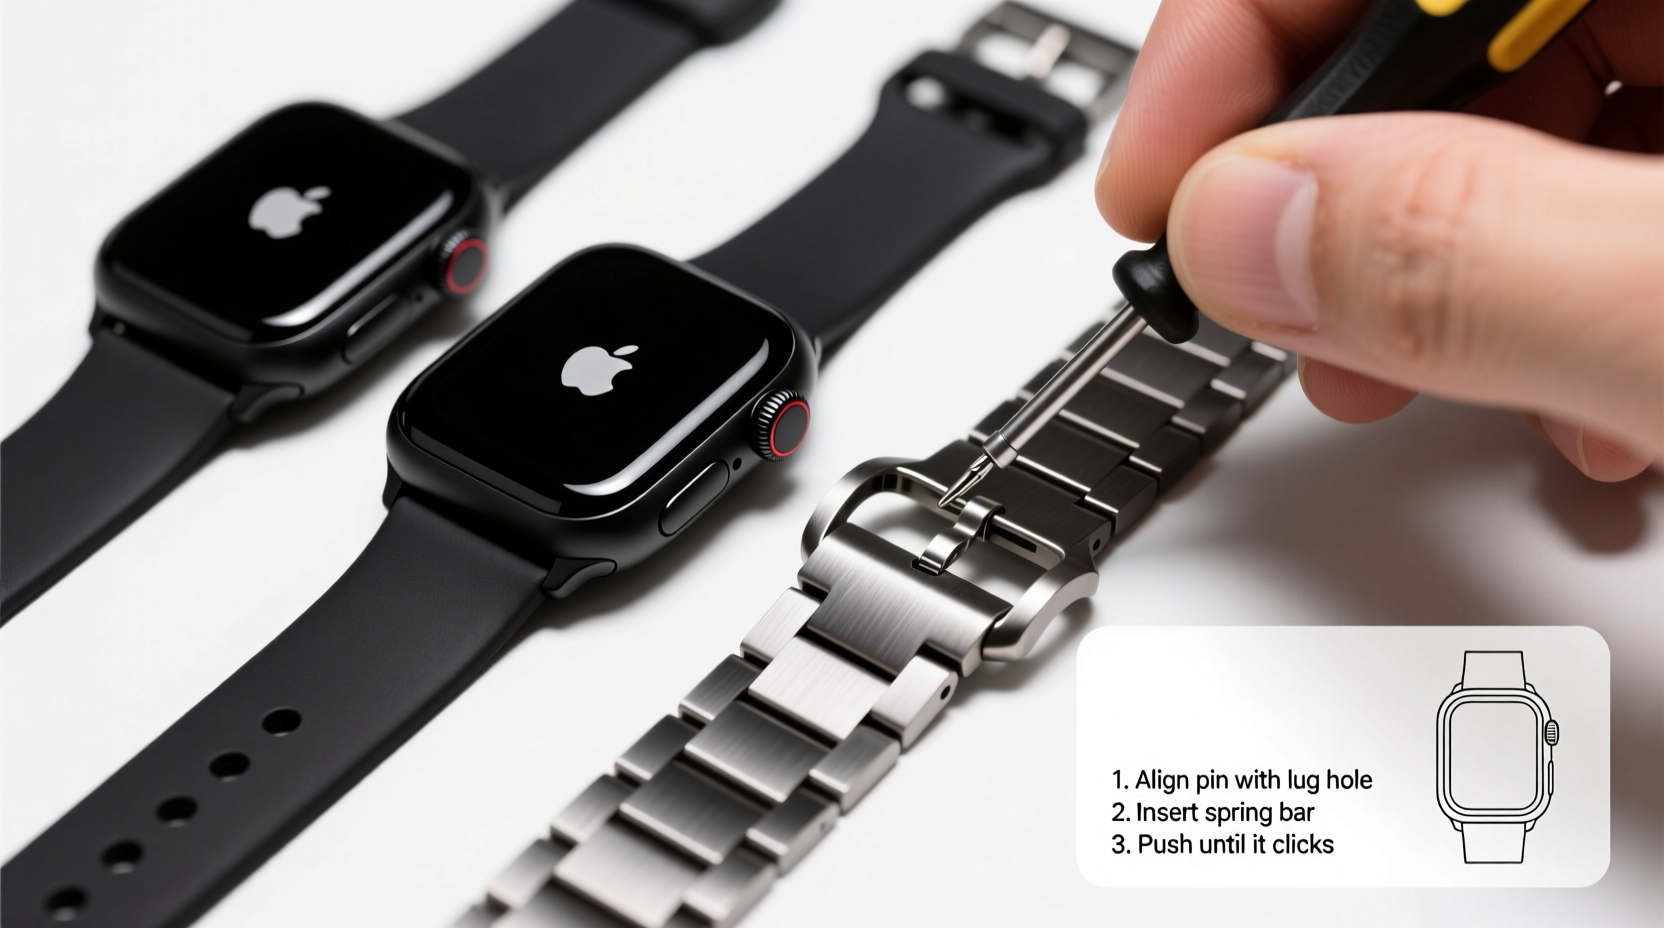
- Align the New Metal Band: Take one end of the metal strap and align its connector with the groove on the watch case. Ensure the release button on the watch is accessible and facing downward.
- Insert One Side First: Slide the band’s connector into the case until you hear a soft click. Do not force it. If resistance occurs, double-check orientation—some metal bands have directional clasps or logos that should face outward.
- Attach the Second Side: With one side secured, press the release button on the opposite side of the watch. Gently insert the remaining connector until it clicks into place. Release the button only after full insertion.
- Test Stability: Lightly tug on both ends of the band to ensure they’re locked. There should be no wobbling or lateral movement. If either side feels loose, detach and reseat it properly.
Adjusting the Fit of Your Metal Strap
Many metal bands, especially link bracelets, require sizing for optimal comfort. An ill-fitting strap can cause discomfort, skin irritation, or even slippage during activity.
To resize:
- Lay the watch face-down on a microfiber cloth.
- Use the included pin removal tool or a fine-tipped pushpin to press out the pins connecting excess links.
- Remove the necessary number of links based on your wrist measurement.
- Reconnect the remaining links and test the fit around your wrist.
For Milanese loops or mesh-style metal bands, adjustment is typically done via a magnetic slider along the band’s length. Simply slide the clasp to tighten or loosen before securing it behind the watch case.
Do’s and Don’ts of Metal Band Adjustment
| Do’s | Don’ts |
|---|---|
| Count and store removed links in a small container | Don’t discard extra links—they may be needed later |
| Follow manufacturer instructions for pin direction | Don’t use excessive force when removing pins |
| Wear gloves to protect hands from sharp edges | Don’t attempt resizing with pliers unless specified |
“Precision matters when adjusting metal bands. Even a slightly misaligned link can compromise long-term comfort and structural integrity.” — Jordan Lee, Wearable Design Engineer
Real-World Example: Installing a Stainless Steel Link Bracelet on Series 3
Sarah, a fitness instructor using an Apple Watch Series 3 (42mm case), wanted a more professional look for client meetings. She purchased a third-party stainless steel link bracelet advertised as compatible with her model. Upon arrival, she followed the steps above, carefully removing the original sport band.
During installation, she noticed the left-side connector didn’t click immediately. After rechecking, she realized the band was upside down—the clasp hinge should face the back of the hand. Once corrected, both sides snapped in smoothly. She then removed three links using the provided tool, ensuring the band sat flush against her wrist without pinching.
After two weeks of daily wear, including workouts and showers, the band remained secure and showed no signs of loosening. Sarah noted improved confidence in the watch’s appearance and appreciated the weight distribution compared to lighter silicone bands.
Frequently Asked Questions
Can I use a metal strap designed for newer Apple Watch models?
Yes, as long as the band specifies compatibility with 38mm or 40mm cases. Bands made for Series 4 and later may physically fit due to identical lug spacing, but some thicker designs might interfere with heart rate sensors or charging. Stick to bands explicitly labeled for Series 1–3 and SE to avoid issues.
Why won’t my metal band stay attached?
This usually indicates incomplete insertion or debris in the watch’s band slot. Clean the connector area with compressed air or a dry toothbrush. Ensure the release button is fully depressed during attachment and that the band clicks audibly into place.
Is it safe to wear a metal strap while exercising?
Generally yes, but consider ventilation and sweat buildup. Stainless steel and titanium resist corrosion, but prolonged moisture exposure may irritate sensitive skin. For intense workouts, a breathable sport band may be more comfortable.
Final Tips for Long-Term Use
Once installed, maintain your metal strap with occasional cleaning. Wipe it down weekly with a damp cloth and dry thoroughly. Avoid exposing it to chlorine, saltwater, or harsh chemicals unless specifically rated for such environments.
Check the connection points monthly. Over time, repeated removal and reattachment can wear the spring mechanism. If you notice decreased tension or difficulty locking, consider replacing the band or having the watch inspected.
Conclusion
Installing a metal Apple Watch strap on your Series SE, 1, 2, or 3 is a simple yet rewarding upgrade. With attention to alignment, careful handling, and proper sizing, you can achieve a secure, polished look that enhances both function and style. These watches were built for customization—take advantage of it.


 浙公网安备
33010002000092号
浙公网安备
33010002000092号 浙B2-20120091-4
Comments
No comments yet. Why don't you start the discussion?