
Birdwatching is more than a pastime—it’s a way to reconnect with nature, observe local wildlife, and support ecological balance in your backyard. One of the simplest and most sustainable ways to invite birds into your garden is by building a homemade bird feeder using recycled plastic bottles. Not only does this repurpose waste that might otherwise end up in landfills or oceans, but it also creates a safe, functional feeding station for sparrows, finches, chickadees, and other common species.
This guide walks you through every stage of creating an effective, durable bird feeder from materials you likely already have at home. From selecting the right bottle to placement tips that keep pests away, the process is affordable, educational, and ideal for families, schools, or solo crafters who care about sustainability and biodiversity.
Why Use Recycled Bottles for Bird Feeders?
Plastic bottles—especially 1- or 2-liter soda bottles—are widely available, weather-resistant, and sturdy enough to hold birdseed without degrading quickly. By transforming them into feeders, you achieve two environmental goals: reducing single-use plastic pollution and supporting urban wildlife.
According to the Environmental Protection Agency (EPA), only about 29% of plastic bottles are recycled in the U.S. The rest contribute to long-term waste. Repurposing just one bottle extends its lifecycle meaningfully. When multiplied across households, the impact becomes significant.
Beyond ecology, these feeders offer practical advantages:
- Cost-effective: No need to buy expensive store-bought models.
- Customizable: Adjust size, port count, and design based on bird species in your area.
- Educational: Great for teaching children about recycling, animal behavior, and responsible consumption.
- Durable: Plastic resists moisture better than wood and won’t rot easily when exposed to rain.
Materials and Tools You’ll Need
The beauty of this project lies in its simplicity. Most supplies can be found around the house. Here’s what to gather before beginning:
| Item | Purpose | Notes / Alternatives |
|---|---|---|
| Clean plastic bottle (1L or 2L) | Main body of feeder | Remove labels and residue; rinse thoroughly |
| Sharp scissors or utility knife | Cutting ports and drainage holes | Use adult supervision if kids are involved |
| Wooden spoons, dowels, or stiff straws | Perches and seed trays | Spoons work best—they double as platforms |
| String, twine, or wire | Hanging mechanism | Natural jute twine blends well with gardens |
| Permanent marker | Marking cut lines | Any waterproof pen will do |
| Birdseed mix | Food source | Avoid bread-based mixes; use millet, sunflower, safflower |
| Tape (optional) | Reinforce weak areas | Duct tape or electrical tape holds well outdoors |
Before starting construction, wash the bottle with soapy water and let it dry completely. Residual sugar or liquid can ferment and attract insects or mold—both harmful to birds.
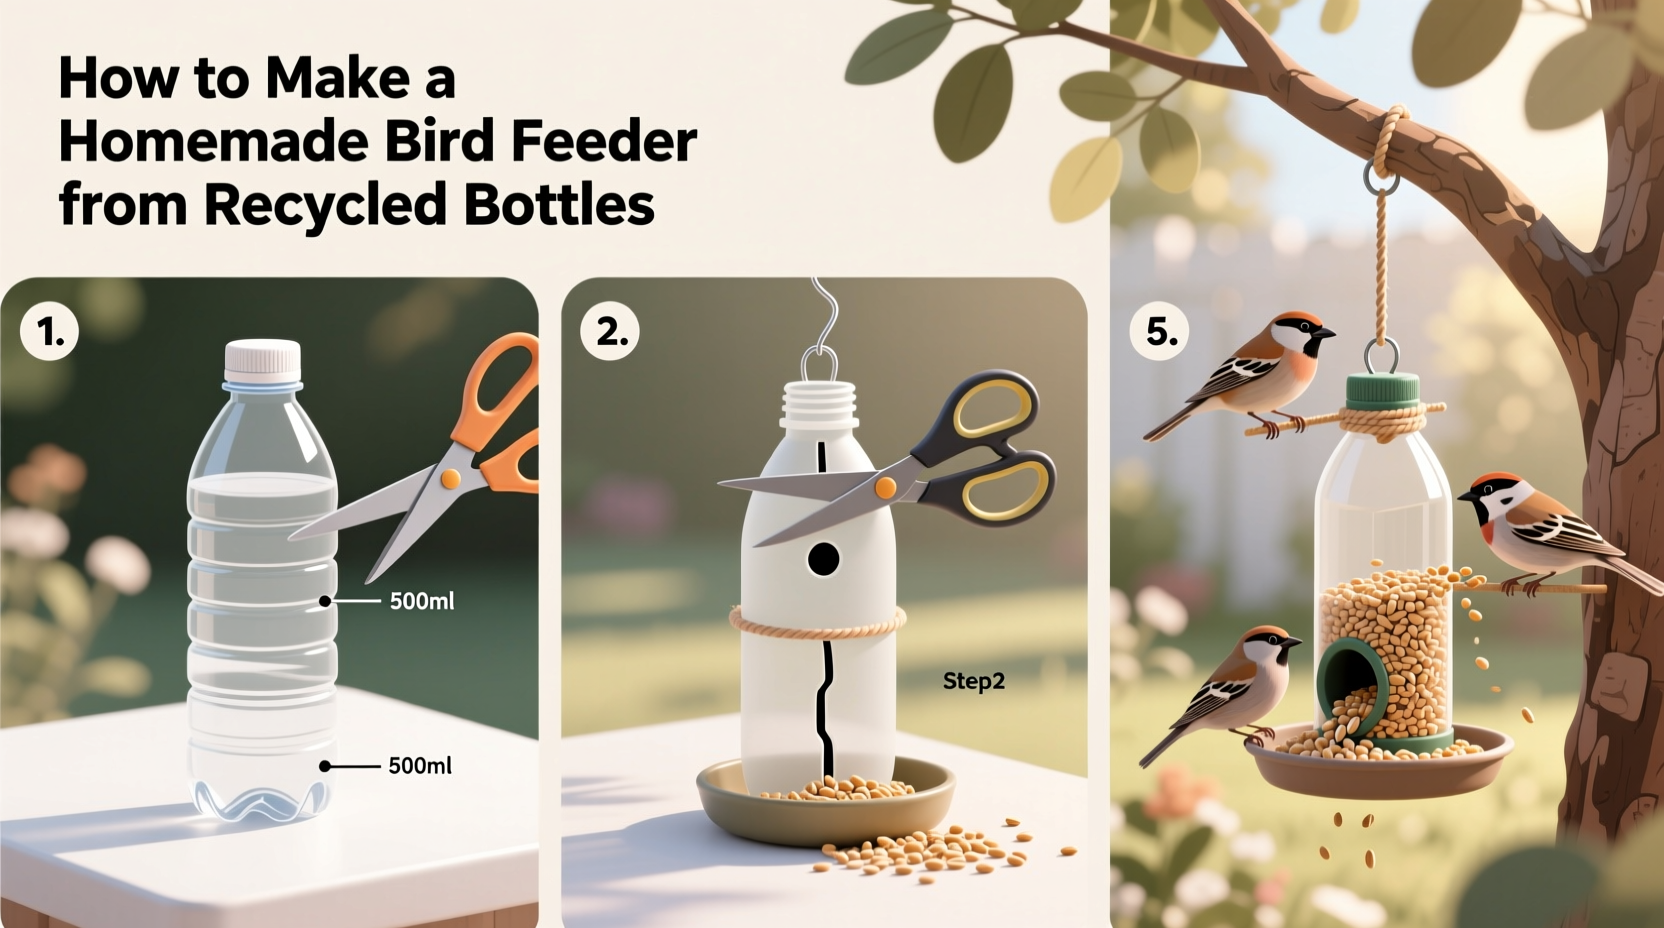
Step-by-Step Construction Guide
Follow this sequence carefully to ensure safety, functionality, and longevity of your feeder.
- Mark feeding port locations: Using a permanent marker, draw two sets of small squares or circles (about 1.5 inches wide) on opposite sides of the bottle. Place the lower set 4 inches from the bottom, the upper set 2 inches above that. These will become entry points for birds.
- Cut the feeding ports: With sharp scissors or a craft knife, carefully cut out each marked shape. Leave edges smooth—rough plastic could injure delicate bird feet or feathers.
- Insert perches: Just below each feeding port, make a horizontal slit large enough to insert a wooden spoon handle or dowel. Slide it through until the bowl of the spoon sits beneath the opening like a tray. This catches falling seeds and gives birds a stable place to stand. Repeat on the opposite side.
- Add drainage: Poke three to four small holes in the bottom of the bottle using a heated needle or nail. This prevents water buildup during rain, which can spoil seed and promote bacterial growth.
- Create a hanging system: Near the bottle’s neck, just below the cap, pierce two small holes on opposite sides. Thread strong string or wire through both and tie securely at the top to form a loop. Ensure the knot can support the weight of a full feeder.
- Fill with birdseed: Unscrew the cap, pour in high-quality birdseed until it reaches just below the top perch level. Overfilling may block airflow and increase moisture retention.
- Seal and hang: Replace the cap tightly. Hang the feeder from a tree branch, hook, or pole in a quiet, elevated spot—at least 5 feet off the ground to deter cats and rodents.
Best Practices for Placement and Maintenance
A well-built feeder is only effective if placed correctly and maintained regularly. Birds are sensitive to predators, noise, and hygiene. Follow these guidelines to maximize visits and minimize risks.
- Location: Position the feeder 10–15 feet from dense shrubs or trees. This gives birds quick escape routes while keeping them visible for observation.
- Height: Mount between 5 and 6 feet high. Too low invites predators; too high makes cleaning difficult.
- Distance from windows: Keep at least 3 feet away to reduce collision risk. Alternatively, apply decals to nearby glass.
- Sun and wind exposure: Choose a spot sheltered from strong winds and midday sun to slow seed spoilage.
Cleaning is critical. Every two weeks—or more often in humid climates—disassemble and wash the feeder with a solution of one part white vinegar to nine parts water. Rinse thoroughly and dry before refilling. Never use bleach unless absolutely necessary, and even then, dilute heavily and rinse multiple times.
“Improperly maintained feeders can spread diseases like avian conjunctivitis. Cleanliness isn’t optional—it’s essential for bird health.” — Dr. Laura Mitchell, Ornithologist & Wildlife Conservationist
Common Mistakes to Avoid
Even simple projects can go wrong if key details are overlooked. Below is a checklist of pitfalls and how to avoid them.
- ✅ Do use wide-mouth bottles for easier filling and cleaning.
- ❌ Don’t add ports too close to the bottom—birds can’t access seeds efficiently.
- ✅ Do include drainage holes to prevent mold.
- ❌ Don’t use colored or opaque bottles unless necessary—hard to monitor fill levels.
- ✅ Do refill consistently once birds start visiting.
- ❌ Don’t place near outdoor cat access points.
- ✅ Do rotate seed types seasonally (nyjer in winter, millet in summer).
- ❌ Don’t ignore signs of pest infestation (ants, squirrels).
Real-Life Example: A Schoolyard Transformation
In Portland, Oregon, fourth-grade teacher Maria Lopez turned a litter problem into a science lesson. Her students collected over 50 discarded bottles from a local park cleanup. Instead of sending them to recycling, they built 12 bird feeders during a week-long STEM unit.
Mounted on poles around the school garden, the feeders attracted goldfinches within days. Students kept observation journals, noting species, feeding times, and weather patterns. Within a month, squirrel-proof baffles were added after nocturnal raids, sparking a new engineering challenge.
“It wasn’t just about birds,” Lopez said. “The kids learned responsibility, design thinking, and empathy for wildlife—all from something as simple as a soda bottle.”
Frequently Asked Questions
Can I use any type of plastic bottle?
Yes, but rigid PET bottles (like those used for soda or water) work best. Avoid thin-walled containers such as milk jugs—they degrade faster and aren’t structurally sound when cut. Stick to 1L or 2L sizes for optimal capacity and stability.
How do I keep squirrels and ants away?
Squirrels are agile climbers. Install a baffle—a dome-shaped shield—above or below the feeder to block access. For ants, choose a location away from trees or fences, or apply a thin layer of petroleum jelly on the hanging wire (not on the feeder itself). Ants won’t cross the slick surface.
Is it safe for birds to eat from plastic feeders?
When properly constructed and maintained, yes. Ensure all cut edges are smooth and free of shards. Wash regularly to prevent biofilm buildup. Avoid using glue or toxic adhesives near feeding zones. The plastic itself doesn’t leach harmful substances under normal outdoor conditions.
Final Thoughts and Call to Action
Creating a bird feeder from a recycled bottle is more than a craft—it’s a small act of stewardship. It bridges human ingenuity with ecological awareness, turning waste into welcome homes for winged neighbors. Whether you’re doing it alone, with kids, or as part of a community initiative, the benefits ripple outward: less pollution, more biodiversity, and deeper appreciation for the natural world.
Start today. Grab an empty bottle, gather your tools, and follow the steps outlined here. Once your first visitor arrives—a cheerful sparrow or a flash of yellow finch—you’ll understand why so many people find joy in simply watching birds eat.


 浙公网安备
33010002000092号
浙公网安备
33010002000092号 浙B2-20120091-4
Comments
No comments yet. Why don't you start the discussion?