
Turning an idea into a fully functional Android app is both exciting and challenging. With over 3 billion active Android devices worldwide, the opportunity to reach users is immense. However, success doesn’t come from just having a great idea—it comes from executing that idea with precision, technical skill, and strategic planning. This guide walks you through every stage of building an Android app, from initial concept to launching on the Google Play Store.
1. Define Your App Idea and Validate It
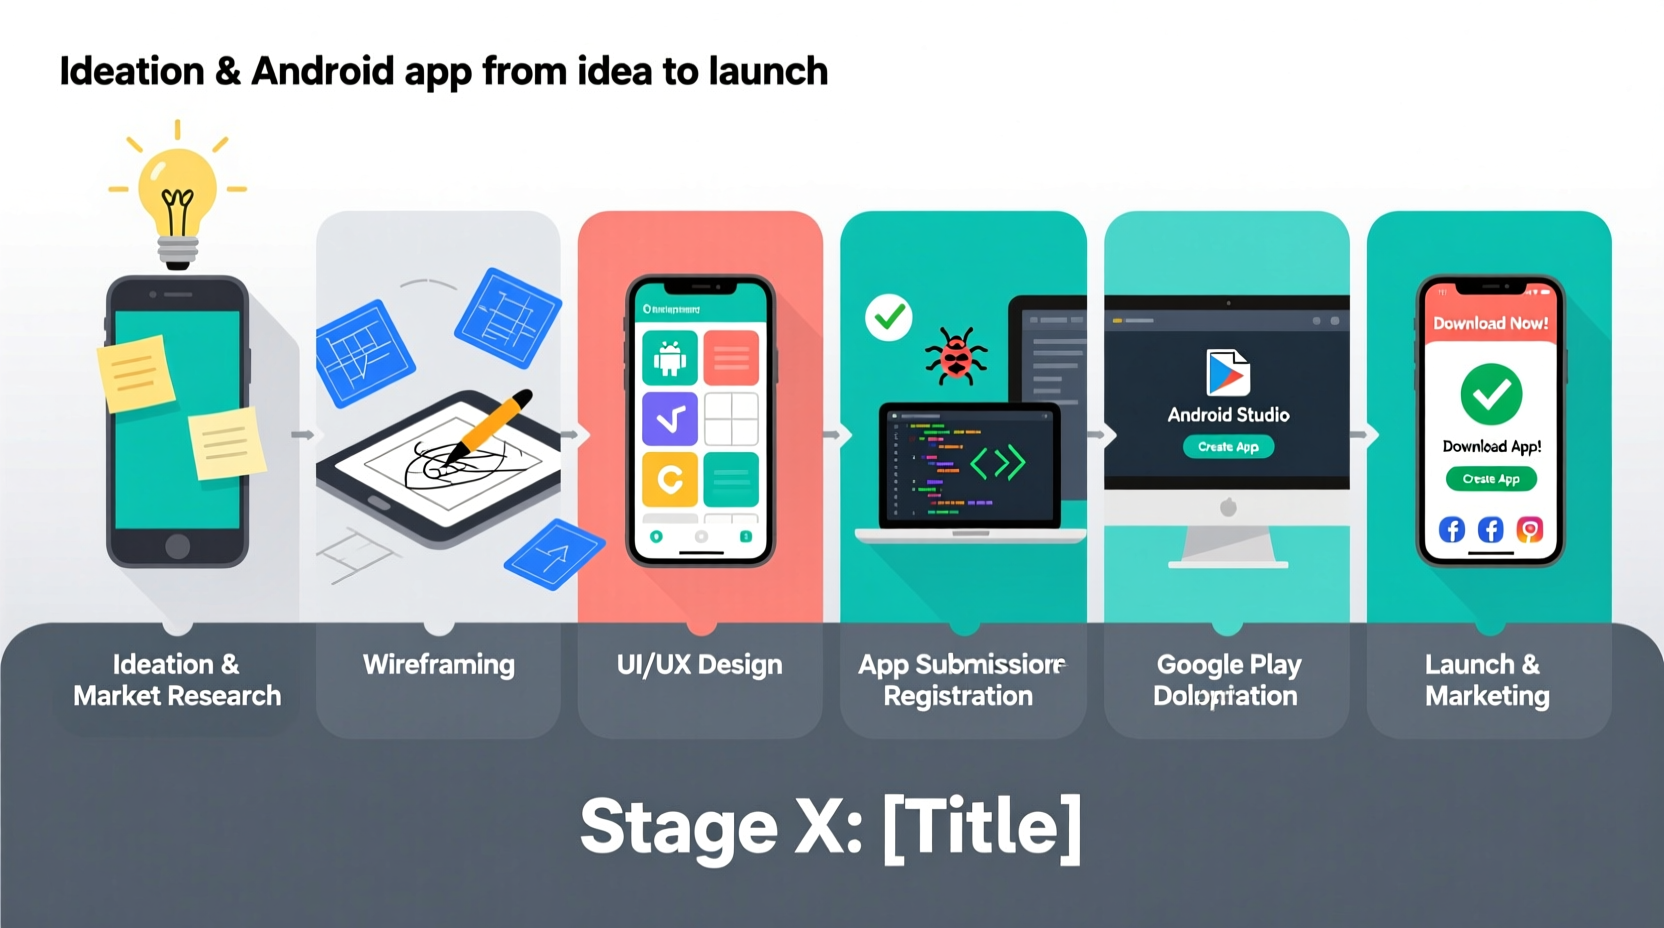
Every successful app starts with a clear problem it solves. Begin by asking: Who is your target user? What pain point does your app address? How is it different from existing solutions?
Write down your app’s core value proposition in one sentence. For example: “An offline-first note-taking app for students that syncs across devices when online.” This clarity will guide every decision moving forward.
Conduct market research by analyzing competing apps. Look at their reviews—what do users complain about? These gaps are opportunities. Tools like Google Trends, App Annie, and Sensor Tower can help assess demand and competition.
“Most failed apps aren’t technically broken—they solve problems nobody feels strongly enough to pay for.” — Arjun Krishnan, Mobile Product Strategist
2. Plan Features and Create a Roadmap
Once you’ve validated your idea, define the minimum viable product (MVP). The MVP includes only the essential features needed to deliver value. Avoid feature creep early on.
Use a simple prioritization framework:
- Must-have: Core functionality (e.g., login, main screen, key action)
- Nice-to-have: Enhancements (e.g., dark mode, social sharing)
- Future: Long-term additions (e.g., AI recommendations, premium tiers)
Development Timeline Example
| Phase | Duration | Milestones |
|---|---|---|
| Idea & Research | 2 weeks | User interviews, competitor analysis |
| Wireframing & Design | 3–4 weeks | UI mockups, prototype |
| Development (MVP) | 8–12 weeks | Core features built and tested |
| Testing & Iteration | 3 weeks | Beta testing, bug fixes |
| Launch Preparation | 2 weeks | Store listing, marketing assets |
| Release | 1 day | Publish on Google Play |
3. Design the User Experience
A well-designed app isn’t just visually appealing—it’s intuitive. Start with wireframes using tools like Figma or Adobe XD. Focus on user flows: How does someone sign up? Add a task? Navigate between screens?
Follow Material Design guidelines, Google’s official design system for Android. It ensures consistency in typography, spacing, buttons, and navigation patterns. Key principles include:
- Clear visual hierarchy
- Responsive touch targets (minimum 48dp)
- Accessibility (contrast ratios, screen reader support)
Create interactive prototypes to test usability. Even clickable mockups can reveal confusing navigation before a single line of code is written.
4. Develop the App Using Android Studio
With design approved, it’s time to build. Android Studio is the official IDE (Integrated Development Environment) and supports Kotlin (recommended) or Java.
Set up your project with proper architecture. Use the Model-View-ViewModel (MVVM) pattern to separate UI logic from business logic. This makes the app easier to test and maintain.
Key components to implement:
- Activities and Fragments: Screen interfaces
- RecyclerView: For lists and grids
- Room Database: Local data storage
- Retrofit: API calls to backend services
- Navigation Component: Handle in-app navigation
Integrate version control with Git from day one. Host your repository on GitHub or GitLab. Commit frequently with descriptive messages.
“Clean code today saves 10 hours of debugging tomorrow. Name your variables clearly, write comments, and refactor early.” — Lena Park, Senior Android Engineer
Mini Case Study: Launching “TaskFlow”
Jamal had an idea for a productivity app that combined to-do lists with habit tracking. He started by interviewing 15 freelancers and remote workers. Most struggled with staying focused across multiple projects.
He sketched wireframes, then built a prototype in Figma. After testing it with five users, he simplified the onboarding flow and removed redundant settings.
Using Android Studio, he developed the MVP in 10 weeks. He used Firebase for authentication and cloud storage, which accelerated backend setup. After two rounds of beta testing with 30 users via TestFlight-equivalent (Google Play Beta), he fixed crashes and improved load times.
The app launched with 50 five-star reviews in the first week. Within three months, it reached 10,000 downloads—proving that thoughtful planning pays off.
5. Test Thoroughly Before Launch
Testing isn’t a final step—it should happen throughout development. Use a layered approach:
- Unit tests: Verify individual functions (e.g., calculating due dates)
- Instrumented tests: Run on devices or emulators (e.g., button clicks)
- Manual testing: Real-world usage on various screen sizes and Android versions
- Beta testing: Release to a small group via Google Play Console’s internal or closed testing tracks
Focus on edge cases: What happens if the internet drops mid-action? Does the app handle large inputs gracefully?
App Launch Checklist
- ✅ Finalize app name and logo (1024x500 PNG for Play Store)
- ✅ Write compelling description with keywords
- ✅ Prepare screenshots (at least 5, showing key features)
- ✅ Record a short promo video (optional but recommended)
- ✅ Set up Google Play Developer Account ($25 one-time fee)
- ✅ Generate signed APK or AAB (Android App Bundle)
- ✅ Configure content rating questionnaire
- ✅ Define pricing (free or paid) and distribution countries
- ✅ Submit for review
Frequently Asked Questions
How much does it cost to develop an Android app?
Costs vary widely. A simple MVP can cost $5,000–$15,000 if outsourced. Building it yourself reduces cost but requires time investment. Ongoing costs include hosting, updates, and marketing.
Do I need to know Java to make an Android app?
No. Kotlin is now Google’s preferred language for Android development. It’s more concise, safer, and easier to learn than Java. Most new apps are built with Kotlin.
How long does Google Play review take?
Typically 1–3 days. Simple updates may go live faster. If your app uses sensitive permissions (e.g., accessibility services), review can take longer. Be transparent in your submission notes.
Final Steps and Going Live
Once your app passes review, you can release it to production. Choose between a gradual rollout (start with 10% of users) or full release. Gradual rollouts let you monitor crash rates and performance before expanding.
After launch, monitor analytics using tools like Firebase Crashlytics and Google Analytics for Firebase. Track key metrics: daily active users, session length, retention rate, and uninstall reasons.
Engage with user reviews. Respond professionally—even to negative ones. A simple “Thanks for the feedback—we’re fixing this in the next update” builds trust.


 浙公网安备
33010002000092号
浙公网安备
33010002000092号 浙B2-20120091-4
Comments
No comments yet. Why don't you start the discussion?