
Double braids are a timeless hairstyle that blends elegance with practicality. Whether you're preparing for school, a casual outing, or a special occasion, double braids offer a neat, symmetrical look that keeps hair secure and styled. While they may appear complex at first glance, the technique is simple once broken down into manageable steps. This guide walks you through every detail—from preparation to finishing touches—so even complete beginners can achieve polished double braids with ease.
Understanding Double Braids: What They Are and Why They Work
Double braids refer to two separate braids running parallel from the crown or sides of the head down to the ends. Common variations include two French braids, two Dutch braids, or two basic three-strand braids. The style suits most hair types and lengths (with some modifications), and it’s especially popular among those seeking a low-maintenance yet put-together look.
The appeal lies in both function and fashion. Double braids reduce tangling, minimize frizz, and keep hair out of the face—ideal for active days or humid weather. They also serve as a foundation for more advanced styles like braid crowns, updos, or half-up looks.
“Double braids are one of the first styles I teach new clients because they build coordination, improve parting precision, and boost confidence with hairstyling.” — Lila Torres, Professional Stylist & Educator
Essential Tools and Preparation
Before beginning, gather the right tools and prepare your hair properly. Skipping this step often leads to uneven parts, slipping braids, or breakage.
What You’ll Need:
- Wide-tooth comb or detangling brush
- Fine-tooth comb (for clean parting)
- Hair ties or elastics (clear or matching your hair color)
- Light-hold hairspray or texturizing spray (optional)
- Mirror (preferably with good lighting)
- Small clips or sectioning pins (to hold hair in place)
Preparing Your Hair:
- Detangle thoroughly: Start with dry or slightly damp hair. Use a wide-tooth comb from ends upward to remove knots gently.
- Apply product if needed: For slippery hair, use a light mousse or texturizing spray. For frizzy hair, apply a smoothing serum to mid-lengths and ends.
- Decide on braid type: Beginners should start with standard three-strand braids. Once comfortable, progress to French or Dutch styles.
Step-by-Step Guide to Creating Classic Double Three-Strand Braids
This sequence assumes you’re creating two symmetrical side braids. Follow each step carefully, using a mirror to check alignment.
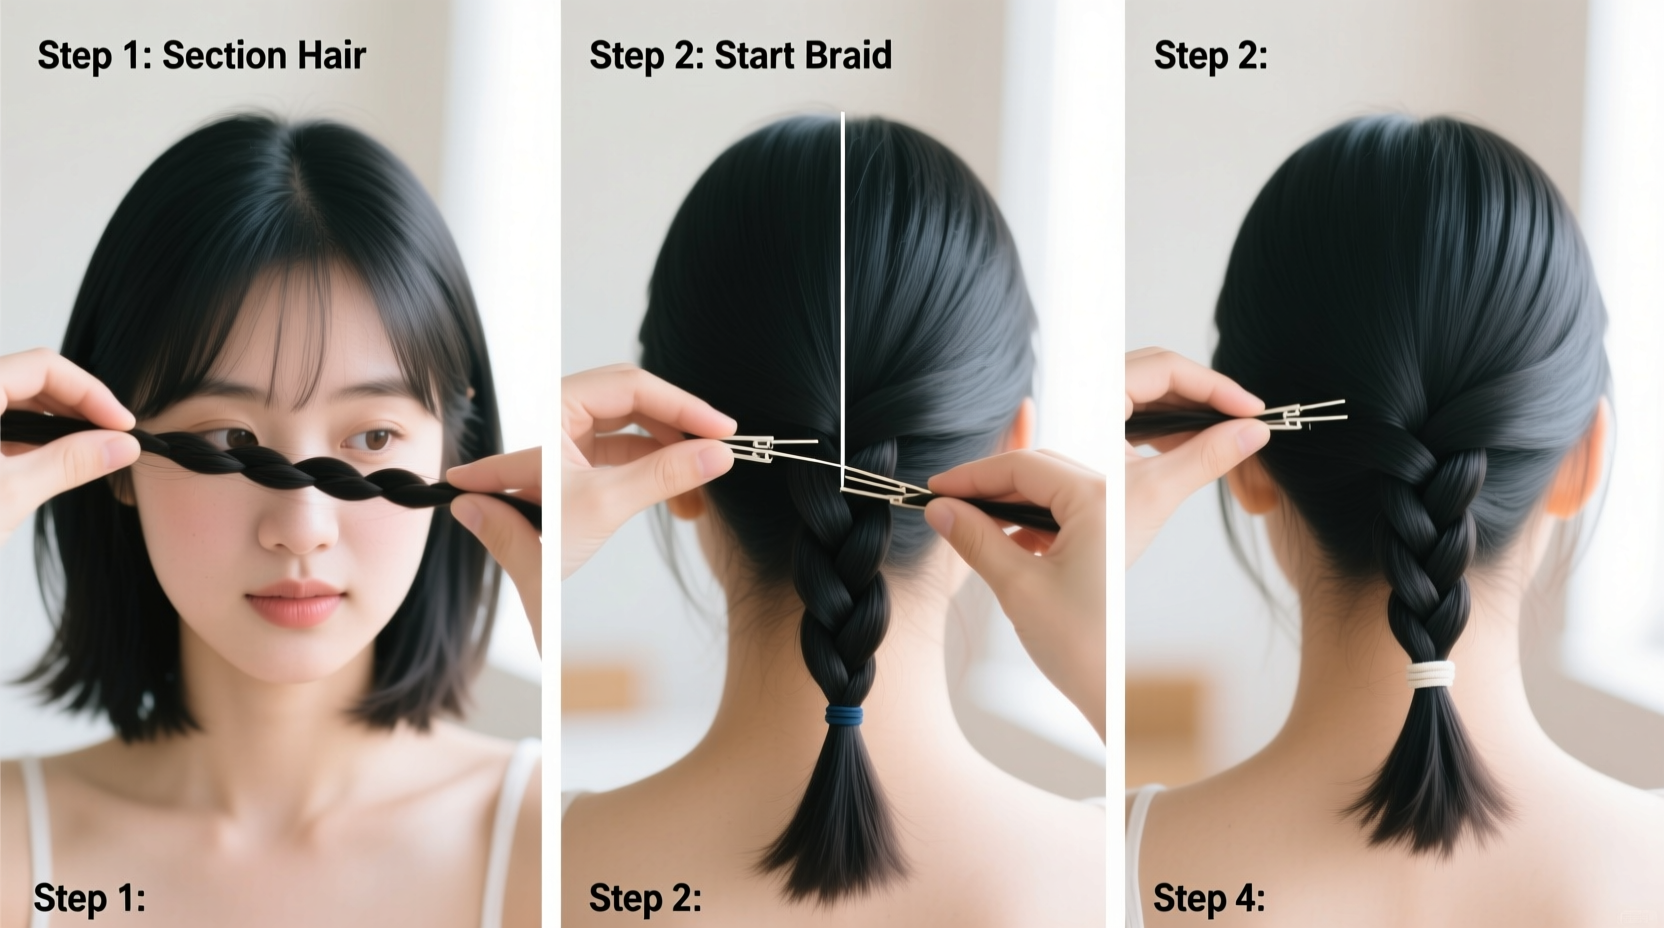
Step 1: Part the Hair Down the Middle
Use a fine-tooth comb to create a straight center part from forehead to nape. Run the comb slowly to avoid jagged lines. Clip one side out of the way while working on the other.
Step 2: Divide One Side Into Three Equal Sections
Pick up hair from the front temple area. Hold it taut and split it into three strands of equal thickness. Uneven sections lead to lopsided braids.
Step 3: Begin the Braid
Cross the right strand over the middle, then the left strand over the new middle. This forms the base of the braid. Keep tension consistent—not too tight to cause discomfort, not too loose to unravel.
Step 4: Continue Braiding to the Ends
Maintain steady rhythm: right over middle, left over middle. Use your thumbs to guide strands smoothly. If hair slips, pause and re-grip.
Step 5: Secure the First Braid
When you reach the ends, wrap a hair tie around the base twice and loop through to fasten. Avoid pulling too hard, which can stress the roots.
Step 6: Repeat on the Other Side
Unclip the second section. Mirror the process exactly—same parting, same tension, same number of crosses. Aim for symmetry in length and tightness.
Step 7: Adjust and Refine
Gently tug on the outer loops of each braid to slightly loosen them for a fuller, softer appearance—a technique called “pancaking.” This adds volume and polish.
Common Mistakes and How to Avoid Them
Even experienced braiders make errors. Recognizing these early helps refine your technique faster.
| Mistake | Why It Happens | How to Fix It |
|---|---|---|
| Uneven parts | Rushing the initial part or using a dull comb | Use a rat-tail comb and trace slowly from hairline to crown |
| Braids too loose | Inconsistent tension or small hand movements | Hold strands firmly and widen your grip slightly |
| Braids too tight | Pulling too hard, especially near scalp | Keep fingers relaxed; focus on smooth crossing motion |
| One braid longer than the other | Starting from different points on each side | Begin both braids at the same horizontal level |
| Frizz at the crown | Not securing top sections tightly enough | Pinch the top strands firmly during first few crosses |
Variations to Try After Mastering the Basics
Once you’ve mastered standard double braids, experiment with these beginner-friendly upgrades:
- Double French Braids: Start with three sections at the crown. Add small pieces from the sides as you braid downward before continuing with a regular braid.
- Double Dutch Braids: Similar to French, but strands go under instead of over, creating a raised effect on the scalp.
- Ponytail Double Braids: Pull hair into two low ponytails, then braid each tail. Simple and great for short practice sessions.
- Fishtail Double Braids: Split each side into two thick strands and cross small pieces from one to the other. More intricate but achievable with patience.
“Don’t expect perfection on day one. I didn’t get clean parts until my third week of daily practice. Consistency beats talent.” — Jordan Kim, Salon Owner & Braiding Instructor
Mini Case Study: From Frustration to Confidence
Sophie, a 14-year-old student, wanted to wear double braids to her school presentation but struggled for weeks. She’d attempt them in the morning, only to end up with crooked parts and one braid falling apart by lunchtime. After watching several tutorials without progress, she decided to slow down and follow a structured method.
She began by practicing just the center part and sectioning at night, using clips to mark ideal starting points. Each morning, she spent five minutes on one braid, then the next day on the other. By day six, she completed both braids in under ten minutes. On presentation day, her sleek double French braids earned compliments—and more importantly, boosted her confidence.
Her key takeaway? “Trying to do everything at once made me quit. Breaking it into micro-steps made it possible.”
Checklist: Mastering Double Braids in 7 Days
Follow this daily plan to build skill gradually:
- Day 1: Practice creating a clean center part and dividing hair into two equal halves.
- Day 2: Master the three-strand braid on one side only. Focus on consistent tension.
- Day 3: Repeat on the opposite side. Compare both braids for symmetry.
- Day 4: Braid both sides in succession. Time yourself to track improvement.
- Day 5: Add light product to manage flyaways. Practice pancaking for fullness.
- Day 6: Attempt a variation (e.g., French braid on one side).
- Day 7: Create full double braids from start to finish with no pauses.
FAQ: Common Questions About Double Braids
Can I braid short hair?
Yes, though the braid may only extend partway down. Use smaller sections and secure with clear elastics. Shorter styles like micro-braids or partial double braids work well for hair above shoulder length.
How do I prevent my braids from looking messy?
Start with detangled hair, maintain even tension, and avoid rushing. Use a light-hold spray before and after braiding to control frizz. Pancaking gently also evens out gaps between strands.
My hands cramp when I braid. Is that normal?
Yes, especially at first. Like any new motor skill, braiding requires hand coordination. Take breaks, stretch your fingers, and practice in short sessions. Cramping usually subsides within a week.
Final Tips for Lasting Success
Mastering double braids isn’t about speed—it’s about consistency and attention to detail. Even professional stylists started where you are now. The most important habit is regular practice. Five minutes a day yields better results than one long session per week.
Pay attention to how your hair behaves: coarse textures may need more smoothing product, while fine hair benefits from light texturizers for grip. Adapt the method to your unique hair type rather than forcing it to fit a rigid standard.
And remember: a “perfect” braid isn’t flawless—it’s one that stays intact, feels comfortable, and makes you feel confident.
Conclusion: Your Journey Starts With One Braid
Double braids are more than a hairstyle—they’re a skill that grows with you. Each time you pick up the comb and begin, you’re building muscle memory, patience, and self-reliance. Whether you’re doing it for convenience, expression, or fun, the effort pays off in small victories: a cleaner part, a tighter twist, a braid that lasts all day.


 浙公网安备
33010002000092号
浙公网安备
33010002000092号 浙B2-20120091-4
Comments
No comments yet. Why don't you start the discussion?