
Water absorption mats are essential in high-moisture areas like bathrooms, laundry rooms, and near pet feeding stations. They protect flooring from spills, reduce slipping hazards, and enhance comfort underfoot. However, off-the-shelf mats rarely fit every space perfectly. A custom-cut mat ensures full coverage, eliminates gaps, and maintains a clean aesthetic. Achieving a precise cut requires more than just scissors and guesswork—it demands the right tools, planning, and technique. This guide walks you through each stage of cutting a water absorption mat to fit any area flawlessly.
Understanding Water Absorption Mats
Before making a single cut, it’s important to understand the material you're working with. Most water absorption mats are made from synthetic rubber, foam, or textile blends designed to trap moisture while remaining durable under daily use. These materials vary in thickness and flexibility, which affects how they respond to cutting tools. For example, dense rubber-backed mats require sharper blades and steady pressure, while softer foam versions can tear easily if not handled carefully.
The backing often includes non-slip elements or antimicrobial treatments that should remain intact after cutting. Damaging these layers during trimming can compromise performance. Always check manufacturer guidelines—some brands explicitly advise against cutting, as doing so may void warranties or affect drainage properties.
“Precision matters when modifying functional flooring products. A poorly cut edge can curl, fray, or create tripping hazards.” — Dana Reeves, Home Safety & Flooring Consultant
Essential Tools and Materials
Using the correct tools is half the battle. The wrong blade or measuring device leads to jagged edges, inaccurate sizing, and wasted material. Below is a list of recommended supplies for clean, professional results:
- Measuring tape: Flexible and clearly marked, ideal for curved or irregular spaces.
- Utility knife or rotary cutter: Sharp, replaceable blades ensure smooth cuts without tearing.
- Stiff ruler or straightedge: Metal rulers resist slipping and protect hands during straight cuts.
- Chalk line or washable marker: For marking cut lines on dark or textured surfaces.
- Adhesive spray (optional): Secures edges on uneven floors or high-traffic zones.
- Cutting mat or protective board: Prevents damage to underlying surfaces during trimming.
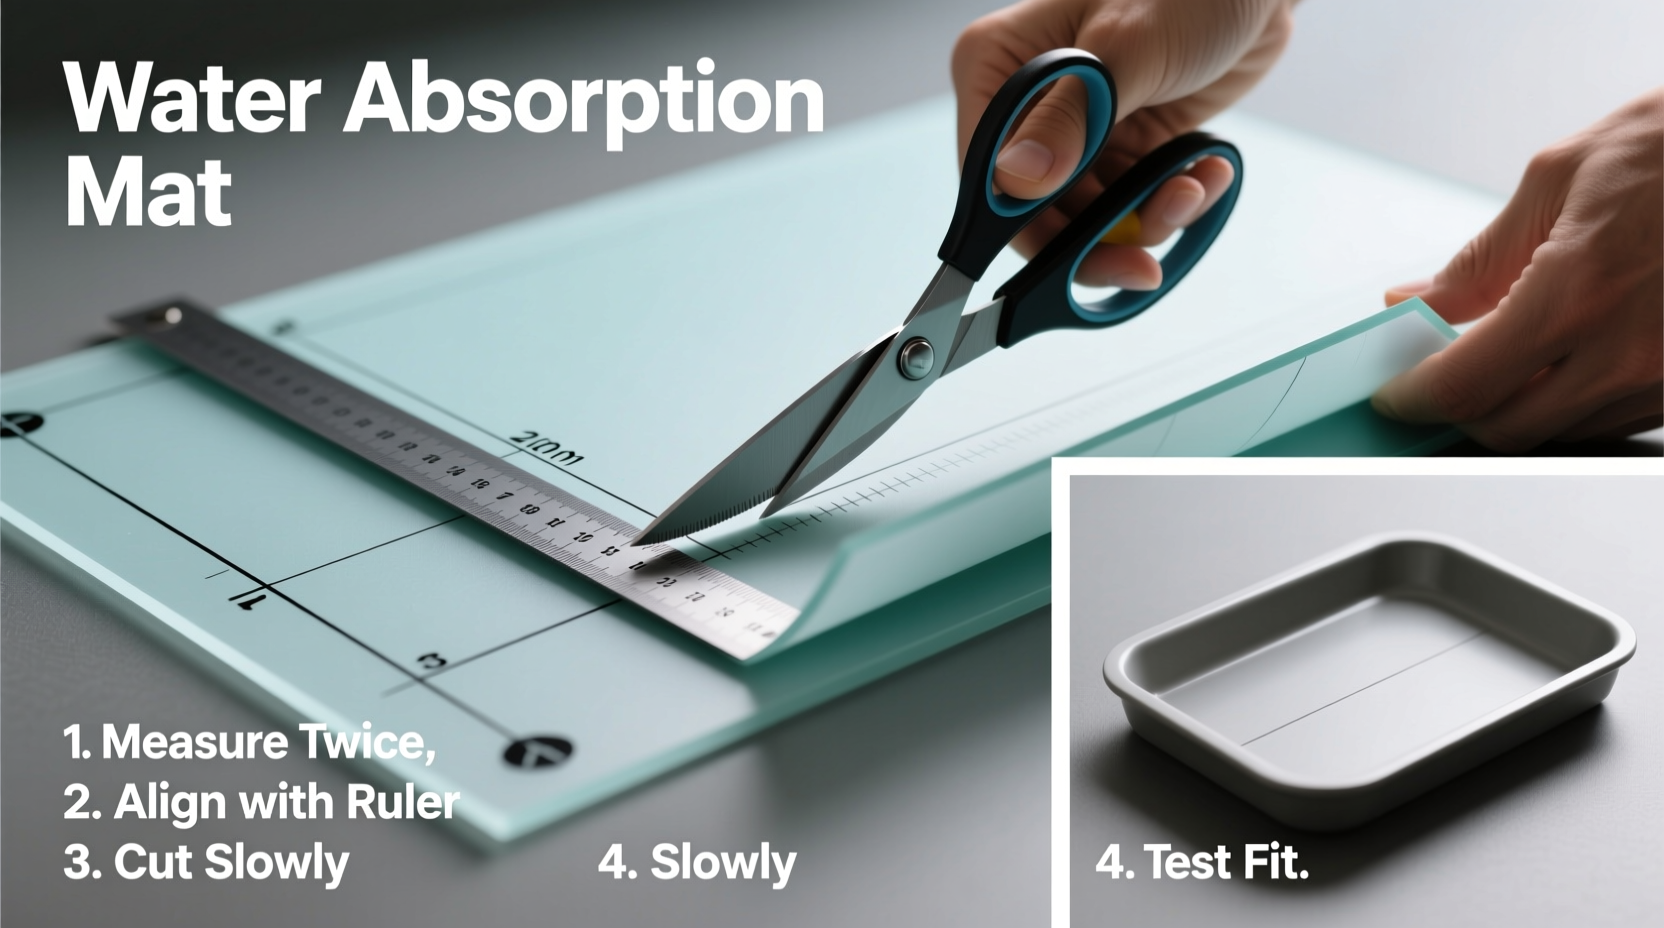
Step-by-Step Cutting Process
Follow this sequence to achieve a precise, custom fit every time:
- Measure the space: Use a tape measure to record length and width at multiple points, especially in older homes where walls may not be perfectly square. Note any obstructions like baseboards, door sweeps, or floor vents.
- Transfer dimensions to the mat: Lay the mat flat on a clean, stable surface. Mark the cut lines using a chalk pencil or light-colored marker. Double-check measurements before marking.
- Score the surface: Run the utility knife lightly along the marked line first to create a guide. This prevents the blade from veering off course during deeper cuts.
- Make the final cut: Using firm, consistent strokes, slice through the mat. For thick models, make several shallow passes rather than forcing a single deep cut.
- Test the fit: Place the trimmed mat in position. Check for gaps, overlaps, or tight corners. Minor adjustments can be made with sandpaper or a fine-grit file.
- Secure if needed: In high-traffic areas, apply double-sided tape or adhesive spray to prevent shifting.
Handling Irregular Shapes
For spaces around toilets, cabinets, or pipes, create a paper template first. Cut a piece of kraft paper or newspaper to match the floor outline, including cutouts for fixtures. Tape the template to the mat and trace the shape before cutting. This method reduces errors and allows dry-fitting without damaging the actual mat.
Do’s and Don’ts of Mat Cutting
| Do’s | Don’ts |
|---|---|
| Use a sharp blade and change it often | Use kitchen scissors or dull tools |
| Work on a flat, protected surface | Cut directly on finished flooring |
| Create a template for complex shapes | Guess measurements or freehand curves |
| Check alignment from multiple angles | Install immediately without testing fit |
| Round corners slightly to prevent peeling | Leave sharp 90-degree angles that catch foot traffic |
Real-World Example: Custom Fit for a Bathroom Nook
Sarah, a homeowner in Portland, wanted to install a water absorption mat in her small bathroom, which had an angled wall and a floor-mounted toilet. Off-the-shelf mats left a 4-inch gap near the shower and overlapped the toilet flange. She followed the template method: first sketching the space on graph paper, then transferring it to newsprint. After adjusting the template twice for accuracy, she aligned it with the mat and used a rotary cutter guided by a metal ruler. The final result fit snugly, absorbed splash water effectively, and lasted over two years without edge lifting. Her key takeaway? “Spend extra time on the template—it saves material and frustration later.”
Frequently Asked Questions
Can I wash the mat after cutting it?
Yes, most water absorption mats can still be cleaned normally after cutting. Avoid soaking for extended periods if the core is foam-based, as moisture may become trapped at exposed edges. Air drying flat is recommended.
Will the edges fray over time?
High-quality mats with sealed or molded edges resist fraying. If yours has raw fibers, seal the perimeter with a clear fabric sealant or heat lightly with a hairdryer (for synthetic materials only) to fuse the fibers.
What if my cut isn’t straight?
If the edge is slightly off, trim again using a straightedge as a guide. If too much material is removed, consider repositioning the mat or adding a coordinating rug to cover the gap aesthetically.
Final Checklist Before Installation
- ✅ All measurements verified in multiple locations
- ✅ Template tested and adjusted (if applicable)
- ✅ Cut lines clearly marked with visible ink or chalk
- ✅ Blade sharp and cutting surface protected
- ✅ Final fit tested in natural lighting
- ✅ Edges smoothed and debris removed
- ✅ Floor surface clean and dry before placement
Making It Last: Care After Cutting
A well-cut mat performs better, but longevity depends on maintenance. Rinse weekly with mild soap and lukewarm water. Avoid bleach or abrasive cleaners that degrade adhesives or discolor fibers. Allow full air drying before reuse—trapped moisture promotes mold and weakens structural integrity. Rotate the mat every few months if placed in one spot constantly to ensure even wear.
“Customization shouldn’t come at the cost of durability. Proper cutting preserves both function and lifespan.” — Marcus Lin, Product Engineer at AquaGuard Flooring Co.
Conclusion
Cutting a water absorption mat to size transforms a generic product into a tailored solution. With accurate measurements, the right tools, and attention to detail, you can achieve a professional-grade fit that enhances safety, comfort, and cleanliness in any room. Whether you're updating a compact powder room or protecting a busy laundry area, taking the time to cut precisely pays off in performance and appearance. Now that you have the complete process, gather your tools and turn that ill-fitting mat into a seamless part of your space.


 浙公网安备
33010002000092号
浙公网安备
33010002000092号 浙B2-20120091-4
Comments
No comments yet. Why don't you start the discussion?