
Perfume bottle phone cases have surged in popularity for their elegant design and nostalgic charm. These cases mimic the glassy finish and delicate contours of luxury fragrance bottles, offering a touch of sophistication to everyday tech. But what if you could make that statement even more personal? Customizing your perfume bottle phone case allows you to transform a stylish accessory into a one-of-a-kind expression of your personality. Whether you're drawn to minimalist elegance or bold artistic flair, this guide walks you through every phase of personalization—safely and effectively.
Why Personalize Your Perfume Bottle Phone Case?
Mass-produced accessories may look beautiful, but they lack individuality. A personalized phone case reflects your taste, memories, or even moods. Perfume bottle cases, often made from glossy TPU or polycarbonate with a glass-like sheen, provide an excellent canvas for customization. Unlike matte or textured cases, their smooth surface responds well to paint, decals, and embellishments—if handled correctly.
Beyond aesthetics, personalization can deepen your emotional connection to your device. It becomes more than a tool; it's a curated extension of self-expression. Plus, a unique case makes your phone instantly recognizable in a sea of identical devices.
Materials You’ll Need
Before diving into customization, gather the right tools. Using inappropriate materials can scratch the glossy finish or cause peeling over time. Here’s a checklist of recommended supplies based on different personalization methods:
- Isopropyl alcohol (70%) and microfiber cloth – for cleaning the surface
- Fine-tip acrylic paint pens (oil-based for durability)
- Clear sealant spray (UV-resistant, non-yellowing)
- Glitter glue or cosmetic-grade glitter (if adding sparkle)
- Precision tweezers and toothpicks – for detailed work
- Temporary vinyl decals or custom water-slide transfers
- Rhinestones, tiny charms, or faux pearls (with strong jewelry adhesive)
- Painter’s tape – for clean lines and geometric designs
- Soft-bristle brush – for applying sealant evenly
“Personalization turns functional objects into wearable art. The key is balancing creativity with material compatibility.” — Lila Monroe, Accessory Designer & Product Stylist
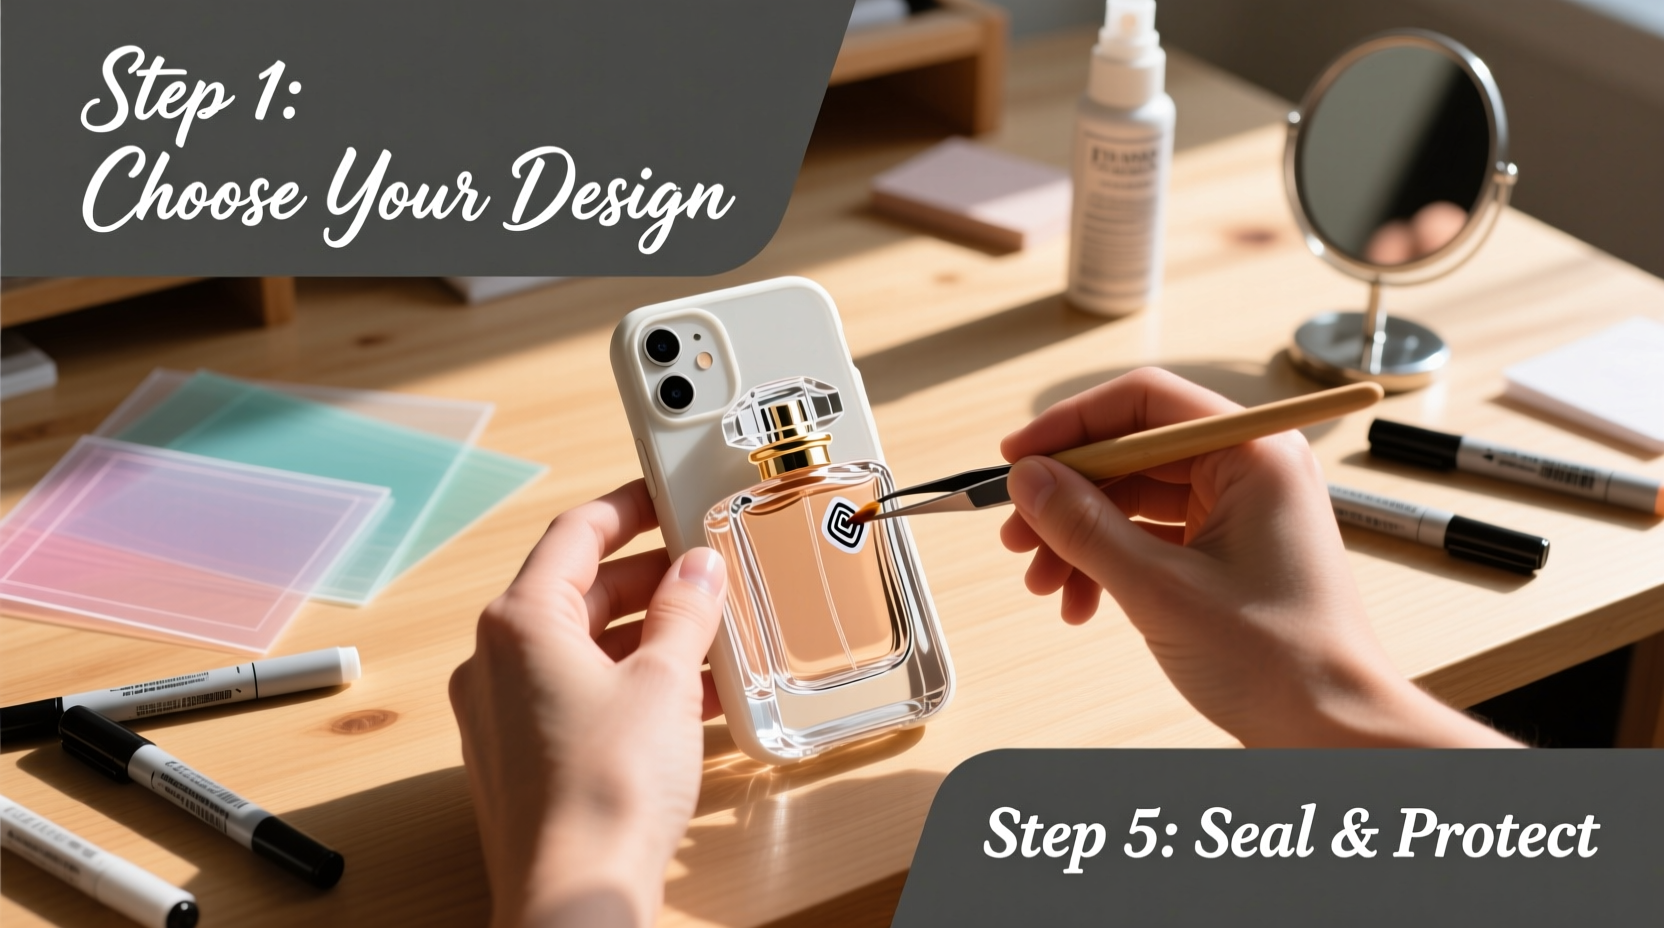
Step-by-Step Guide to Customization
Follow this structured process to ensure your design lasts and enhances the case’s original appeal.
- Clean the Surface Thoroughly: Wipe the case with isopropyl alcohol to remove oils, dust, and residues. Let it dry completely. This ensures better adhesion for paints and adhesives.
- Scheme Your Design: Sketch your idea on paper or use a digital mockup. Consider symmetry, color contrast, and how elements will interact with the case’s curves and camera cutouts.
- Apply Painter’s Tape (If Needed): For straight lines, patterns, or sections of negative space, use low-adhesion tape to mask areas. Avoid leaving tape on for extended periods to prevent residue.
- Begin Painting or Applying Decals: Use acrylic paint pens for hand-drawn details. Apply light, even strokes. If using water-slide decals, soak them in water, slide onto the case, and smooth out air bubbles with a soft card.
- Add Embellishments Carefully: Attach rhinestones or charms using a dot of E6000 or GS Hypo cement. Hold each piece in place for 30 seconds. Work one at a time to avoid misalignment.
- Let Everything Cure: Allow paint and glue to dry for at least 24 hours in a dust-free environment. Rushing this step risks smudging or weakening bonds.
- Seal the Design: Apply 2–3 thin layers of clear UV-protective sealant, letting each layer dry fully. This prevents chipping, fading, and moisture damage.
Design Ideas and Real-Life Inspiration
Customization doesn’t require artistic mastery. Simple touches can make a dramatic difference. Consider these real-world examples:
Mini Case Study: Maya’s Vintage-Inspired Makeover
Maya, a graphic designer in Portland, owned a clear Chanel-inspired perfume bottle case. She wanted something that felt timeless yet uniquely hers. Using black fine-line paint pens, she hand-drew Art Deco motifs around the edges—geometric fans and sunbursts inspired by her grandmother’s vintage perfume ads. She added three small silver rhinestones near the top to mimic a cap jewel. After sealing with matte varnish, the result was a retro-luxury look that drew compliments daily. Her phone now feels like a curated heirloom.
Popular Themes to Try
- Monogram Magic: Elegant cursive initials in gold or rose gold paint.
- Floral Whimsy: Delicate hand-painted blossoms trailing from the top corner.
- Glamour Accent: A single row of micro-rhinestones along the bottom edge.
- Minimalist Line Art: Abstract shapes or constellations in black or white.
- Color Dip Effect: Dip the bottom third in translucent pastel paint for an ombre illusion.
| Customization Method | Pros | Cons |
|---|---|---|
| Acrylic Paint Pens | Precise, wide color range, affordable | Requires sealing; can scratch without protection |
| Water-Slide Decals | Detailed designs, professional look | Bubbles can form; needs careful application |
| Rhinestones/Charms | Luxurious texture and shine | Can snag fabrics; adds bulk |
| Glitter Accents | Vibrant sparkle, easy to apply | Messy; may flake without proper seal |
Common Mistakes and How to Avoid Them
Even well-intentioned efforts can go wrong. Awareness prevents frustration and wasted materials.
- Skipping the cleaning step: Dirt or oil creates weak spots where paint or glue won’t adhere.
- Using regular nail polish: It may crack or yellow over time. Opt for artist-grade acrylics instead.
- Overloading with embellishments: Too many rhinestones can interfere with wireless charging or pocket storage.
- Applying thick sealant layers: Thick coats can cloud the finish or create drips. Thin, even layers are best.
- Ignoring UV exposure: Sunlight fades colors. Always use a UV-protective topcoat.
FAQ
Can I remove the customization later?
Most permanent modifications like paint or glued gems cannot be removed without damaging the case. If you want reversible options, consider magnetic overlays or decorative phone straps instead.
Will my customized case still protect my phone?
Yes, as long as the structural integrity isn’t compromised. Avoid drilling holes or covering sensors. Most paints and sealants add negligible thickness and don’t reduce shock absorption.
How do I clean a decorated perfume bottle case?
Use a damp microfiber cloth and mild soap. Avoid soaking or scrubbing embellished areas. Never use abrasive cleaners or alcohol after sealing, as it can dull the protective coat over time.
Final Thoughts and Call to Action
Your phone is with you every day—it deserves to reflect who you are. Personalizing a perfume bottle phone case is more than a craft project; it’s a chance to merge functionality with personal narrative. With patience and the right materials, you can create a piece that’s not only beautiful but meaningfully yours.
Start small: try a monogram or a single accent. As your confidence grows, experiment with bolder designs. Share your creation online with friends or in style communities. You might inspire someone else to turn their everyday accessory into a masterpiece.


 浙公网安备
33010002000092号
浙公网安备
33010002000092号 浙B2-20120091-4
Comments
No comments yet. Why don't you start the discussion?