
Pom pom keychains are more than just decorative—they're personal expressions of style, often attached to bags, zippers, or keys. When the metal ring that connects the fluffy charm breaks, it doesn’t mean the end of its life. With a few basic tools and careful attention, you can replace the broken keychain ring and restore both function and flair. This guide walks you through the entire process, from diagnosing damage to securing a durable replacement, so your favorite accessory stays in rotation.
Understanding the Problem: Why Keychain Rings Fail
The small split ring or lobster clasp connecting a pom pom to a keychain is one of the most vulnerable components. Despite being made of metal, these connectors endure constant stress—twisting, pulling, and jostling during daily use. Over time, this leads to fatigue, corrosion, or outright breakage. The issue is compounded when the ring is undersized or made from low-grade alloy. Recognizing early signs like bending, fraying, or looseness can help prevent total detachment.
Replacing the ring isn't just about reattachment—it's an opportunity to upgrade durability. Many original rings are thin and prone to failure; swapping them for a sturdier alternative significantly extends the accessory’s lifespan.
Essential Tools and Materials
Before beginning the repair, gather the necessary supplies. Most items are affordable and reusable across multiple DIY projects. Here’s what you’ll need:
- Replacement split ring or lobster clasp: Choose stainless steel or nickel-plated brass in a size that matches or slightly exceeds the original (typically 10–12mm diameter).
- Jewelry pliers (flat-nose and chain-nose): Provide precision grip and control when opening and closing metal loops.
- Small wire cutters: For removing damaged components without harming the pom pom base.
- Tweezers (optional but helpful): Useful for handling tiny parts or adjusting thread near the attachment point.
- Thread sealant or clear nail polish: To reinforce stitching if the pom pom’s core loop is frayed.
- Magnifying glass (optional): Aids visibility for detailed work, especially with densely woven pom poms.
Ensure all tools are clean and free of rust. Using dull or corroded instruments may damage delicate fibers or slip during operation, risking injury or further damage.
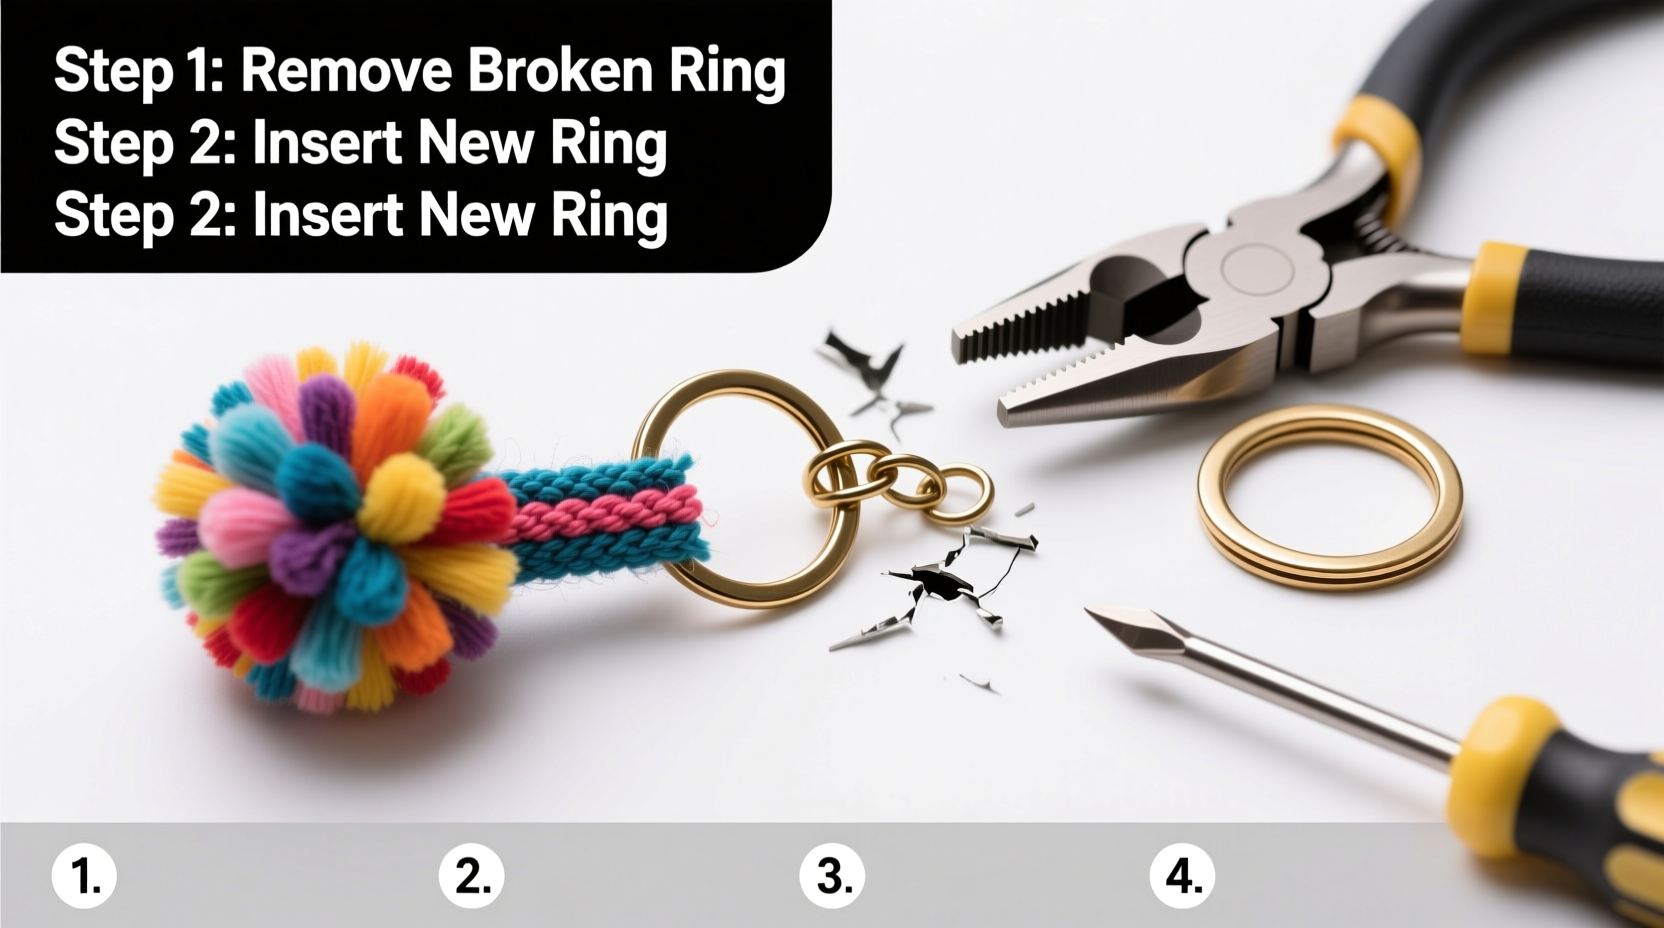
Step-by-Step Replacement Process
- Assess the Damage: Determine whether only the ring is broken or if the fabric loop on the pom pom is also compromised. Gently tug the connection point to check stability.
- Remove the Old Ring: Use wire cutters to carefully snip the broken ring open. Avoid cutting into the pom pom’s core thread bundle. If the ring is intact but stuck, use pliers to gently twist it apart at the split.
- Inspect the Pom Pom Base: Look for loose threads, wear, or unraveling where the ring was attached. Trim any stray fibers and apply a drop of thread sealant to strengthen the knot if needed.
- Select the New Ring: Choose a high-quality replacement. Lobster clasps offer better security than split rings, while larger split rings are easier to attach accessories to.
- Attach the New Ring: Open the new split ring using two pairs of pliers—one holding each end—and twist sideways to create a gap. Slide the pom pom’s attachment loop through, then close the ring by reversing the motion. For lobster clasps, simply hook the clasp onto the loop and test the spring mechanism.
- Test the Connection: Give the new ring a firm but gentle pull to ensure it holds. Wiggle it side-to-side to confirm there’s no lateral weakness.
- Final Touches: Fluff the pom pom gently to restore shape. If desired, add a drop of fabric glue inside the core where threads meet to prevent future loosening.
Do’s and Don’ts: Maintaining Long-Term Durability
| Do | Don’t |
|---|---|
| Use stainless steel hardware for moisture resistance | Reuse a bent or fatigued ring |
| Check connections every few weeks | Attach heavy items to delicate pom pom chains |
| Store pom poms flat or hanging to preserve shape | Expose them to excessive water or heat |
| Reinforce thread knots with sealant | Force a stiff clasp open with bare hands |
Real-Life Example: Restoring a Sentimental Accessory
Sophia had a handmade rainbow pom pom her niece made in kindergarten. It hung on her backpack for years until the split ring snapped during a rainy commute. Devastated at the thought of losing it, she followed a method similar to this guide. She replaced the flimsy 8mm ring with a corrosion-resistant 12mm stainless steel version and added a dab of fabric glue to the internal knot. Not only did the repair hold, but the upgraded ring made it easier to clip onto different bags. Two years later, the pom pom remains a cherished daily companion.
“Small accessories carry big emotional weight. A well-executed repair doesn’t just fix function—it preserves memory.” — Lena Torres, Textile Restoration Specialist
Frequently Asked Questions
Can I replace a split ring with a lobster clasp?
Yes, and it’s often a smarter choice. Lobster clasps provide a more secure closure and are easier to connect and disconnect. Just make sure the clasp size matches the pom pom’s loop diameter and that the spring mechanism is smooth and strong.
What if the pom pom’s thread loop is torn?
If the internal loop is damaged, carefully unpick a small section of the base to access the main thread bundle. Wrap a new piece of strong nylon thread around the core, tie a double knot, and secure it with fabric glue. Allow 24 hours to dry before attaching a new ring.
How long should a repaired keychain last?
With quality materials and proper technique, a repaired pom pom ring can last several years under normal use. Stainless steel rings resist corrosion, and reinforced stitching minimizes stress points, significantly outperforming factory originals.
Pro Checklist: Replacing Your Pom Pom Keychain Ring
- Identify the type and extent of ring damage
- Gather tools: pliers, cutters, replacement ring, sealant
- Safely remove the broken ring without damaging the pom pom
- Inspect and reinforce the attachment point if needed
- Select a durable replacement ring or clasp
- Securely attach the new hardware using proper twisting technique
- Test strength and finalize appearance
- Establish a maintenance routine to prevent future breakage
Conclusion: Keep Your Style Intact
A broken keychain ring doesn’t have to signal the end of your favorite pom pom’s journey. With minimal effort and the right approach, you can restore its functionality and even improve upon its original design. The key lies in using quality materials, applying precise techniques, and treating small repairs as acts of care rather than chores. Whether it’s a gift, a souvenir, or a statement piece, every pom pom deserves a second chance.


 浙公网安备
33010002000092号
浙公网安备
33010002000092号 浙B2-20120091-4
Comments
No comments yet. Why don't you start the discussion?