
Repotting a monstera plant is essential for its long-term health, but doing it incorrectly can cause stress, leaf drop, or stunted growth. The key lies not in whether you repot, but how you do it. Monsteras are sensitive to root disturbance, especially mature specimens with extensive root systems. When done with care, repotting supports vigorous growth, prevents root binding, and refreshes soil nutrients. However, rushing the process or using improper techniques can lead to transplant shock—a condition that weakens the plant and delays recovery for weeks or even months.
This comprehensive guide walks through every phase of repotting your monstera with minimal disruption. From timing and preparation to post-repot care, each step is designed to preserve root integrity, maintain moisture balance, and encourage rapid adaptation to its new home.
When to Repot Your Monstera
Knowing when to repot is just as important as knowing how. Repotting too frequently stresses the plant; waiting too long restricts growth. Signs that your monstera needs a new pot include:
- Roots growing out of drainage holes
- Soil dries out unusually fast after watering
- Water pools on the surface instead of absorbing
- Stunted growth despite proper light and feeding
- Visible roots coiling around the inside of the pot
The best time to repot is during the active growing season—spring or early summer. At this stage, the plant has the energy to recover quickly and establish itself in fresh soil. Avoid repotting in fall or winter, when growth slows and recovery takes longer.
Choosing the Right Pot and Soil
Selecting appropriate materials sets the foundation for a smooth transition. A poor choice in container or mix can lead to water retention, oxygen deprivation, or physical instability.
Pot Size and Type
Always increase pot size gradually. Jumping from a 6-inch to a 10-inch pot overwhelms the root system and increases the risk of overwatering. Instead, move up one size—typically 1–2 inches in diameter. This gives roots room to expand without sitting in excess damp soil.
Material matters too. Terracotta pots are porous and help regulate moisture, making them ideal for growers who tend to overwater. Plastic retains moisture longer and is lightweight, good for larger plants. Glazed ceramic offers aesthetics but must have adequate drainage.
Soil Mix for Optimal Drainage
Monsteras thrive in well-aerated, chunky soil that mimics their natural epiphytic environment. Standard potting soil compacts easily and holds too much water. Instead, use a custom blend that promotes airflow and prevents rot.
| Component | Function | Recommended Ratio |
|---|---|---|
| Potting soil (peat-based) | Base structure and nutrient retention | 40% |
| Perlite or pumice | Improves aeration and drainage | 30% |
| Orchid bark (medium grade) | Prevents compaction, allows root grip | 20% |
| Coconut coir or worm castings | Moisture retention and mild nutrients | 10% |
“Monsteras aren’t typical potted plants—they grow on trees in the wild. Their roots need air as much as they need water.” — Dr. Lena Reyes, Tropical Horticulturist, University of Florida
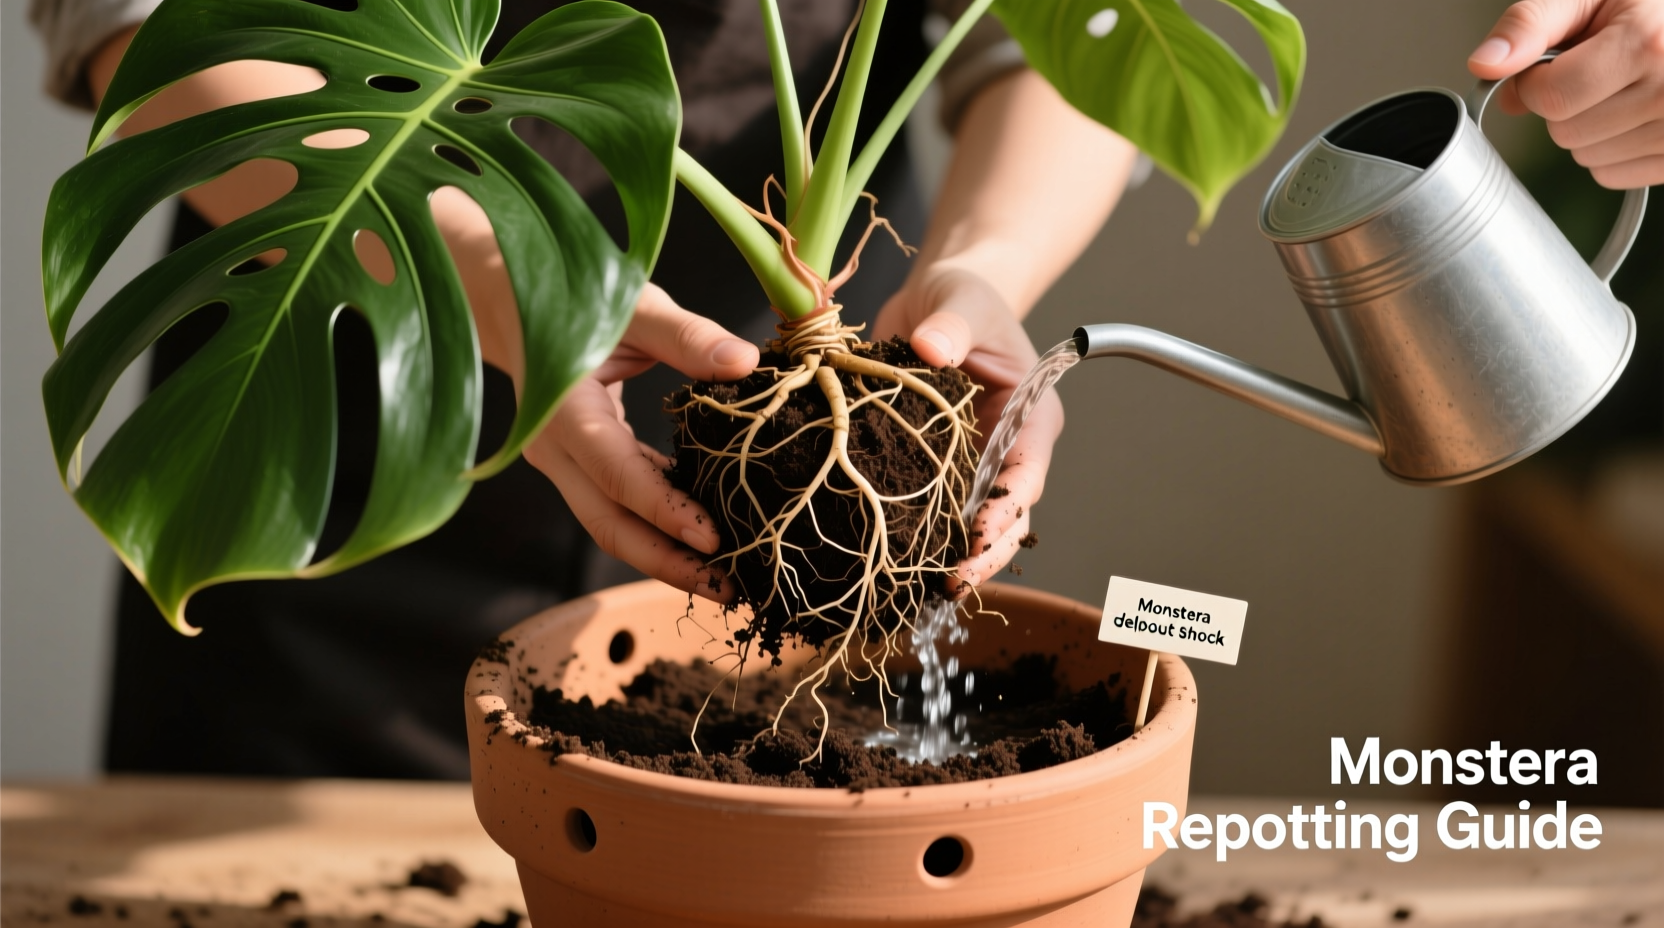
Step-by-Step Guide to Repotting Without Shock
Follow this sequence carefully to minimize stress and support seamless adjustment.
- Prepare the new pot. Clean it with mild soapy water if reused. Place a mesh screen or coffee filter over the drainage hole to prevent soil loss while allowing water flow.
- Mix your soil ahead of time. Moisten it slightly until it feels like a damp sponge—not soggy, not dry. Pre-moistening reduces transplant shock by avoiding sudden moisture shifts.
- Water the plant 1–2 days before repotting. This ensures roots are hydrated and less brittle. Dry roots break easily during handling.
- Gently remove the plant from its current pot. Turn it sideways, support the base of the stem, and tap the bottom. If stuck, run a clean knife around the inner edge. Never yank the plant by the stems.
- Inspect and loosen the root ball. Look for circling, tangled, or blackened roots. Use your fingers to gently tease apart the outer layer—this encourages outward growth into new soil. Trim only dead or mushy roots with sterilized scissors.
- Add soil to the bottom of the new pot. Enough so the top of the root ball sits 1–2 inches below the rim. This space allows for watering.
- Position the plant centrally. Hold it steady while filling around the sides with soil. Press lightly—do not compact. Leave the crown (where stems meet roots) above soil level.
- Water thoroughly after repotting. Allow water to drain completely. This settles the soil and eliminates air pockets. Do not let the pot sit in standing water.
Post-Repot Care: Supporting Recovery
The first two weeks after repotting are critical. The plant may show temporary signs of stress—drooping leaves, slight yellowing—but these usually resolve with proper care.
Avoid fertilizing for at least 4–6 weeks. Fresh soil contains enough nutrients, and adding fertilizer too soon can burn tender roots. Wait until you see new growth before resuming feeding.
Maintain consistent humidity levels between 50–60%. Monsteras appreciate misting or placement near a humidifier, especially in dry indoor environments. Stable temperatures (65–80°F) also aid recovery.
Do not prune immediately after repotting. Leaves act as energy factories, helping the plant rebuild root mass. Only remove severely damaged or dying foliage.
Common Mistakes That Cause Shock
Avoid these pitfalls to protect your monstera’s vitality:
- Over-potting: Too much soil retains excess moisture, leading to root rot.
- Dry handling: Removing a completely dry plant increases root breakage.
- Immediate sun exposure: Moving a repotted plant into direct sunlight causes leaf scorch and dehydration.
- Ignoring root health: Failing to inspect or trim diseased roots spreads problems into fresh soil.
Real Example: Saving an Overgrown Monstera Deliciosa
Sarah, a plant enthusiast in Portland, noticed her 3-year-old monstera wasn’t producing new splits and had started leaning heavily to one side. Roots were emerging from the saucer, and watering required daily attention. She decided to repot in late April, following a cautious approach.
She selected a terracotta pot one size larger and prepared a custom mix of peat, perlite, orchid bark, and coconut coir. After watering the plant the day before, she carefully removed it and found tightly wound roots circling the base. Using her fingers, she gently loosened the outer third and trimmed a few dark, soft sections.
After repotting, she placed the plant in a north-facing room with filtered light and avoided fertilizing. Within five days, the leaves perked up. By week three, a new aerial root emerged, and a fresh leaf began unfurling. Six weeks later, the plant showed visible signs of vertical growth and produced its first fenestrated leaf since being indoors.
Sarah credits success to gradual pot sizing, root care, and patience during recovery.
Essential Checklist for Safe Repotting
Use this checklist before, during, and after repotting to ensure nothing is missed:
- ☑ Choose a pot 1–2 inches larger in diameter
- ☑ Ensure the pot has drainage holes
- ☑ Prepare a well-draining, airy soil mix
- ☑ Water the plant 1–2 days prior
- ☑ Gently loosen roots without aggressive pulling
- ☑ Position the plant at the same depth as before
- ☑ Water thoroughly after repotting
- ☑ Keep in bright, indirect light for 7–10 days
- ☑ Hold off on fertilizing for 4–6 weeks
- ☑ Monitor for new growth as a sign of recovery
Frequently Asked Questions
Can I repot my monstera while it's flowering?
Monsteras rarely flower indoors, but if yours does, it’s best to delay repotting until after the bloom fades. Flowering requires significant energy, and combining it with root disturbance may cause bud drop or prolonged stress.
Why are the leaves drooping after repotting?
Some drooping is normal due to root adjustment. As long as the soil is properly moist and the plant isn’t in direct sun, recovery should occur within a week. Persistent drooping may indicate overwatering or root damage.
How often should I repot a monstera?
Young monsteras benefit from annual repotting. Mature plants can go 2–3 years between repottings, especially if top-dressed with fresh soil each spring. Focus on root health rather than a fixed schedule.
Final Thoughts: Confidence Through Careful Practice
Repotting a monstera doesn’t have to be daunting. With the right timing, tools, and technique, it becomes a powerful way to revitalize your plant and unlock its full growth potential. The goal isn’t just to change pots—it’s to create conditions where roots can breathe, absorb nutrients efficiently, and support lush, dramatic foliage.
Every successful repot strengthens your understanding of your plant’s needs. Pay attention to how your monstera responds, learn from each experience, and adjust accordingly. Over time, you’ll develop an intuitive sense of when and how to intervene—without fear of causing harm.


 浙公网安备
33010002000092号
浙公网安备
33010002000092号 浙B2-20120091-4
Comments
No comments yet. Why don't you start the discussion?