
Removing an administrator account in Windows 10 is a task that requires careful planning. Unlike standard user accounts, admin accounts often contain personal files, application settings, and system-level configurations. Accidentally deleting one without backing up critical data can lead to irreversible loss. More importantly, removing the last admin account can lock you out of essential system functions. This guide walks through a secure, structured process to eliminate an admin account while preserving both your files and system integrity.
Why You Should Be Cautious When Deleting Admin Accounts
Admin accounts hold elevated privileges, allowing full control over system settings, software installations, and user management. However, this power also means they are more likely to store sensitive data, saved passwords (via browsers or credential managers), and personalized configurations for tools like Outlook, Visual Studio, or Adobe apps.
Deleting such an account without proper preparation may result in:
- Loss of personal documents, photos, or downloads stored under the user profile.
- Inability to access encrypted files if EFS (Encrypting File System) was used.
- Disruption of scheduled tasks, scripts, or services tied to the account.
- System instability if it was the primary or only administrator.
“Always ensure there’s at least one active administrator account before removing another. Removing all admin rights can render the system unusable.” — IT Security Bulletin, Microsoft Support
Pre-Deletion Checklist: Prepare Before You Proceed
Before taking any action, complete the following steps to minimize risk and ensure continuity.
- Identify all admin accounts on the system using Computer Management or Command Prompt.
- Create a backup of the desktop, documents, downloads, favorites, and AppData folders from the target account.
- Transfer ownership of any shared files or network resources managed by the account.
- Export browser data (bookmarks, passwords) if the user relied on Chrome, Edge, or Firefox.
- Verify at least one other admin account exists with full privileges.
- Log into the account one final time to confirm access and extract necessary files.
Step-by-Step Guide to Safely Remove an Admin Account
Follow these steps precisely to delete the admin account without compromising data or system functionality.
Step 1: Confirm Another Administrator Exists
Navigate to Settings > Accounts > Family & other users. Under “Other users,” verify that at least one additional account has administrator privileges. If not, promote a standard user first:
- Click the non-admin account.
- Select “Change account type.”
- Choose “Administrator” and confirm.
Step 2: Back Up All User Data
While logged into the admin account (or accessing its profile from another admin session), navigate to:
C:\\Users\\[Username]\\
Copy the following folders to an external location:
- Documents
- Pictures
- Desktop
- Downloads
- Favorites (browser bookmarks)
- AppData\\Local and AppData\\Roaming (for application settings)
Step 3: Reassign Files and Permissions
If the admin account owned specific files or folders outside its profile (e.g., project directories on D:\\), take ownership:
- Right-click the folder > Properties > Security > Advanced.
- Change the owner to your current admin account.
- Check “Replace owner on subcontainers and objects.”
- Apply and confirm.
Step 4: Remove Admin Privileges First (Optional but Recommended)
Instead of deleting immediately, demote the account to a standard user first. This allows testing system stability and ensures no background processes fail.
- Open Settings > Accounts > Family & other users.
- Select the admin account > Change account type.
- Switch to “Standard User” and save.
- Wait 24–48 hours to monitor for issues.
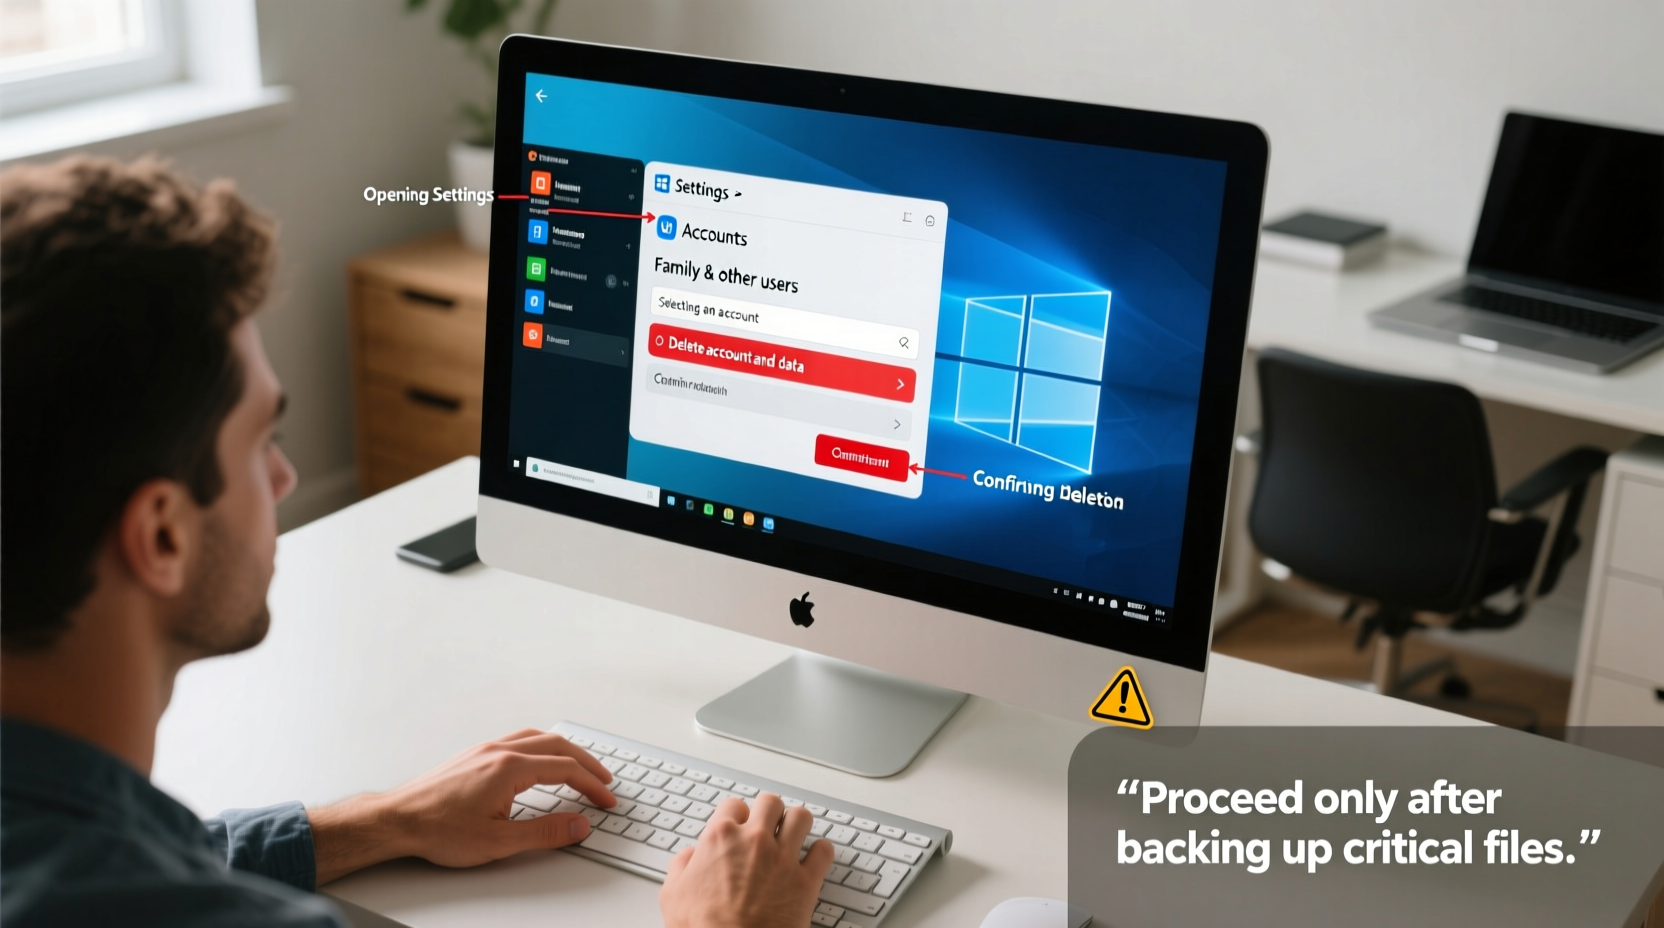
Step 5: Delete the Account via Settings or Control Panel
Once confirmed safe, proceed with deletion.
- Option A – Settings App: Go to Settings > Accounts > Family & other users > Select account > Remove.
- Option B – Control Panel: Open Control Panel > User Accounts > Manage another account > Select account > Delete the account and data.
⚠️ Choose “Keep files” only if you already backed them up externally. Otherwise, select “Delete files” after confirming backup completion.
Step 6: Clean Up Leftover Profile Folders (Advanced)
Sometimes, even after deletion, the user folder remains in C:\\Users\\. To remove it:
- Boot into an alternate admin account.
- Open Command Prompt as Administrator.
- Run:
rmdir /S \"C:\\Users\\[OldAdminUsername]\" - Confirm deletion.
Note: Do not delete folders like Public, Default, or your current user profile.
Do’s and Don’ts When Deleting Admin Accounts
| Do’s | Don’ts |
|---|---|
| ✔ Always back up user data before deletion | ✖ Never delete the only admin account on the system |
| ✔ Use built-in tools like Settings or Control Panel | ✖ Avoid manually deleting user folders without logging in first |
| ✔ Test system functionality after removal | ✖ Don’t ignore file ownership and permission errors |
| ✔ Keep a recovery drive ready | ✖ Don’t skip verifying backups |
Real-World Example: Corporate Laptop Transition
A small business owner, Sarah, needed to offboard a former IT consultant who had been granted temporary admin access. The consultant’s account contained configuration scripts and local database backups. Instead of immediately deleting the account, Sarah:
- Created a new admin account for herself.
- Logged into the consultant’s profile and exported all scripts and databases to a secure folder.
- Changed ownership of shared project folders.
- Demoted the account to standard user for two days to monitor for service disruptions.
- Finally deleted the account through Settings after confirming no dependencies remained.
This cautious approach prevented downtime and preserved critical operational data.
Frequently Asked Questions
Can I recover a deleted admin account?
Only if you have a system restore point created before deletion. Otherwise, the user profile and registry entries are permanently removed. Files can sometimes be recovered using data recovery tools if “Delete files” was selected—but success is not guaranteed.
What happens to encrypted files when an admin account is deleted?
If the files were encrypted using EFS (Encrypting File System), they become inaccessible unless a recovery agent certificate was previously configured. Always export EFS certificates before deleting accounts that use encryption.
Is it safe to delete an admin account used for automated tasks?
No—unless those tasks are reassigned. Scheduled tasks, batch scripts, or services running under the admin account will fail after deletion. Update their execution context to use a retained admin or service account first.
Final Steps and Best Practices
After successfully removing the admin account, perform a quick audit:
- Reboot the system to ensure smooth startup.
- Verify all applications launch correctly.
- Check network drives and printers still function.
- Review Event Viewer for any login or access errors related to the deleted account.
“User account management is not just about access—it’s about data continuity and system resilience.” — James Lin, Senior Systems Administrator, TechOps Group
Conclusion
Deleting an admin account on Windows 10 doesn’t have to be risky. With methodical preparation—backing up data, verifying alternative admin access, and carefully managing permissions—you can remove unnecessary accounts without sacrificing files or system stability. Whether you're streamlining a personal PC or managing organizational devices, this process ensures security and peace of mind.


 浙公网安备
33010002000092号
浙公网安备
33010002000092号 浙B2-20120091-4
Comments
No comments yet. Why don't you start the discussion?