
Dogs thrive on walks, but not all leashes and harnesses are created equal. Many commercial harnesses can cause chafing, restrict movement, or slip off during energetic moments. For pet owners seeking a personalized fit that prioritizes both comfort and control, repurposing an existing leash into a custom dog harness is a practical, cost-effective solution. With thoughtful design and proper materials, you can convert a standard leash into a functional, safe, and adjustable harness tailored to your dog’s size and behavior.
This guide walks through the entire process—from assessing your gear to final adjustments—ensuring your dog enjoys a better-fitting, pressure-distributed walking experience without the bulk or expense of retail options.
Why Convert a Leash into a Harness?
A traditional collar places strain directly on a dog’s neck, which can lead to tracheal damage, especially in small breeds or dogs with respiratory conditions. A well-designed harness distributes force across the chest and shoulders, reducing injury risk and improving control.
Converting a leash into a harness allows customization based on your dog’s body shape, activity level, and behavioral tendencies. It also reduces waste by reusing durable components like webbing, clips, and padding from old or surplus leashes.
“Harnesses that properly distribute tension reduce spinal and joint stress in dogs during pulling episodes.” — Dr. Lena Torres, Veterinary Behavior Specialist
Materials and Tools You’ll Need
Before beginning, gather the following items. Most can be sourced from old leashes, backpacks, or hardware stores:
- One sturdy leash (preferably 1-inch-wide nylon webbing)
- Two heavy-duty D-rings or carabiner-style clips
- Adjustable side-release buckles (size appropriate for your dog)
- Scissors or rotary cutter
- Measuring tape
- Lighter or fray-check solution (to seal cut ends)
- Sewing needle and heavy-duty thread, or a sewing machine
- Ruler or straight edge
Step-by-Step Construction Guide
Follow this timeline to assemble a secure, no-pull harness from a single leash. This method creates a front-clip Y-back design, ideal for gentle steering and reduced pulling.
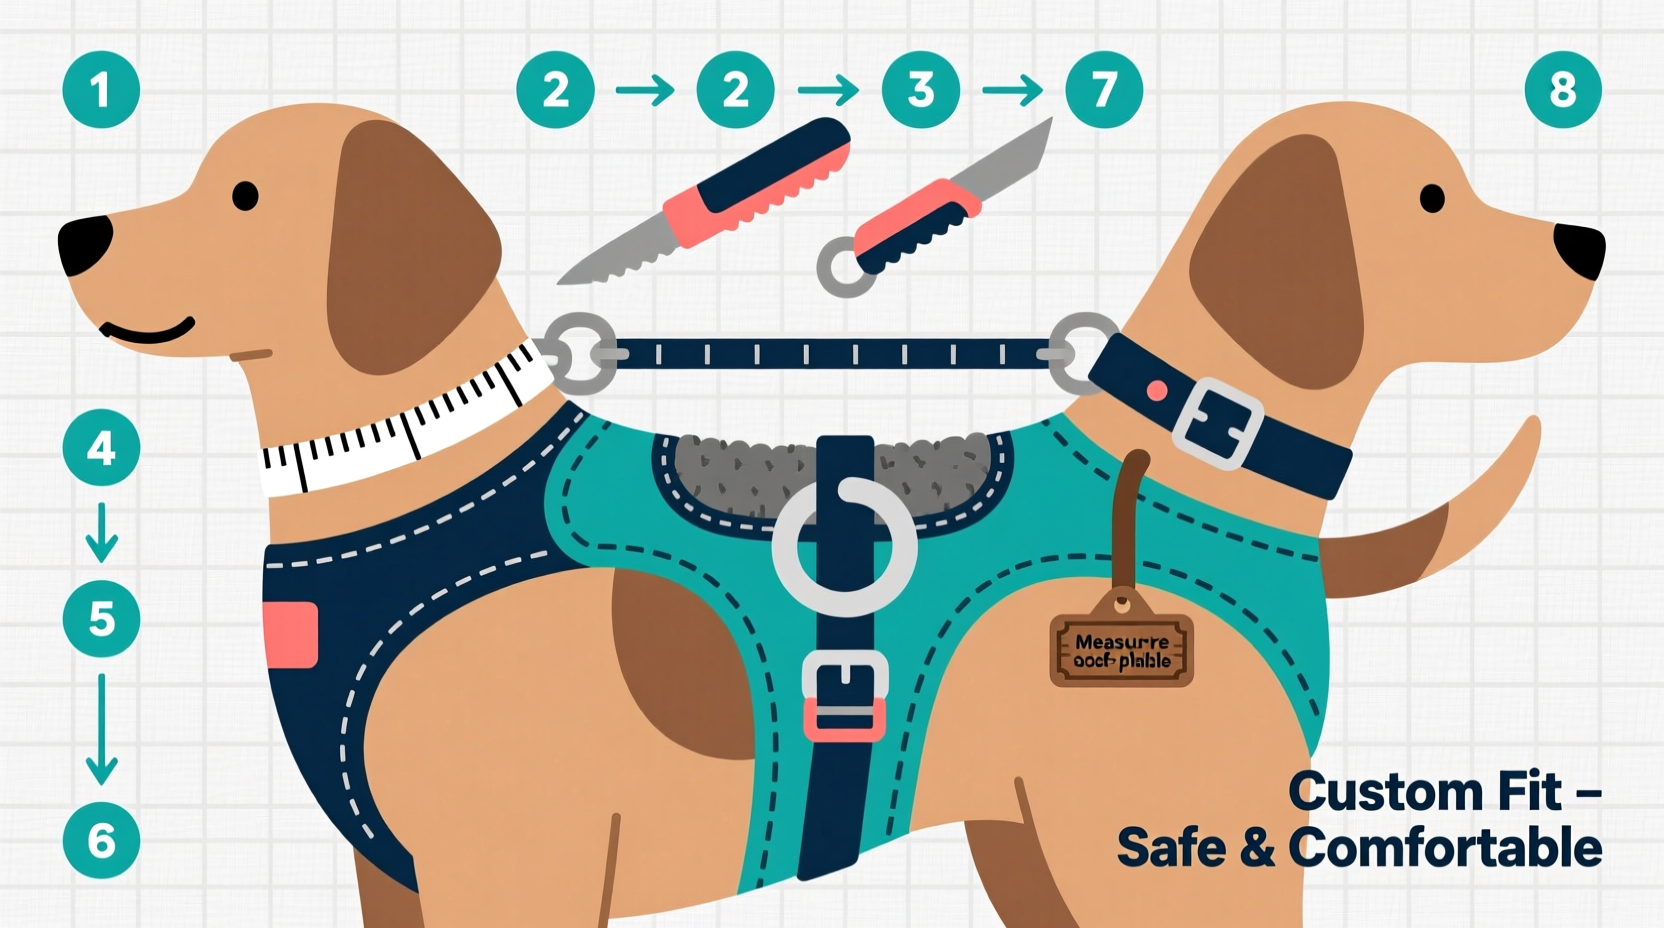
- Measure your dog: Use a soft tape measure to record girth behind the front legs (chest), neck circumference, and back length from base of neck to tail. Add 2 inches to each for adjustability.
- Cut the leash: Unravel the leash if it’s braided or detach any metal parts. Cut the webbing into three sections:
- 1 long piece: 1.5 times your dog’s chest girth
- 2 shorter pieces: Neck measurement + 4 inches each
- Create the chest loop: Fold the long piece in half and sew the ends together to form a large loop. Melt or seal the stitched ends to prevent fraying.
- Attach shoulder straps: Position each short strap at the sides of the chest loop, about 3–4 inches from the bottom. These will go over the dog’s shoulders. Sew securely with box stitches for reinforcement.
- Add buckles: Insert one end of each shoulder strap through a side-release buckle. Sew in place, then feed the free end through the other side so it’s adjustable.
- Install D-rings: Attach a D-ring at the front center of the chest loop. This will serve as the leash attachment point for front-clip control. Optionally, add a second D-ring on the back for dual-clip versatility.
- Test fit: Place the harness on your dog. Adjust straps so they’re snug but allow two fingers underneath. Ensure freedom of movement and no rubbing near armpits or spine.
Design Considerations and Safety Checks
A homemade harness must balance security, comfort, and ease of use. Avoid these common pitfalls:
| Do | Don’t |
|---|---|
| Use high-tensile nylon webbing rated for at least 300 lbs | Use elastic or stretchy materials that degrade under tension |
| Reinforce all stress points with double stitching | Leave loose threads or weak seams near load-bearing areas |
| Ensure buckles click securely and don’t loosen under pressure | Allow excess strap length to dangle where paws can get tangled |
| Check fit weekly—dogs can gain or lose weight | Assume one size fits all growth stages |
Real-World Example: Transforming a Retired Leash
Marcus adopted a terrier mix named Scout who pulled aggressively on walks. His old 6-foot cotton leash was worn but still structurally sound. Instead of discarding it, Marcus disassembled the leash, extracted 48 inches of intact webbing, and followed the steps above. He added a front D-ring from a broken backpack clip and used seatbelt buckles from a thrifted car seat belt.
After two test walks, he adjusted the shoulder straps to sit higher on Scout’s shoulders, eliminating underarm rub. The new harness reduced pulling by allowing him to gently redirect Scout using the front clip. Six months later, the harness remains intact with only minor wear at the chest seam.
Expert Tips for Long-Term Use
Even well-made DIY gear requires maintenance. Follow this checklist monthly:
- Inspect stitching for loose threads or abrasion
- Wipe down with mild soap and water; air dry completely
- Test buckle integrity—replace if mechanism feels loose
- Confirm D-rings rotate freely and aren’t bent
- Verify fit—especially after seasonal coat changes or fitness shifts
“A custom fit encourages better posture and breathing during exercise, which supports long-term joint health.” — Dr. Anika Patel, Canine Physical Therapist
Frequently Asked Questions
Can I use any type of leash for this project?
No. Only leashes made of flat, non-stretch nylon or polyester webbing are suitable. Avoid rope, bungee, or fabric-covered cables, as they lack structural consistency and may fail under sudden load.
Is a front-clip harness better than a back-clip?
Front-clip harnesses attach at the chest, giving you more control over pulling behaviors by redirecting the dog’s momentum. They’re ideal for training. Back-clip harnesses offer more natural stride alignment and are better for relaxed walking. Dual-clip designs provide flexibility for both uses.
How do I know if the harness is too tight?
If you cannot fit two fingers between the harness and your dog’s body, it’s too tight. Also watch for signs of discomfort—excessive scratching, reluctance to move, or red marks after removal.
Final Thoughts and Call to Action
Creating a custom dog harness from a leash isn’t just a craft project—it’s an investment in your dog’s physical well-being and daily comfort. When designed thoughtfully, a DIY harness can outperform mass-produced models by addressing your pet’s unique proportions and habits. The process fosters deeper understanding of canine ergonomics and strengthens the bond between owner and animal through hands-on care.
Start with accurate measurements, prioritize durability in materials and stitching, and always test in a safe environment before full use. Whether you’re reviving an old leash or building from scratch, the result is a functional, personalized tool that enhances every walk.


 浙公网安备
33010002000092号
浙公网安备
33010002000092号 浙B2-20120091-4
Comments
No comments yet. Why don't you start the discussion?