
Every attic, basement, or forgotten corner of a closet holds at least one relic from a past era—an old suitcase with dents, scratches, and stories etched into its surface. Rather than letting it gather dust, consider giving it new life as a functional and stylish piece of furniture. Transforming an old suitcase into a side table is more than just a craft project; it’s a celebration of sustainability, individuality, and design ingenuity. With minimal tools, some creativity, and a few hours of effort, you can create a conversation-starting centerpiece for your living room, bedroom, or reading nook.
This guide walks you through the entire process—from selecting the right suitcase to final assembly—with practical tips, material recommendations, and design ideas that ensure professional-looking results. Whether you're a seasoned DIYer or a beginner eager to try something new, this project offers a rewarding blend of nostalgia and modern functionality.
Selecting the Right Suitcase
The foundation of your side table begins with choosing the ideal suitcase. Not all vintage luggage is suitable for conversion. Look for structural integrity, aesthetic appeal, and size compatibility with your intended space.
A well-built suitcase should have a solid base, intact corners, and minimal warping. Hard-shell cases made from leather, vinyl, or molded plastic tend to hold up better than flimsy fabric models. Vintage trunks from the mid-20th century often feature reinforced edges and sturdy clasps, making them excellent candidates.
Size matters too. A medium-sized suitcase (approximately 18–22 inches long) works best as a side table next to a sofa or armchair. Oversized trunks can serve as coffee tables, while smaller cases might double as decorative stools or plant stands.
| Suitcase Type | Pros | Cons |
|---|---|---|
| Leather Trunk | Durable, timeless look, ages beautifully | May require conditioning; heavier to move |
| Vinyl/Hard Shell | Lightweight, easy to clean, often colorful | Can crack over time; less breathable |
| Fabric/Cloth | Vintage charm, lightweight | Prone to tearing, harder to stabilize |
| Metal Luggage | Extremely durable, industrial aesthetic | Rusty over time; very heavy |
Materials and Tools You’ll Need
Gathering the right supplies ensures a smooth workflow and reduces interruptions during the build. Most items are readily available at hardware stores or online retailers.
Essential Materials
- One vintage suitcase (cleaned and structurally sound)
- Four wooden or metal table legs (pre-made or custom-cut)
- Screws or bolts with washers and nuts (size depends on leg type)
- Wooden board (¾-inch plywood or MDF, cut to fit inside suitcase top)
- Strong adhesive (e.g., construction glue or epoxy)
- Sandpaper (medium and fine grit)
- Paint or sealant (optional, for legs or interior reinforcement)
Tools Required
- Drill with drill bits
- Screwdriver or power driver
- Measuring tape and pencil
- Saw (if cutting legs or wood yourself)
- Clamps (to hold pieces in place during drying)
- Protective gloves and goggles
“Repurposing old objects isn’t just about saving money—it’s about creating heirlooms with soul.” — Lena Torres, Sustainable Interior Designer
Step-by-Step Construction Process
Follow these clear steps to assemble your suitcase side table securely and aesthetically.
- Clean and Prepare the Suitcase
Remove all contents and wipe down both interior and exterior surfaces. Use mild soap and water for hard shells; for leather, use a gentle cleaner followed by conditioner. Let dry completely. If the lining is torn or musty, carefully peel it out and replace it with contact paper or fabric glued to thin cardboard. - Reinforce the Top Surface
Open the suitcase and place it upside down. Measure the internal dimensions of the lid. Cut a piece of ¾-inch plywood or MDF to match. This creates a rigid platform that will bear weight without sagging.
Apply construction adhesive to the inside of the lid, press the board firmly into place, and clamp it overnight. For extra strength, add screws from the outside (through the shell into the wood), then cover screw heads with filler or decorative caps. - Mark Leg Placement
Flip the suitcase right-side up. Measure and mark where each leg will attach—typically near each corner, about 1–2 inches from the edges. Ensure symmetry by measuring diagonally across the corners; both measurements should be equal. - Attach the Legs
Position each leg over its marked spot. Drill pilot holes through the suitcase base and into the wooden insert. Secure each leg using appropriate screws or bolts. If using threaded inserts or flange bolts, tighten with a wrench for maximum stability.
For added durability, apply a drop of thread-locking fluid to the bolts. Test wobble by gently rocking the table—if movement occurs, adjust leg alignment or add shims under shorter legs. - Finishing Touches
Sand any rough edges on the legs or mounting points. Wipe away dust. If desired, paint or stain the legs before attachment. Consider adding felt pads to the bottom of each leg to protect flooring.
Optionally, line the inside of the suitcase with fabric, wallpaper, or vintage maps to enhance visual appeal when opened. This also preserves storage functionality.
Design Ideas and Customization Options
Your suitcase table doesn’t have to be purely utilitarian. With thoughtful customization, it becomes a personal statement.
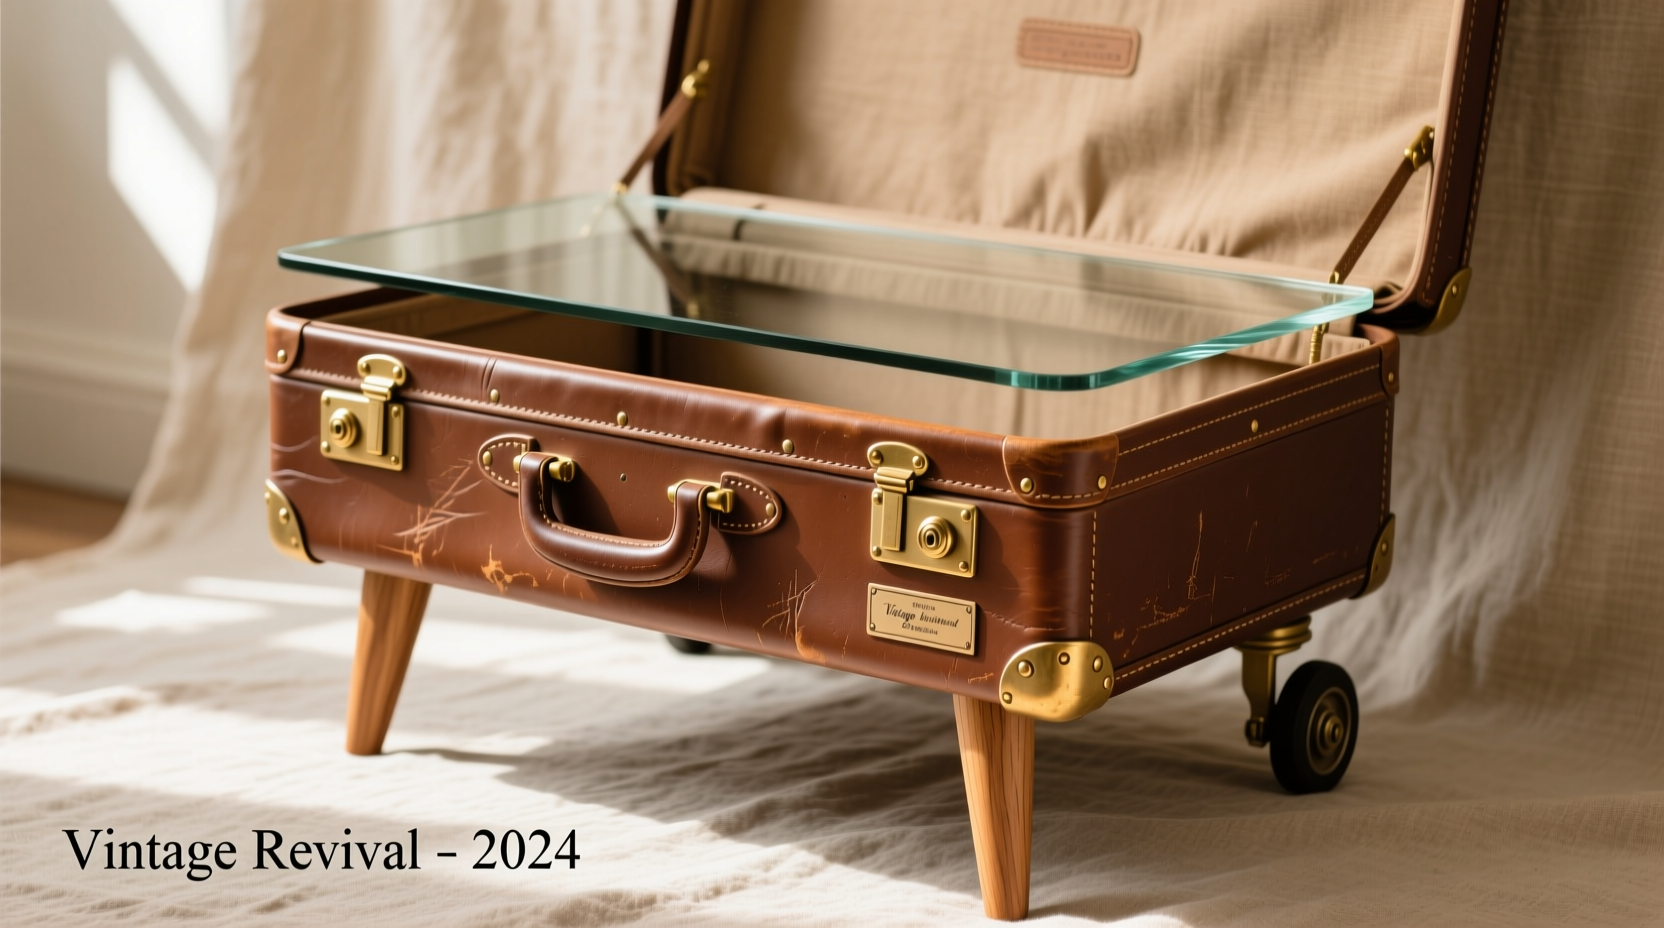
- Vintage Glamour: Choose a leather trunk with brass corners and pair it with gold-tipped tapered legs. Line the interior with velvet and use it to store blankets or books.
- Bohemian Style: Use a painted suitcase with floral patterns. Attach carved wooden legs and leave the interior exposed for eclectic charm.
- Industrial Edge: Opt for a metal or canvas case and combine it with black iron pipe legs. Add casters for mobility.
- Child’s Room Fun: Pick a brightly colored suitcase and decorate the top with decals or stencils. Use it as a toy bin and seat hybrid.
You can also preserve original features like locks, handles, and travel stickers—they contribute character and authenticity. Just ensure they don’t interfere with stability or comfort.
Mini Case Study: Sarah’s Living Room Makeover
Sarah, a graphic designer in Portland, inherited her grandmother’s 1950s Samsonite suitcase after a family estate sale. Though outdated, she loved its retro red finish and chrome trim. Instead of storing it, she decided to repurpose it.
She purchased four matte black hairpin legs online for $32 and used scrap plywood from a previous project. After reinforcing the lid and attaching the legs, she placed the table beside her mid-century couch. She lined the inside with navy linen and now uses it to store remote controls and magazines.
“It gets compliments every time someone visits,” Sarah says. “Plus, I feel connected to my grandma every time I walk past it.” Her total project time was under five hours, spread across two weekends.
Common Pitfalls and How to Avoid Them
Even simple projects can go wrong without proper planning. Here are frequent issues and their solutions:
| Pitfall | Solution |
|---|---|
| Lid sags under weight | Always reinforce with a rigid inner board; never rely on original fabric or thin plastic. |
| Table wobbles | Ensure legs are evenly spaced and tightly secured. Use adjustable feet or shims if needed. |
| Legs don’t align with suitcase base | Double-check measurements before drilling. Use a template or cardboard cutout for accuracy. |
| Damage to suitcase finish | Pre-drill holes and use washers to distribute pressure. Avoid overtightening screws. |
Frequently Asked Questions
Can I still use the suitcase for storage after converting it?
Yes, absolutely. In fact, that’s one of the biggest advantages. The top lifts open, allowing access to the interior. Just avoid overloading it with heavy items that could strain hinges or the mounting structure.
Are there weight limits for suitcase side tables?
Most converted tables can safely support 20–30 pounds when properly reinforced. This is sufficient for lamps, books, drinks, or decorative objects. Avoid placing televisions, appliances, or excessive weight on the surface.
What if my suitcase has a broken handle or latch?
Minor damage can be repaired. Replace missing rivets with small bolts. Fix loose handles with epoxy or metal brackets. Broken latches can be removed or replaced with magnetic closures for smoother operation.
Final Checklist Before You Begin
Use this checklist to ensure you’re fully prepared before starting your transformation:
- ☐ Inspect suitcase for structural damage
- ☐ Clean and dry thoroughly
- ☐ Choose and purchase legs (confirm height and style)
- ☐ Cut reinforcement board to fit lid interior
- ☐ Gather all tools and safety gear
- ☐ Measure and mark leg positions accurately
- ☐ Reinforce lid with adhesive and fasteners
- ☐ Attach legs securely and test stability
- ☐ Add finishing touches (paint, lining, felt pads)
- ☐ Style and enjoy your new piece!
Conclusion: Turn Nostalgia Into Functionality
Transforming an old suitcase into a side table blends practicality with emotional resonance. It honors the past while serving the present—a perfect example of sustainable design done right. Beyond aesthetics, this project encourages resourcefulness, reduces waste, and adds a unique focal point to any room.
With careful selection, smart reinforcement, and attention to detail, your creation won’t just be a table—it’ll be a story told through craftsmanship. So dig into that attic, visit a thrift store, or rescue a forgotten case from storage. Your next favorite furniture piece is already waiting.


 浙公网安备
33010002000092号
浙公网安备
33010002000092号 浙B2-20120091-4
Comments
No comments yet. Why don't you start the discussion?