
Changing your email address on Facebook is a common task, especially when switching jobs, retiring an old inbox, or enhancing account security. However, doing it incorrectly can lead to access issues, missed notifications, or even unauthorized takeovers. A secure and efficient update ensures you maintain full control of your profile while minimizing risks. This guide walks you through the entire process—from preparation to verification—with expert-backed strategies to keep your account safe.
Why Updating Your Email Matters for Security
Your email address is one of the primary recovery methods for your Facebook account. It's used for password resets, two-factor authentication codes, and critical security alerts. If your email is outdated or compromised, you risk losing access entirely. Cybersecurity experts emphasize that keeping contact information current is as important as using strong passwords.
“An outdated or unmonitored email linked to social accounts is a silent vulnerability. Attackers often exploit forgotten inboxes to hijack profiles.” — Lena Patel, Digital Identity Specialist at SecureNet Labs
Updating your email isn’t just about convenience—it’s a proactive defense against account compromise. Additionally, if you use Facebook for business pages or advertising, having a reliable email ensures you receive policy updates and payment confirmations without delay.
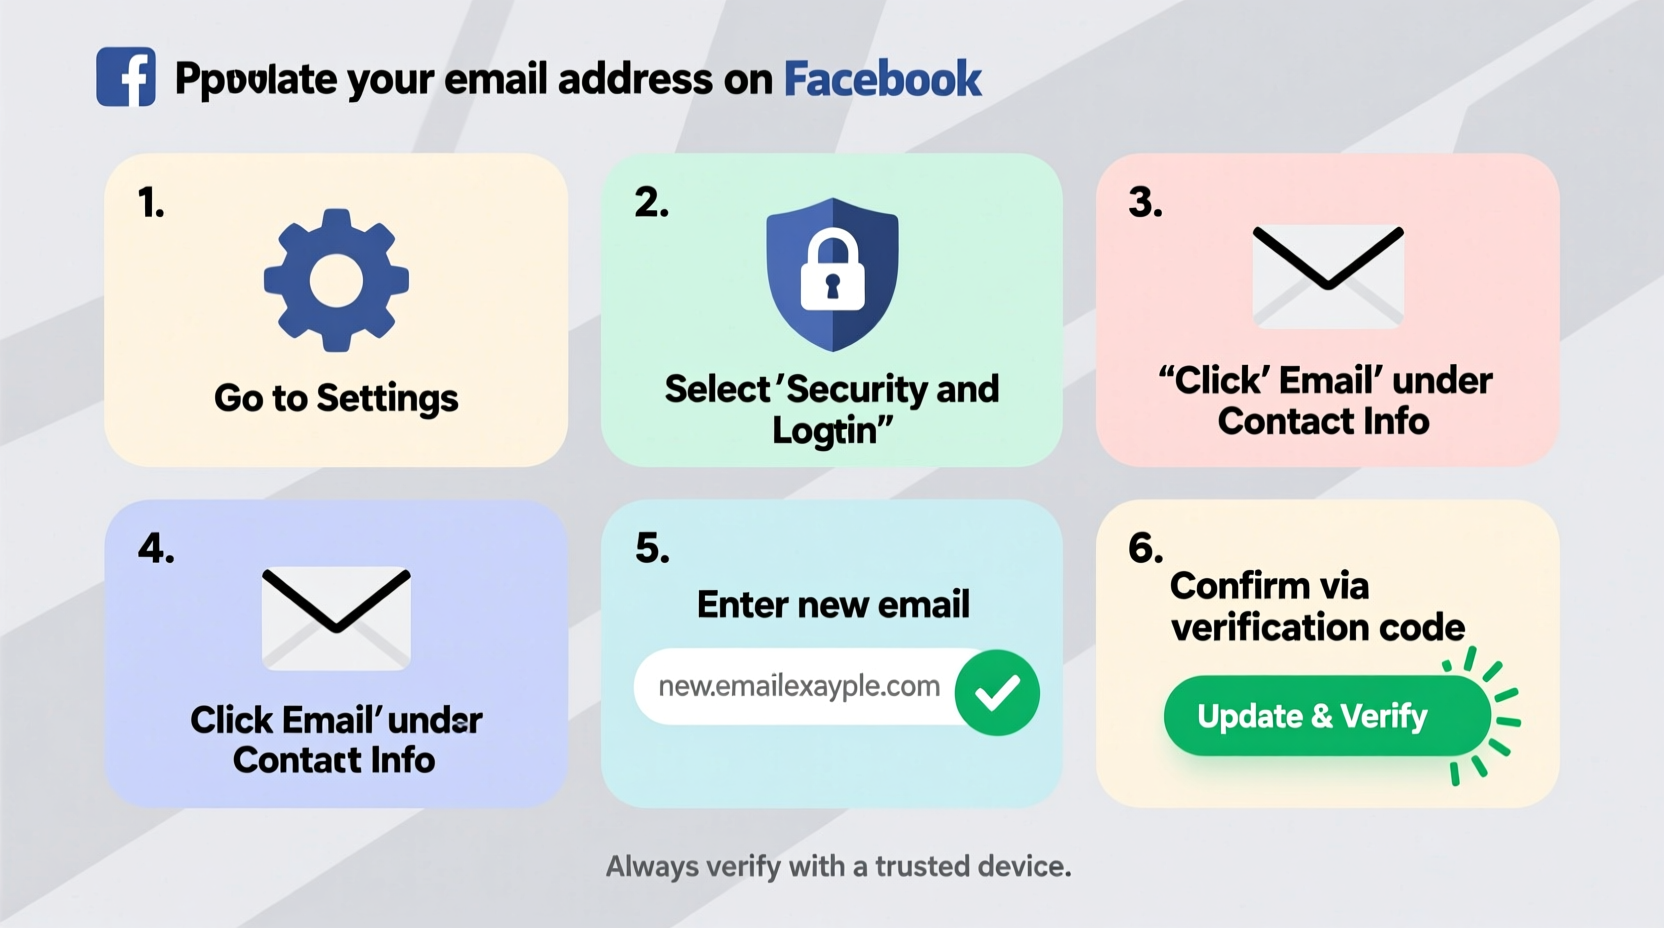
Step-by-Step: How to Change Your Email on Facebook
Follow this structured timeline to update your email address safely. The process takes less than 10 minutes but significantly strengthens your account integrity.
- Log in to Facebook from a trusted device – Use a personal computer or phone where you’re already signed in and recognized by Facebook. Avoid public terminals or shared networks.
- Navigate to Settings & Privacy – Click the downward arrow in the top-right corner of the screen, then select “Settings & Privacy,” followed by “Settings.”
- Select “Contacts” under Account Settings – In the left-hand menu, find “Personal Information” and click “Contact Info.” Here, you’ll see your current email(s). <4> Add your new email address – Click “Add Another Email or Phone Number.” Enter your new, active email address and confirm it.
- Verify the new email – Facebook will send a confirmation link to the new address. Open your inbox, locate the message (check spam/junk if needed), and click “Confirm This Email Address.”
- Set the new email as primary (optional) – Once verified, return to Contact Info. You can now choose which email receives notifications and serves as the login ID.
- Remove the old email (recommended after verification) – After confirming the new email works, delete the old one to reduce exposure. Click the trash icon next to it.
Best Practices During the Transition
Making the switch smoothly requires more than just following steps—it demands awareness of potential pitfalls. Consider these do’s and don’ts to protect your digital footprint.
| Do’s | Don’ts |
|---|---|
| Use a secure, private email provider (e.g., ProtonMail, Gmail with 2FA) | Don’t use temporary or disposable email addresses |
| Enable two-factor authentication before changing emails | Don’t skip the verification step—even if the email seems correct |
| Test login with the new email after update | Don’t leave multiple old emails attached indefinitely |
| Update email across all linked services (Instagram, Meta Ads Manager) | Don’t perform changes over public Wi-Fi without a VPN |
Avoiding Common Verification Failures
Many users report not receiving the confirmation email. Before assuming failure, check your spam folder, wait up to 15 minutes, and ensure you're checking the correct inbox. If still missing, use Facebook’s “Resend Confirmation” option. Never add the same email twice—this can trigger temporary blocks.
Real-World Scenario: Recovering Access After an Email Change
Sarah, a freelance graphic designer, updated her Facebook email to match her new business domain. She removed her old university email immediately after adding the new one—without verifying. Two weeks later, she couldn’t log in. Facebook sent the password reset link to the unverified address, which bounced back. Her account was locked until she completed identity verification via photo ID submission—a process that took six days.
This case illustrates a preventable error: skipping verification. Had Sarah waited 10 minutes to confirm the new email first, she would have avoided downtime during a critical client campaign. Always follow the sequence: Add → Verify → Promote → Remove.
Essential Checklist Before You Begin
Before initiating the change, ensure everything is in place. Use this checklist to avoid interruptions.
- ✅ Access to both current and new email inboxes
- ✅ Trusted device with stable internet connection
- ✅ Two-factor authentication enabled on Facebook
- ✅ Updated password (if not changed in the last 90 days)
- ✅ No active login alerts or unrecognized devices
- ✅ Backup method (phone number or recovery codes) set up
Frequently Asked Questions
Can I use my new email to log in immediately after changing it?
Yes—but only after it has been verified. Once confirmed and set as primary, you can sign in using the new email. Test this by logging out and back in to confirm functionality.
What if I no longer have access to my old email?
If your old email is inaccessible, Facebook allows recovery through alternative methods. Go to the login page, click “Forgotten Password,” enter your username or phone number, and follow prompts to verify identity via trusted contacts or government ID upload.
How many email addresses can I have linked to my Facebook account?
You can add up to three email addresses or phone numbers. However, only one can be designated as primary for login and notifications. Keeping one backup contact is wise, but avoid cluttering with unused ones.
Final Steps: Securing Your Account Post-Update
After successfully changing your email, take two additional actions to reinforce security. First, review your active sessions under “Security and Login” settings. Log out of any unfamiliar devices. Second, revisit your privacy settings to ensure notification preferences align with your new email.
Consider this moment an opportunity to audit other account details: update your birthday visibility, review app permissions, and clean up outdated friend lists. A fresh email is the start of a broader digital hygiene routine.
Conclusion
Updating your email address on Facebook is a simple yet powerful act of digital self-care. When done correctly, it enhances both usability and protection. By following this guide, you’ve not only changed a setting—you’ve strengthened your online identity. Don’t wait for a lockout or phishing scare to act. Take five minutes today to ensure your contact information is accurate, verified, and secure.


 浙公网安备
33010002000092号
浙公网安备
33010002000092号 浙B2-20120091-4
Comments
No comments yet. Why don't you start the discussion?