
Revitalizing a worn or outdated chest of drawers doesn’t always require painting or refinishing. Upholstering offers a fresh, tactile alternative that adds texture, color, and personality to your furniture. Whether you’re aiming for vintage charm, modern elegance, or bold eclecticism, re-covering your dresser in fabric can turn it into a statement piece. This comprehensive guide walks you through the entire process—from selecting materials to securing the final staple—ensuring professional results even if you're new to DIY upholstery.
Why Upholster Instead of Paint?
While painting remains a popular furniture refresh method, upholstering introduces depth and softness that paint simply can't replicate. Fabric brings warmth to a room, especially when used on larger surfaces like drawer fronts or side panels. It’s ideal for spaces where comfort and visual interest matter: bedrooms, dressing rooms, or cozy reading nooks.
Additionally, upholstery allows you to match or contrast existing decor more precisely than paint. With thousands of fabrics available—from linen and velvet to outdoor-grade synthetics—you can tailor the look and durability to your space’s needs.
Essential Tools and Materials
Before starting, gather everything you’ll need. Having all supplies ready prevents mid-project delays and ensures clean, uninterrupted work.
- Staple gun (manual or electric)
- Fine-point scissors or rotary cutter
- Measuring tape
- Utility knife
- Iron and ironing board
- Fabric (with at least 4–6 inches extra per side)
- Foam or batting (optional, for padding)
- Adhesive spray (spray mount type)
- Fine-grit sandpaper
- Painter’s tape
- Screwdriver (for removing hardware)
“Upholstery transforms function into art. The right fabric elevates not just the piece, but the whole room.” — Lena Torres, Interior Refinishing Specialist
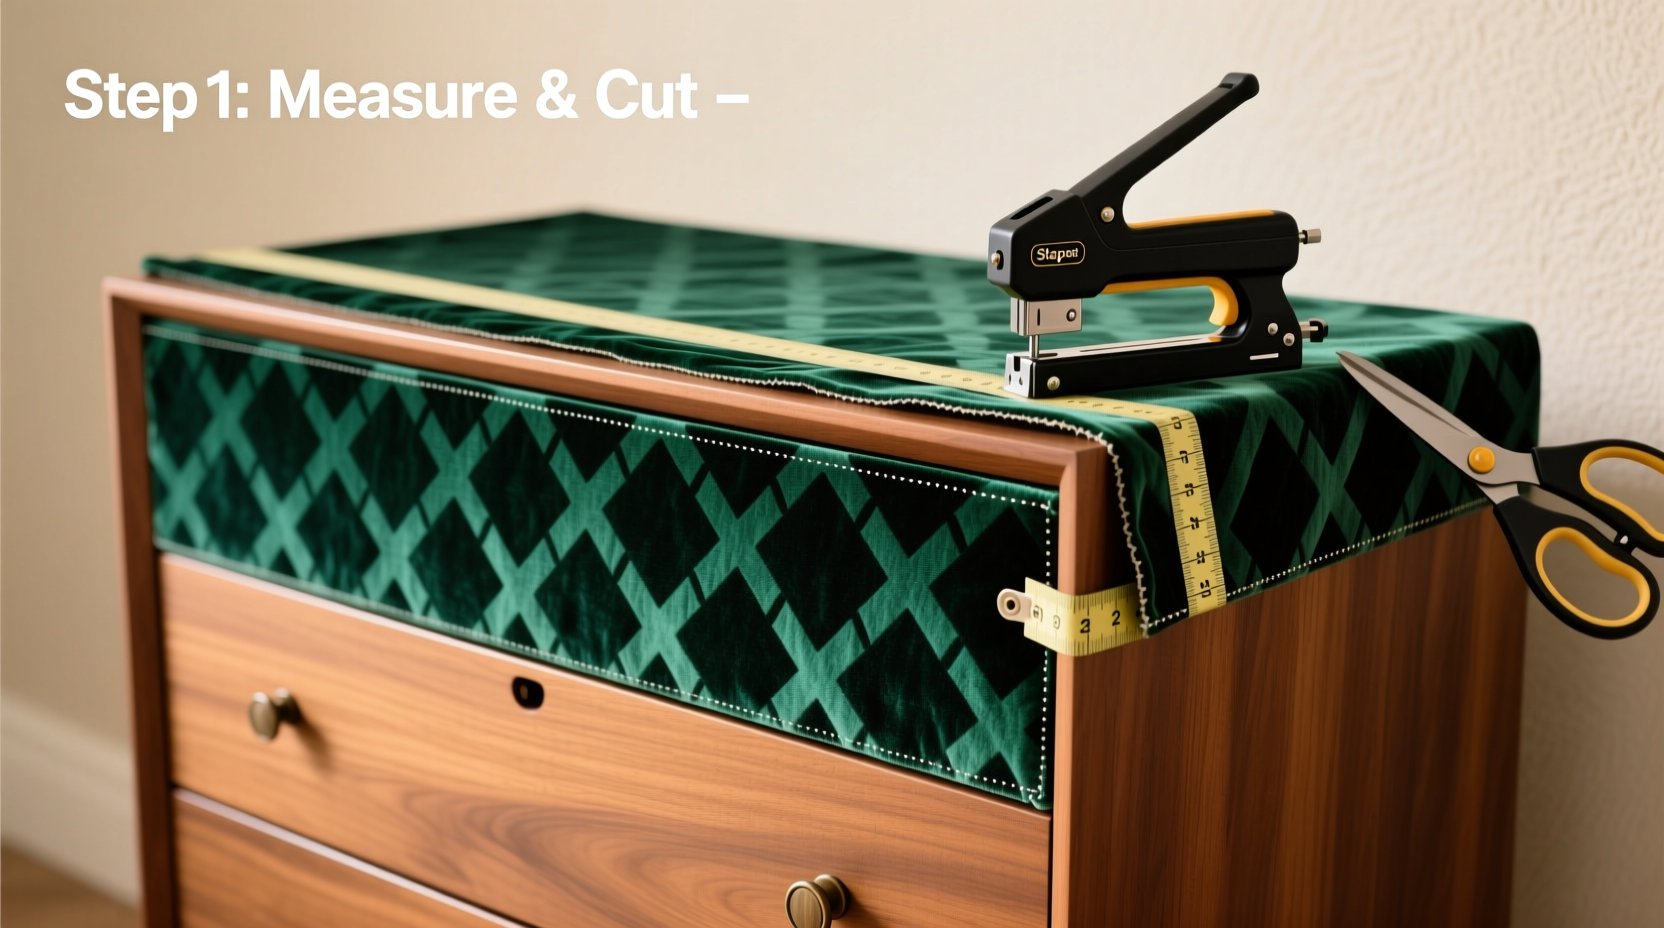
Step-by-Step Guide to Upholstering Your Chest of Drawers
This process works best on flat-front dressers with simple drawer faces. Curved or ornate pieces may require additional shaping techniques.
- Remove hardware and drawers. Use a screwdriver to take off knobs or pulls. Label each drawer’s contents and position if needed. Set aside safely.
- Clean and prep the surface. Wipe down each drawer front with a damp cloth. Lightly sand glossy finishes to help adhesive bond better. Let dry completely.
- Measure and cut foam or batting (optional). For a padded look, cut foam to match the exact size of each drawer front. Attach using spray adhesive. One layer of medium-density foam (¼ inch) is usually sufficient.
- Prepare the fabric. Iron out wrinkles. Lay the drawer front face-down on the wrong side of the fabric. Add 3 inches of excess on all sides. Cut the fabric, leaving ample margin for wrapping.
- Attach fabric to one edge. Starting at the top center, pull the fabric taut and staple it in place. Use two staples per side, centered. Do not stretch diagonally yet.
- Work opposite edges. Move to the bottom edge, pull the fabric smoothly (no wrinkles), and staple. Repeat for left and right sides, maintaining consistent tension.
- Corners and folds. At each corner, fold the excess fabric neatly like wrapping a present. Tuck and staple for a clean finish. Avoid bunching.
- Reattach drawers and add hardware. Once all drawer fronts are covered, reinsert them. Reinstall original or updated knobs for a cohesive look.
Timeline for Completion
| Task | Estimated Time |
|---|---|
| Preparation (cleaning, removing hardware) | 20 minutes |
| Measuring and cutting foam/fabric | 30 minutes |
| Upholstering one drawer | 25–35 minutes |
| Total (for 6-drawer chest) | 3.5–4.5 hours |
Choosing the Right Fabric: What Works Best?
Not all fabrics are suitable for furniture upholstery. Durability, texture, and maintenance matter significantly.
Cotton duck, canvas, and indoor-outdoor fabrics withstand daily use and resist fraying. Velvet offers luxury and hides minor imperfections well. Avoid delicate silks or loosely woven weaves unless the piece is purely decorative.
If you have pets or children, consider stain-resistant or treated fabrics. Many modern textiles come with protective coatings that repel spills without altering appearance.
“Test fabric durability by rubbing it firmly between your fingers. If it pills easily, it won’t last on furniture.” — Marcus Lin, Textile Consultant
Mini Case Study: Reviving a Hand-Me-Down Dresser
Sarah inherited a 1970s oak chest from her grandmother. Though sturdy, its dark varnish clashed with her airy bedroom palette. Rather than stripping or painting it, she opted for upholstery.
She chose a muted sage-green performance fabric with a subtle herringbone weave. After adding thin foam padding for softness, she re-covered all six drawer fronts over a weekend. She replaced the brass knobs with matte black ceramic pulls.
The result? A transitional piece that honored the original craftsmanship while fitting seamlessly into her modern farmhouse aesthetic. Friends assumed it was store-bought from a high-end boutique.
Common Mistakes to Avoid
Even experienced DIYers can make missteps. Knowing what to watch for improves your outcome.
| Mistake | Consequence | Solution |
|---|---|---|
| Using wrinkled or stretched fabric | Puckering and uneven finish | Iron thoroughly and staple symmetrically |
| Skipping surface prep | Adhesive failure or bubbling | Sand and clean before applying |
| Over-stretching corners | Tears or loose seams | Fold neatly like gift wrap |
| Inconsistent staple spacing | Loose fabric over time | Use 1–1.5 inch intervals |
Frequently Asked Questions
Can I upholster a curved drawer front?
Yes, but it requires scoring the foam and using heat-moldable fabric. Lightly cut relief slits in the foam backing to allow bending. Use steam from an iron (not touching the fabric) to ease synthetic blends into curves.
How do I clean upholstered drawers?
Dust regularly with a dry microfiber cloth. For stains, use a fabric-safe cleaner tested in an inconspicuous area first. Avoid soaking; spot-clean only. Removable fabric covers are ideal for washable solutions.
Will staples damage the wood?
Standard upholstery staples are designed for wood and cause minimal damage. If concerned, pre-drill tiny pilot holes or use dual-adhesive methods (glue + fewer staples).
Final Checklist Before You Begin
- ✅ Remove all hardware and drawers
- ✅ Clean and lightly sand surfaces
- ✅ Measure drawer fronts accurately
- ✅ Purchase 10–15% extra fabric for errors
- ✅ Test staple gun on scrap wood
- ✅ Iron fabric to remove creases
- ✅ Work in a clean, well-lit space
Bring New Life to Old Furniture
Upholstering a chest of drawers is more than a home improvement task—it’s a creative act that personalizes your space. With careful planning and attention to detail, you can achieve a result that looks professionally done. The transformation is often dramatic: what once felt tired or out of place becomes a focal point of comfort and style.
Whether you're refreshing a thrift-store find or honoring a family heirloom, this technique gives you full control over aesthetics and quality. And unlike mass-produced furniture, your upholstered piece carries the mark of intention and care.


 浙公网安备
33010002000092号
浙公网安备
33010002000092号 浙B2-20120091-4
Comments
No comments yet. Why don't you start the discussion?