
Window screens serve a vital role in keeping insects out while allowing fresh air to flow through your home. But when it comes time to clean them, replace them, or prepare for seasonal maintenance, knowing how to remove them properly is essential. Done incorrectly, you risk damaging the screen, frame, or even injuring yourself. This comprehensive guide walks you through every step of safely and efficiently removing window screens—regardless of type or style—so you can handle the task with confidence.
Why Proper Screen Removal Matters
Many homeowners assume that removing a window screen is as simple as pulling it out. However, different windows use different mechanisms—some require lifting, others need tilting, and some are secured with clips or tabs. Using force or incorrect techniques can bend aluminum frames, crack fiberglass mesh, or damage vinyl-coated tracks. Beyond physical damage, improperly removed screens can be difficult to reinstall, leaving your home vulnerable to pests or weather exposure.
Proper removal ensures longevity of both the screen and the window system. It also makes cleaning more effective and replacement smoother. Whether you're preparing for deep house cleaning, storm season, or exterior painting, mastering this skill is a small but impactful part of home maintenance.
Types of Window Screens and Their Removal Mechanisms
Not all window screens are created equal. The method used to remove them depends largely on the type of window and screen design. Below is an overview of the most common types:
| Type of Screen | Common Locations | Removal Method |
|---|---|---|
| Sliding Window Screens | Balconies, patios, basement windows | Lift upward slightly, then pull toward you |
| Double-Hung Window Screens | Traditional upstairs/downstairs windows | Tilt inward at bottom, lift out from top track |
| Casement Window Screens | Kitchens, bathrooms, side windows | Unscrew or unclip mounting hardware |
| Retractable Screens | Modern homes, sliding doors | Usually not user-removable; consult manufacturer |
| Outsized or Heavy-Duty Screens | Garages, older homes | May require two people and specialty tools |
Understanding which category your screen falls into is the first step in safe removal. Misidentifying the type can lead to unnecessary force and potential damage.
Step-by-Step Guide to Removing Common Window Screens
Most residential screens fall into the double-hung or sliding variety. Follow these steps carefully to ensure a smooth, damage-free removal process.
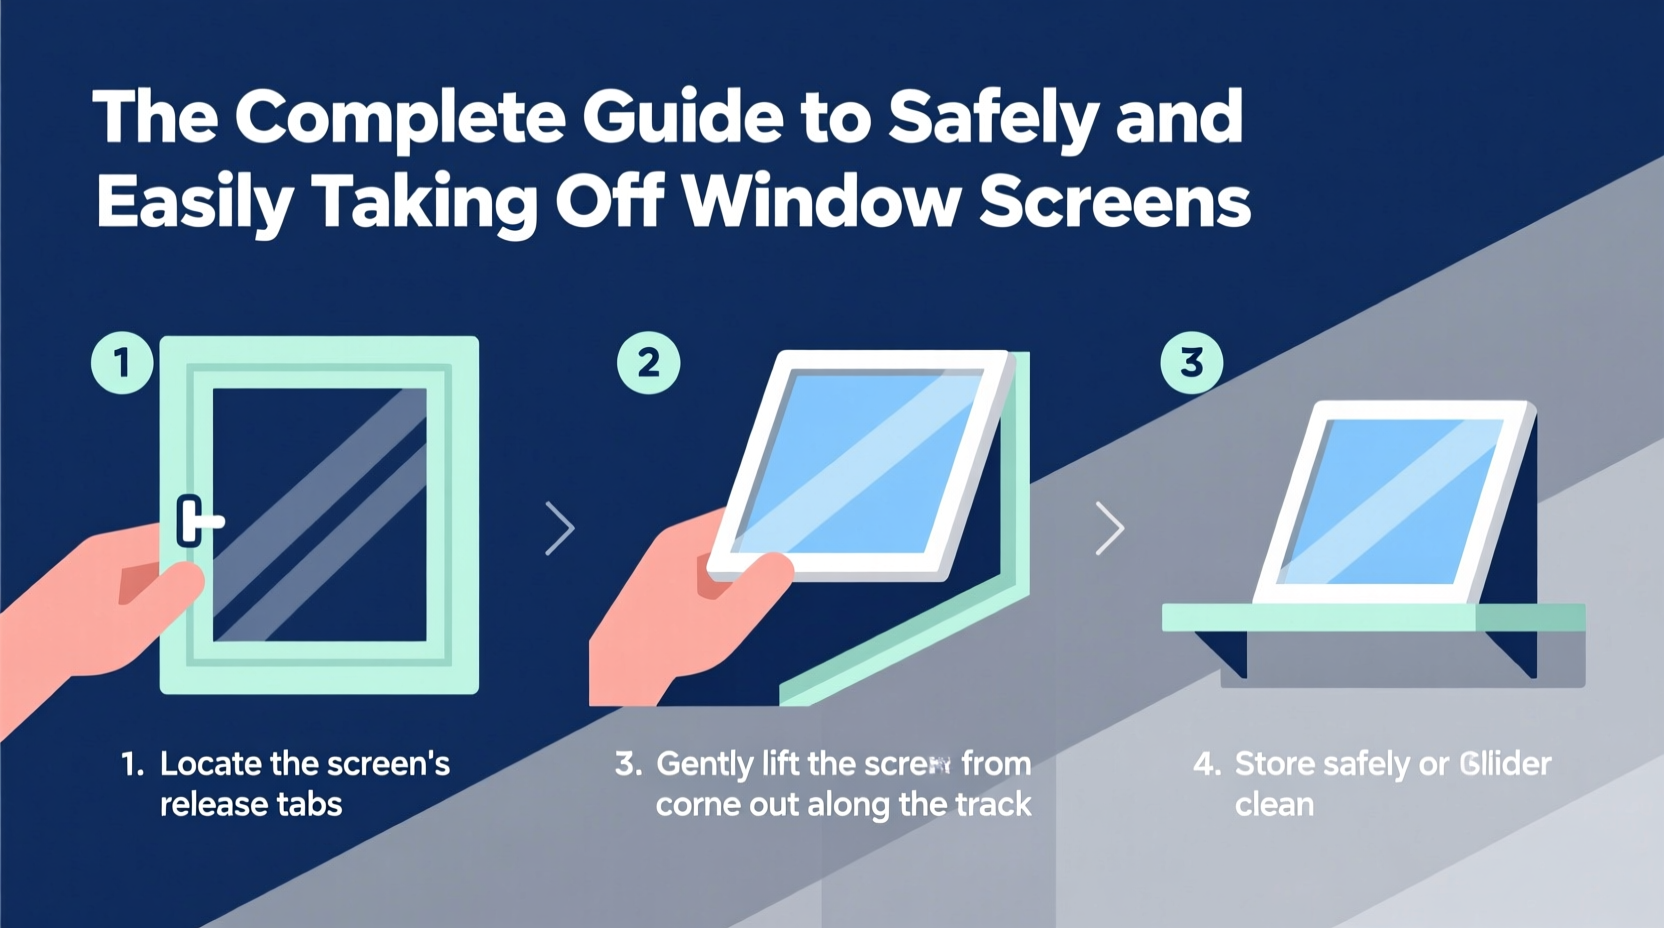
- Inspect the Frame: Look along the edges of the screen for spring clips, tabs, or locking mechanisms. These often appear as small plastic or metal protrusions near the top or sides.
- Clear the Area: Open the window fully and move any nearby furniture, curtains, or blinds out of the way. You’ll need space to work and a place to set the screen once removed.
- Release Retention Clips (if present): Use your fingers or a flat-head screwdriver to gently push spring clips inward. They’re usually located at the top corners and hold the screen in place.
- Tilt the Bottom Inward (for double-hung): For interior-mounted screens, grasp the screen firmly at the center of the bottom rail. Tilt it toward you at about a 30-degree angle.
- Lift Out the Top Edge: Once tilted, raise the top edge of the screen up and out of the track. Be careful not to scrape the frame against the window sill.
- Set Down Carefully: Place the screen on a soft surface like grass, carpet, or a towel to avoid scratching the mesh or frame.
Common Mistakes and How to Avoid Them
Even experienced homeowners make errors when handling window screens. Awareness of these pitfalls can prevent costly or frustrating outcomes.
- Using excessive force: Never yank or twist a screen. Most issues stem from resistance caused by overlooked clips or dirt buildup.
- Ignoring manufacturer instructions: Some modern windows have proprietary screen systems. Always check the manual or manufacturer website before proceeding.
- Removing screens during high winds: Wind pressure can cause screens to slip from your grip. Choose a calm day for removal and reinstallation.
- Leaving windows unprotected: Once the screen is out, close the window or mark the opening clearly to prevent accidental falls or pest entry.
“Improper screen removal accounts for over 60% of DIY window damage claims we see annually.” — Mark Reynolds, Home Safety Inspector, National Window Association
Checklist: Preparing to Remove Your Window Screen
Follow this concise checklist before beginning to ensure a smooth and efficient process:
- ☑ Identify your screen type (sliding, double-hung, casement, etc.)
- ☑ Check for retention clips or screws
- ☑ Clear space around the window
- ☑ Gather necessary tools (screwdriver, gloves, soft mat)
- ☑ Choose a low-wind time of day
- ☑ Have a safe, flat surface ready for the screen
- ☑ Wear gloves to protect hands from sharp edges
Real-World Example: Removing Screens Before Exterior Painting
Sarah, a homeowner in Portland, Oregon, decided to repaint her house’s exterior. She assumed she could simply pull out the screens like she’d seen neighbors do. After struggling with one particularly stubborn unit, she cracked the fiberglass mesh trying to force it free.
She paused, researched her window model online, and discovered small spring clips at the top that needed to be compressed before tilting. With a little patience and a soft cloth to cushion the frame, she successfully removed the remaining eight screens without further incident. Her painter praised her preparation, noting that damaged screens often delay projects and increase costs.
Sarah’s experience highlights the importance of research and technique—even for seemingly simple tasks.
Frequently Asked Questions
Can I remove a window screen from the outside?
In most cases, screens are designed to be removed from the inside for safety reasons. Exterior removal increases fall risks and may violate local housing codes. Only attempt outside removal if specifically instructed by the manufacturer and with proper safety gear.
What should I do if the screen won’t budge?
First, verify there are no hidden clips or screws. Then, inspect the track for dirt, paint buildup, or warping. Gently clean the track with soapy water and a soft brush. If still stuck, apply a silicone-based lubricant and wait 10 minutes before trying again. Never use metal tools that could scratch or gouge.
How often should I remove and clean my window screens?
Experts recommend cleaning screens at least twice a year—once in spring and again in fall. Homes near dusty roads, construction zones, or wooded areas may benefit from quarterly cleaning to maintain airflow and visibility.
Conclusion: Mastering a Simple Yet Essential Skill
Removing a window screen might seem minor, but doing it correctly protects your investment in your home’s windows and comfort. With the right knowledge, tools, and attention to detail, what once felt like a frustrating chore becomes a quick, routine task. Whether you're prepping for cleaning, renovation, or seasonal changes, confidence in this skill pays off in efficiency and peace of mind.


 浙公网安备
33010002000092号
浙公网安备
33010002000092号 浙B2-20120091-4
Comments
No comments yet. Why don't you start the discussion?