
Every MacBook user eventually faces the same issue: a growing collection of unused apps that consume storage, slow down system performance, and clutter the interface. Simply dragging an app to the Trash may seem like enough, but it often leaves behind preference files, caches, and support data. These remnants can accumulate over time, silently eating up gigabytes and interfering with new software installations. Safely removing an app means eliminating not just the application itself, but all associated files that serve no purpose once the app is gone.
Understanding how macOS manages applications—and where hidden data resides—is essential for maintaining a clean, efficient system. This guide walks through proven methods to fully uninstall apps, avoid common pitfalls, and keep your MacBook running at peak performance.
How macOS Stores App Data
Unlike Windows, macOS bundles many app components into a single package (the .app file), which makes apps appear self-contained. However, when you install and use an app, it creates additional files in multiple locations across your system:
- Preferences: Located in
~/Library/Preferences, these store settings and user configurations. - Caches: Found in
~/Library/Caches, temporary files that speed up app performance but aren’t necessary after uninstallation. - Application Support: In
~/Library/Application Support, this folder holds databases, templates, plugins, and other persistent data. - Logs: Stored in
~/Library/Logs, diagnostic files that track app behavior. - Containers: Sandboxed apps isolate their data in
~/Library/Containers.
If these files are left behind, they contribute to digital clutter. Over months or years, orphaned files from dozens of deleted apps can take up hundreds of megabytes—or even gigabytes—of space.
“Most users think deleting an app ends with the Trash, but the real cleanup happens in the Library folders.” — David Lin, macOS Systems Analyst
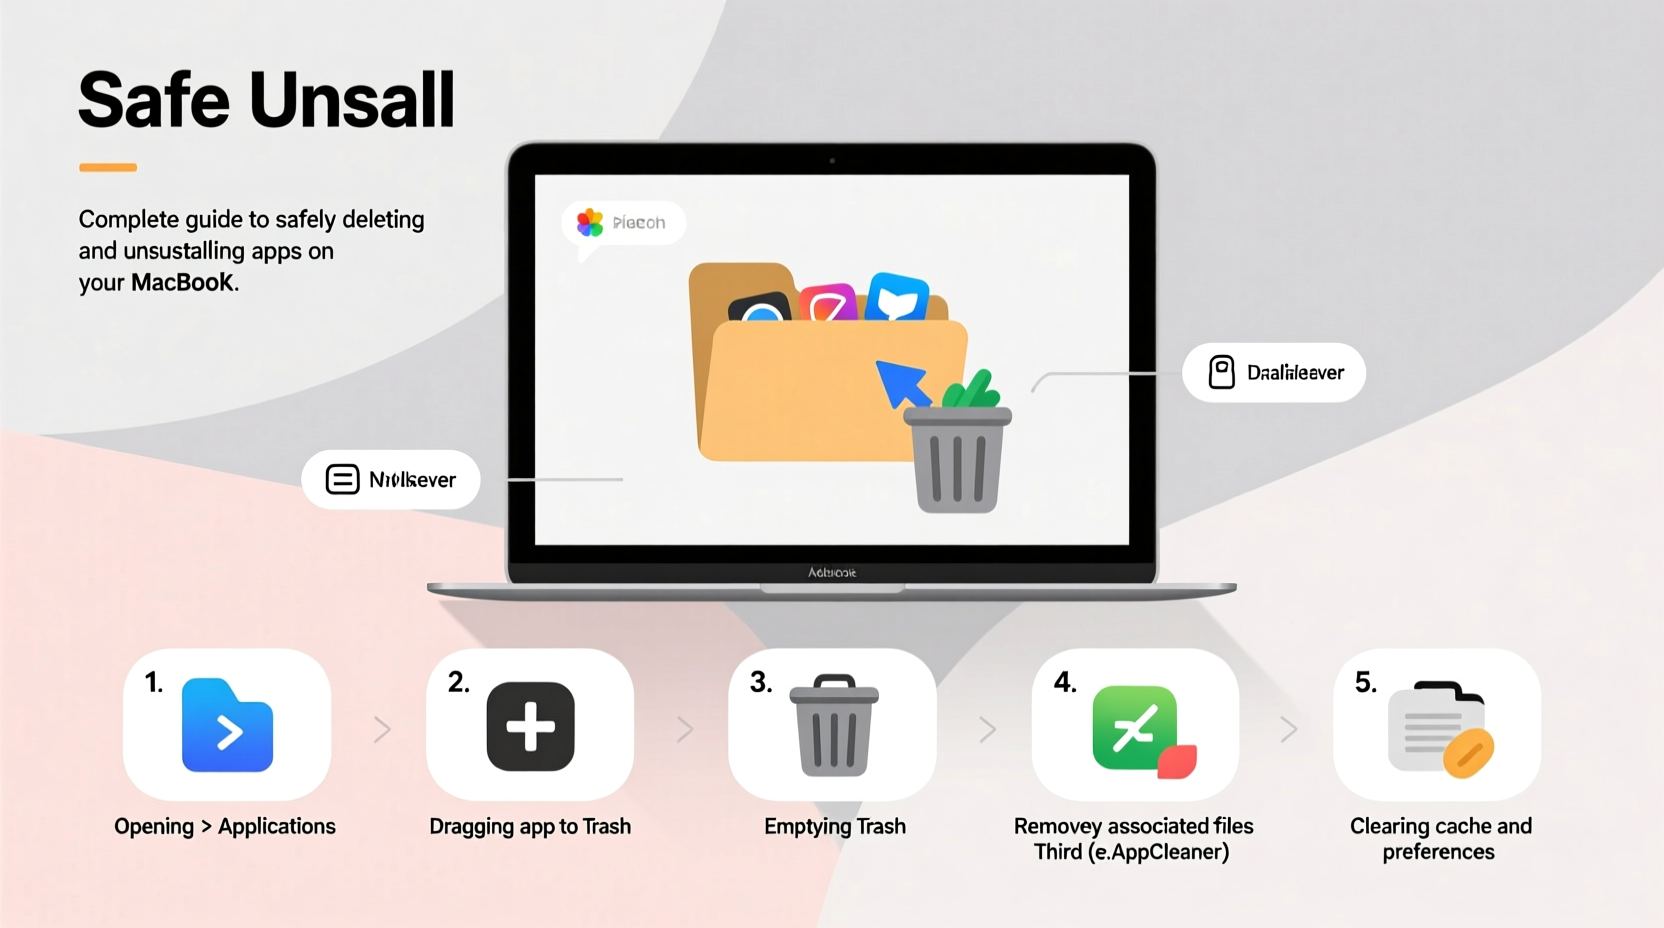
Step-by-Step Guide to Fully Uninstall an App
To ensure a clean removal, follow this systematic process. It works for both standard and sandboxed applications.
- Quit the Application: Right-click its Dock icon and select “Quit,” or use Command + Q. Never delete an app while it’s running.
- Remove the App Bundle: Open Finder, go to the Applications folder, locate the app, and drag it to the Trash.
- Empty Key Related Folders: Open Finder, press Command + Shift + G, and enter each of the following paths one by one:
~/Library/Preferences~/Library/Caches~/Library/Application Support~/Library/Logs~/Library/Containers
- Check for Login Items: Go to System Settings > General > Login Items. Remove any entries related to the uninstalled app.
- Empty the Trash: Right-click the Trash icon and select “Empty Trash.” Confirm the action.
Do’s and Don’ts of App Removal
| Do’s | Don’ts |
|---|---|
| Always quit the app before deletion | Don’t delete system apps like Safari or Mail |
| Search ~/Library folders for leftovers | Don’t manually edit system-level Library folders unless experienced |
| Use third-party tools if managing frequent uninstalls | Don’t skip checking Login Items |
| Verify app origin before removal (some apps auto-reinstall) | Don’t assume the App Store version behaves like the downloaded one |
Using Third-Party Tools for Efficient Cleanup
For users who frequently install and test apps, manual cleanup becomes impractical. Several trusted utilities automate the process by scanning for all related files and offering one-click removal.
Popular options include:
- AppCleaner (Free): Lightweight and intuitive. Drag an app into the window, and it reveals associated files for review before deletion.
- CleanMyMac X (Paid): Offers deep system scans, malware checks, and uninstallation with safety verification.
- AppZapper (Paid): Long-standing favorite known for precision and reliability.
These tools work by cross-referencing file signatures and naming patterns linked to the app. While effective, always review the list of detected files before confirming deletion—some might be shared with other applications.
Real Example: Removing a Bloatware Trial App
Sophie, a freelance designer, downloaded a 30-day trial of video editing software. After deciding not to purchase, she dragged the app to the Trash. A month later, her MacBook began showing low storage warnings. Using About This Mac > Storage, she discovered over 5 GB attributed to “Other.”
She used AppCleaner to scan for remnants. The tool found:
- A 3.2 GB cache folder in
~/Library/Caches - A preferences file in
~/Library/Preferences - A support folder with sample projects in
~/Library/Application Support - An active login item that launched a helper daemon at startup
When Manual Deletion Isn’t Enough: Handling Stubborn Apps
Some apps, especially those with kernel extensions or background services, resist standard removal. Examples include antivirus suites, cloud sync tools, and development environments.
In such cases:
- Visit the developer’s website for an official uninstaller.
- Use Terminal commands only if documented by the vendor. For example:
sudo /Applications/Utilities/AppName\\ Uninstaller.app/Contents/MacOS/uninstall
- Check
/Library/Extensionsor/Library/LaunchDaemonsfor system-level components (requires admin access).
Never delete files from the system-level /Library unless certain of their origin. Missteps here can destabilize macOS.
FAQ
Can I reinstall an app after fully deleting it?
Yes. Once removed, you can download or reinstall the app from the original source. All settings will be reset, giving you a fresh start.
Does the Mac App Store automatically remove associated files?
Partially. The App Store deletes the main app bundle and some sandboxed data, but preference files in ~/Library/Preferences may remain. Manual cleanup is still recommended.
Is it safe to delete files in the Library folder?
Yes—if they belong to an uninstalled app. Always verify the filename matches the app you removed. When in doubt, skip it or back up the file first.
Final Checklist for Safe App Removal
- Quit the app completely
- Delete the app from Applications
- Search and remove related files in ~/Library folders
- Check and remove login items
- Empty the Trash
- (Optional) Use a trusted uninstaller tool for verification
Conclusion
Maintaining a clean MacBook isn’t just about freeing up space—it’s about preserving performance, reducing startup delays, and minimizing software conflicts. Taking a few extra minutes to fully remove apps pays long-term dividends in system responsiveness and reliability. Whether you prefer manual control or automated tools, the key is consistency and attention to detail.


 浙公网安备
33010002000092号
浙公网安备
33010002000092号 浙B2-20120091-4
Comments
No comments yet. Why don't you start the discussion?