
Deer antlers have become a favorite among pet owners seeking durable, natural chew options for dogs. They’re long-lasting, rich in nutrients like calcium and phosphorus, and satisfy a dog’s instinct to gnaw. However, raw or improperly cleaned antlers can carry bacteria, parasites, or environmental contaminants that pose health risks. Proper sterilization is essential to ensure your dog enjoys a safe, hygienic chew. This guide walks you through the science-backed methods, tools, and best practices for sterilizing deer antlers at home—without compromising their integrity.
Why Sterilization Matters
While deer antlers are naturally shed and appear clean, they often spend time on forest floors, exposed to soil, feces, insects, and moisture—all potential sources of harmful pathogens such as E. coli, Salmonella, and mold spores. Even antlers collected directly from nature should never be given to dogs without thorough cleaning and sterilization.
A study published in the *Journal of Veterinary Medicine* found that untreated animal-based chews were linked to higher rates of gastrointestinal infections in pets. Sterilization significantly reduces this risk by eliminating microbial load while preserving the antler’s structural strength and nutritional value.
Step-by-Step Sterilization Process
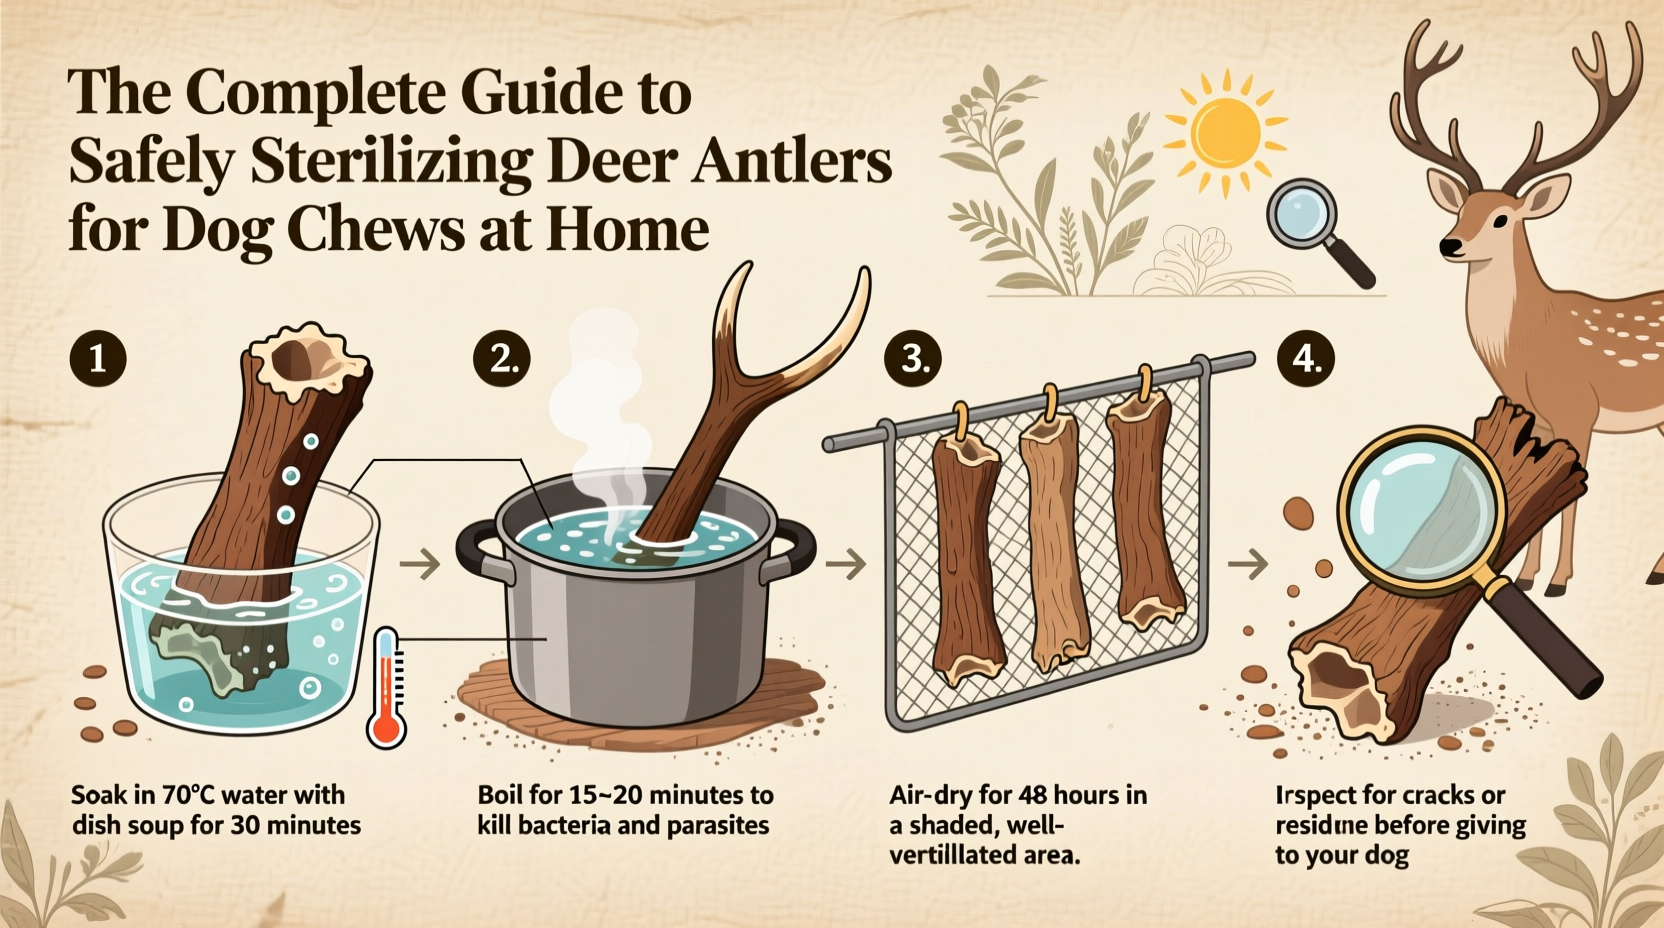
Sterilizing deer antlers at home involves three phases: cleaning, disinfecting, and drying. Follow this timeline for optimal results:
- Preparation (5 minutes): Gather supplies and inspect the antler for cracks, splinters, or excessive dirt.
- Cleaning (30–60 minutes): Remove surface debris using a brush and mild detergent.
- Sterilization (60–90 minutes): Use boiling water or oven baking to kill microbes.
- Drying & Cooling (12–24 hours): Allow antlers to air-dry completely before storage or use.
Phase 1: Initial Cleaning
Begin by scrubbing the antler under warm running water using a stiff-bristled brush (like a nail or grill brush). Focus on crevices where dirt and organic matter may accumulate. Use a small amount of unscented dish soap if needed, but avoid harsh detergents or bleach at this stage.
- Rinse thoroughly until water runs clear.
- Soak in a vinegar-water solution (1 part white vinegar to 3 parts water) for 30 minutes to loosen grime and reduce odor.
- Scrub again after soaking, then rinse once more.
Phase 2: Sterilization Methods
Two proven home-safe methods effectively sterilize antlers: boiling and oven baking. Both eliminate bacteria without rendering the antler brittle when done correctly.
Method A: Boiling Water
- Place cleaned antlers in a large pot and cover completely with water.
- Bring to a rolling boil and maintain for 30–60 minutes.
- Use tongs to remove antlers and place them on a clean towel.
Note: Boiling too long (over 90 minutes) can cause cracking due to rapid moisture loss. Avoid adding salt or oils, which may degrade the bone matrix.
Method B: Oven Baking
- Preheat oven to 250°F (120°C).
- Place antlers on a parchment-lined baking sheet.
- Bake for 2 hours, turning halfway through for even exposure.
- Remove and let cool completely before handling.
Oven baking is preferred for larger antlers or those with complex branching, as heat penetrates deeper than boiling water. It also dries the antler slightly, reducing moisture-related spoilage over time.
Phase 3: Drying and Final Inspection
After sterilization, allow antlers to dry in a well-ventilated area away from direct sunlight. Place them on a wire rack or clean cloth, turning daily. Full drying typically takes 12–24 hours.
Inspect each antler before giving it to your dog:
- Check for sharp edges or loose pieces.
- Feel for dampness or musty odors—signs of incomplete drying or internal mold.
- Discard any antler showing deep cracks or signs of decay.
“Home sterilization, when done properly, can make natural chews as safe as commercial alternatives—without artificial preservatives.” — Dr. Rebecca Lin, DVM, Canine Nutrition Specialist
Do’s and Don’ts of Antler Sterilization
| Do’s | Don’ts |
|---|---|
| Wear gloves during handling | Use bleach or chemical cleaners (they can leave toxic residues) |
| Boil or bake within 24 hours of collection | Leave antlers in standing water for days (promotes bacterial growth) |
| Store sterilized antlers in breathable cotton bags | Give antlers to puppies under 6 months (risk of tooth damage) |
| Supervise your dog during first chew sessions | Microwave antlers (uneven heating causes cracking and fire hazards) |
| Replace antlers when small enough to swallow | Reuse antlers that have developed a foul smell or slimy texture |
Real Example: Safe Antler Prep in Practice
Mark, a dog owner in Colorado, collects shed antlers during spring hikes. He used to hand them directly to his German Shepherd, Max, until Max developed an upset stomach. After consulting his vet, Mark learned about pathogen risks. Now, he follows a strict protocol: he brushes each antler with soapy water, soaks it in vinegar, boils it for 45 minutes, and lets it dry for two full days. Max hasn’t had any digestive issues since—and Mark feels confident about what his dog is chewing.
Storage and Usage Tips
Even after sterilization, improper storage can compromise safety. Store antlers in a cool, dry place inside a breathable fabric bag or open container. Avoid plastic bins, which trap moisture and encourage mold.
Limit chew sessions to 30–60 minutes per day, especially for aggressive chewers. Prolonged gnawing can lead to dental wear or ingestion of large fragments. Rotate chews weekly to keep them fresh and engaging.
Frequently Asked Questions
Can I reuse a sterilized antler?
Yes, but only if it remains structurally intact, clean, and free of splinters. Re-sterilize between uses by briefly boiling (10–15 minutes) or wiping with a vinegar solution. Discard if worn down to a size small enough to be swallowed whole.
Are there safer alternatives to wild-collected antlers?
Purchase from reputable suppliers who source, clean, and sterilize antlers commercially. These undergo regulated sanitation processes and are tested for contaminants. While more expensive, they offer peace of mind—especially for households with immunocompromised individuals or senior pets.
How do I know if an antler is too hard for my dog?
If the antler doesn’t yield slightly under firm pressure or makes a loud “clinking” sound when tapped against another hard object, it may be too dense. Overly hard chews can fracture teeth, particularly in small breeds or older dogs. Opt for smaller, softer splits (such as “paddle” antlers) for moderate chewers.
Final Checklist Before Giving an Antler to Your Dog
- ✅ Collected or sourced responsibly (no illegal harvesting)
- ✅ Thoroughly cleaned of dirt and organic residue
- ✅ Sterilized via boiling or baking
- ✅ Fully dried and cooled
- ✅ Inspected for cracks, splinters, or odors
- ✅ Appropriately sized for your dog’s breed and chewing habits
- ✅ Introduced under supervision
Conclusion: Safety First, Always
Natural chews like deer antlers offer real benefits, but their safety depends entirely on preparation. Taking the time to properly sterilize antlers protects your dog from preventable illness and ensures a longer-lasting, satisfying chew experience. Whether you collect antlers yourself or prepare store-bought ones, following these steps creates a standard of care that matches—or exceeds—commercial products.


 浙公网安备
33010002000092号
浙公网安备
33010002000092号 浙B2-20120091-4
Comments
No comments yet. Why don't you start the discussion?